> ## Documentation Index
> Fetch the complete documentation index at: https://www.referly.so/docs/llms.txt
> Use this file to discover all available pages before exploring further.
# Ask application questions
> Collect extra details from affiliates during sign-up in Referly. Add a custom onboarding step with Short Text, Long Text, Dropdown, Multiple Choice, and Image Upload questions, mark them required or editable, and see every answer on the affiliate's detail page.
New affiliates often need to tell you more than their name and email. You might want to know which platforms they'll promote on, how big their audience is, or why they want to join — and you may need them to upload proof of who they are. Application questions let you collect exactly that, as part of the sign-up experience, before an affiliate becomes active.
You do this by adding a custom step to your affiliate onboarding: the short guided flow every new affiliate goes through right after they sign up. You choose what to ask, pick the answer format for each question, and decide which answers are required. Every answer is saved to the affiliate's record so you can review it, and affiliates can return and update their answers later from their portal.
Adding a custom step with your own questions is a **Business plan** feature. You can arrange and edit the built-in onboarding steps on any plan, but the **Add custom step** button and the questions it holds require the Business plan.
## How affiliate onboarding works
Onboarding is the set of screens an affiliate sees the first time they join, guiding them through setting up their account. Out of the box it includes a handful of built-in steps, shown in this order:
* **Profile Photo** — upload a profile picture
* **Website & Socials** — add a website and social accounts
* **Payout Settings** — choose how to get paid
* **Invoice Information** — billing details for payouts
* **Summary** — a final review before finishing
Your application questions live in a **custom step** that you slot into this flow. You can add more than one custom step, place them wherever you like, and hide any built-in step you don't need. The **Summary** step always stays last.
To find these settings, go to **Settings**, open the **Affiliate portal** section, and select **Onboarding**.
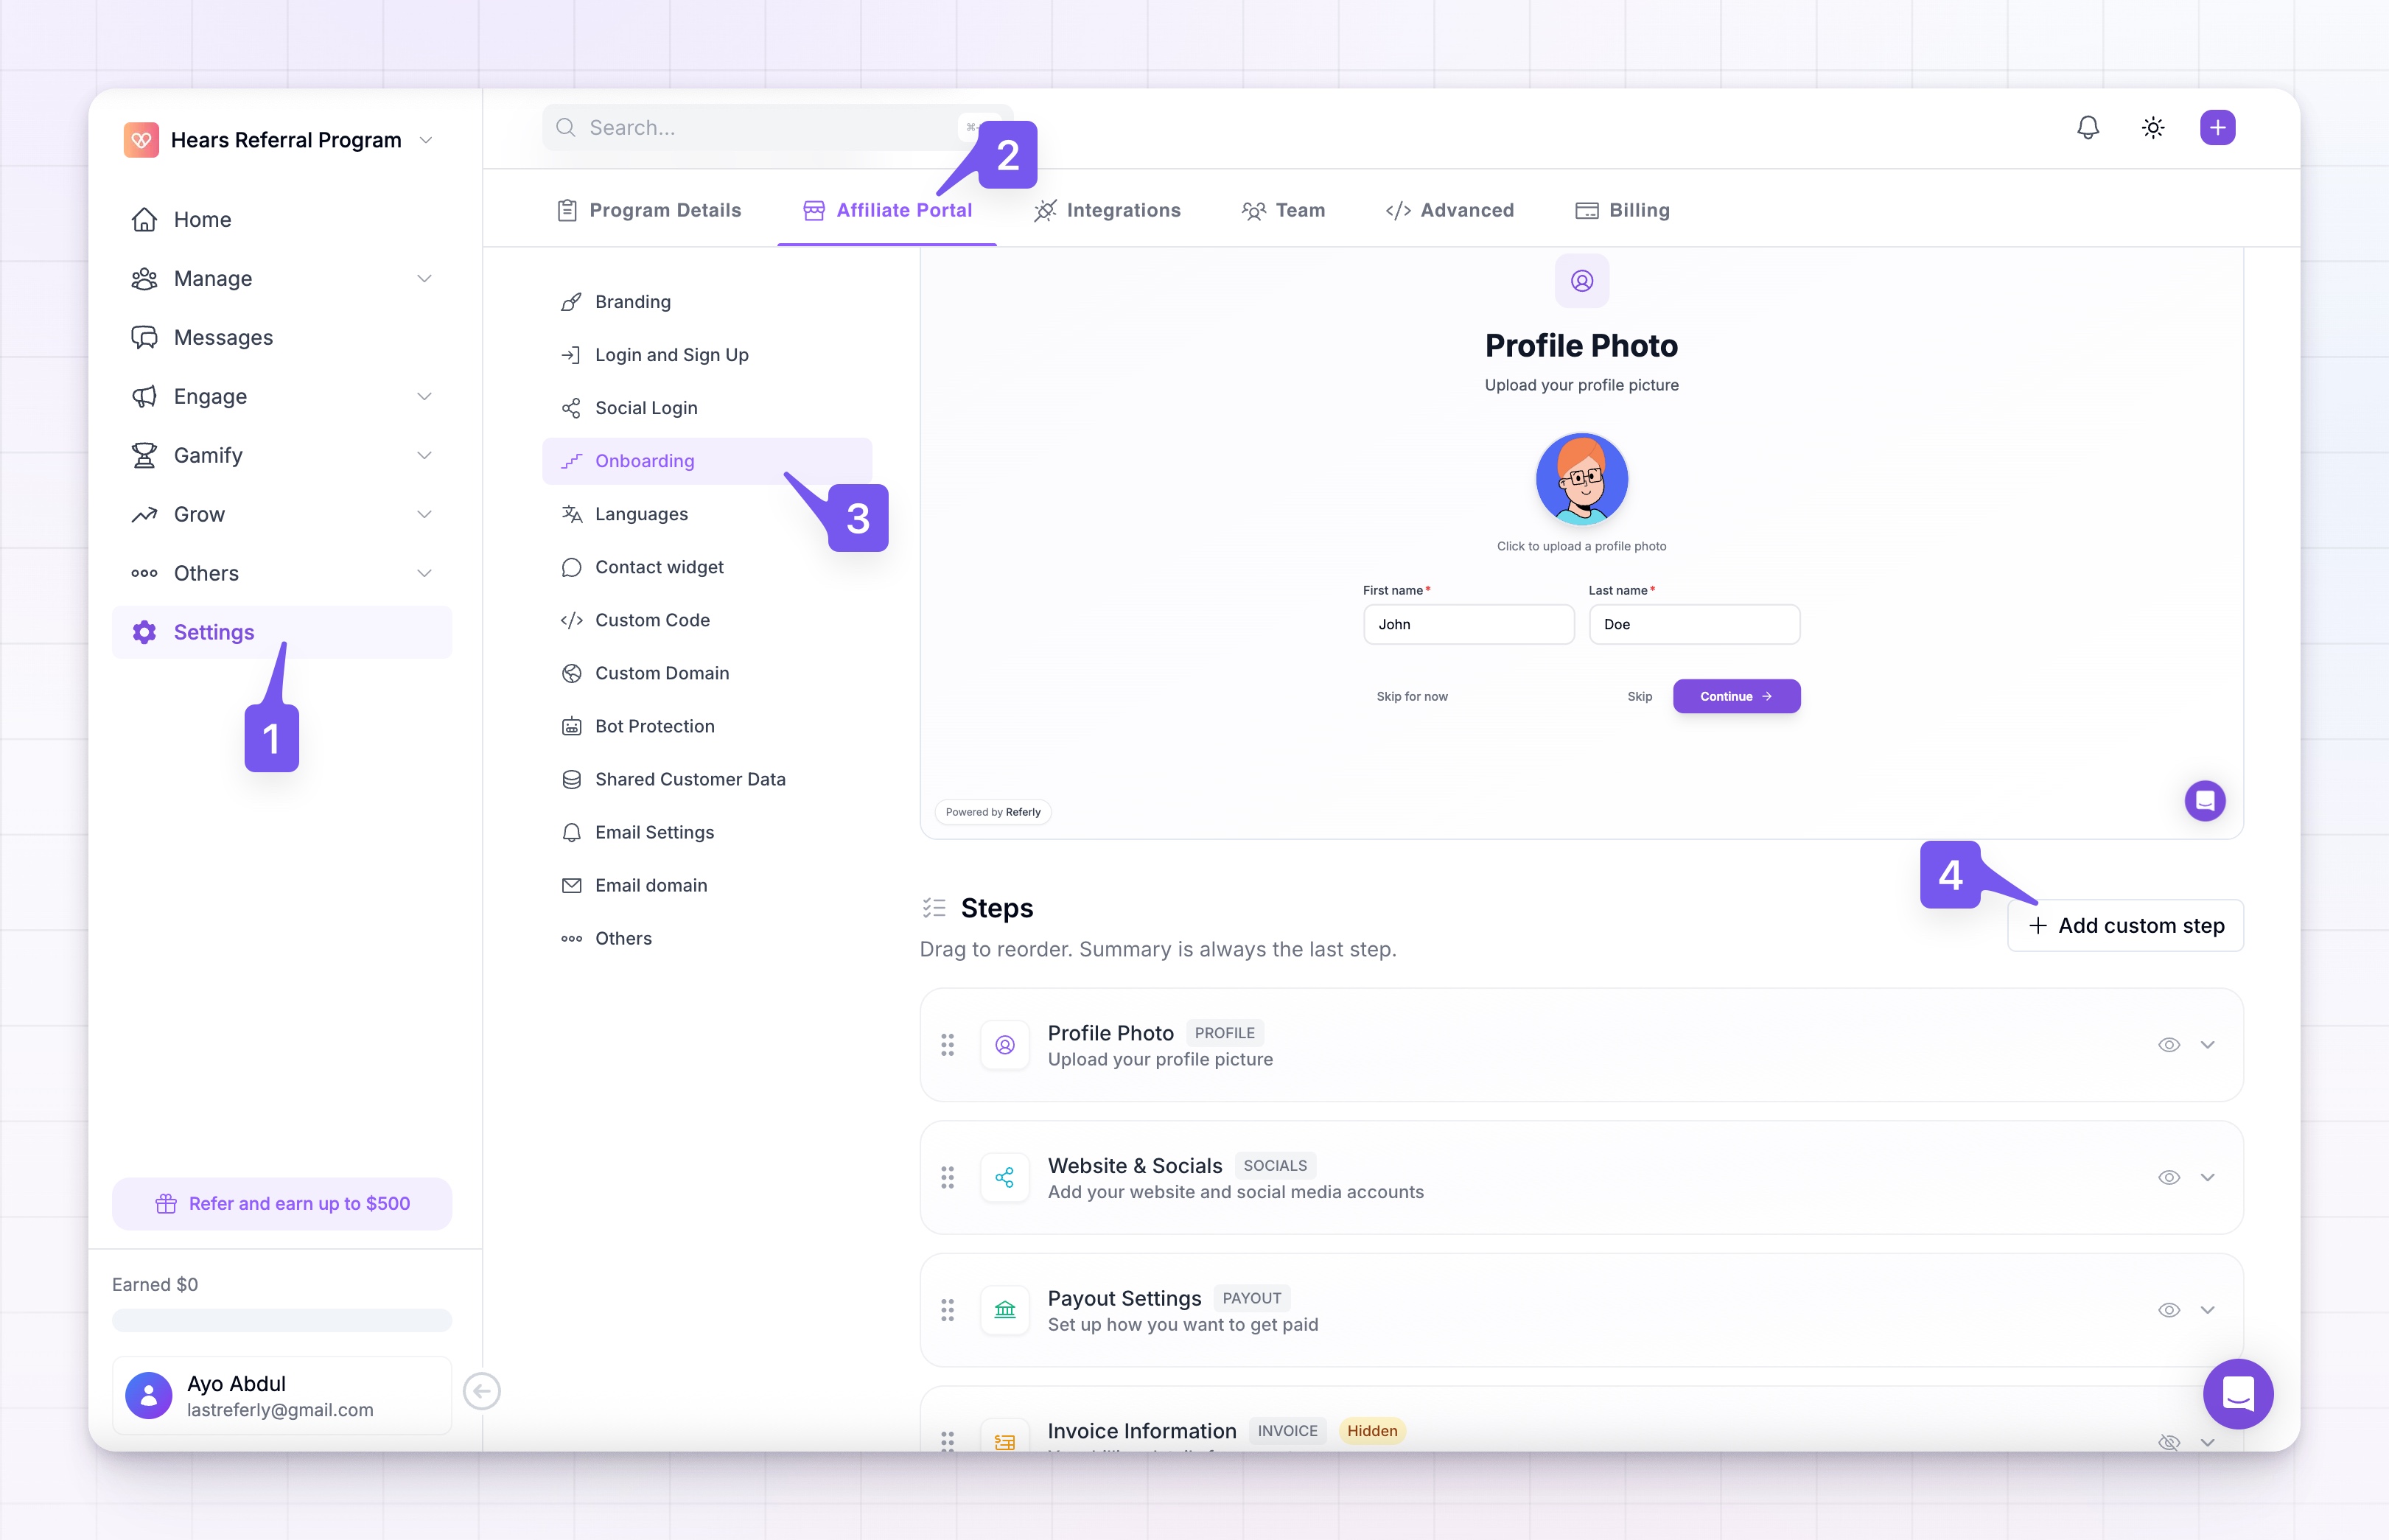
At the top of the page, **Enable onboarding** controls whether new affiliates see the flow at all. Two more options sit alongside it:
* **Allow skipping** lets affiliates skip the entire onboarding and go straight into their portal.
* **Show confetti** celebrates affiliates with a small animation when they finish.
## Add a custom step
A custom step is the container that holds your questions. Everything you ask lives inside one.
In the **Steps** section, select **Add custom step**. A new step appears in the list, ready to name.
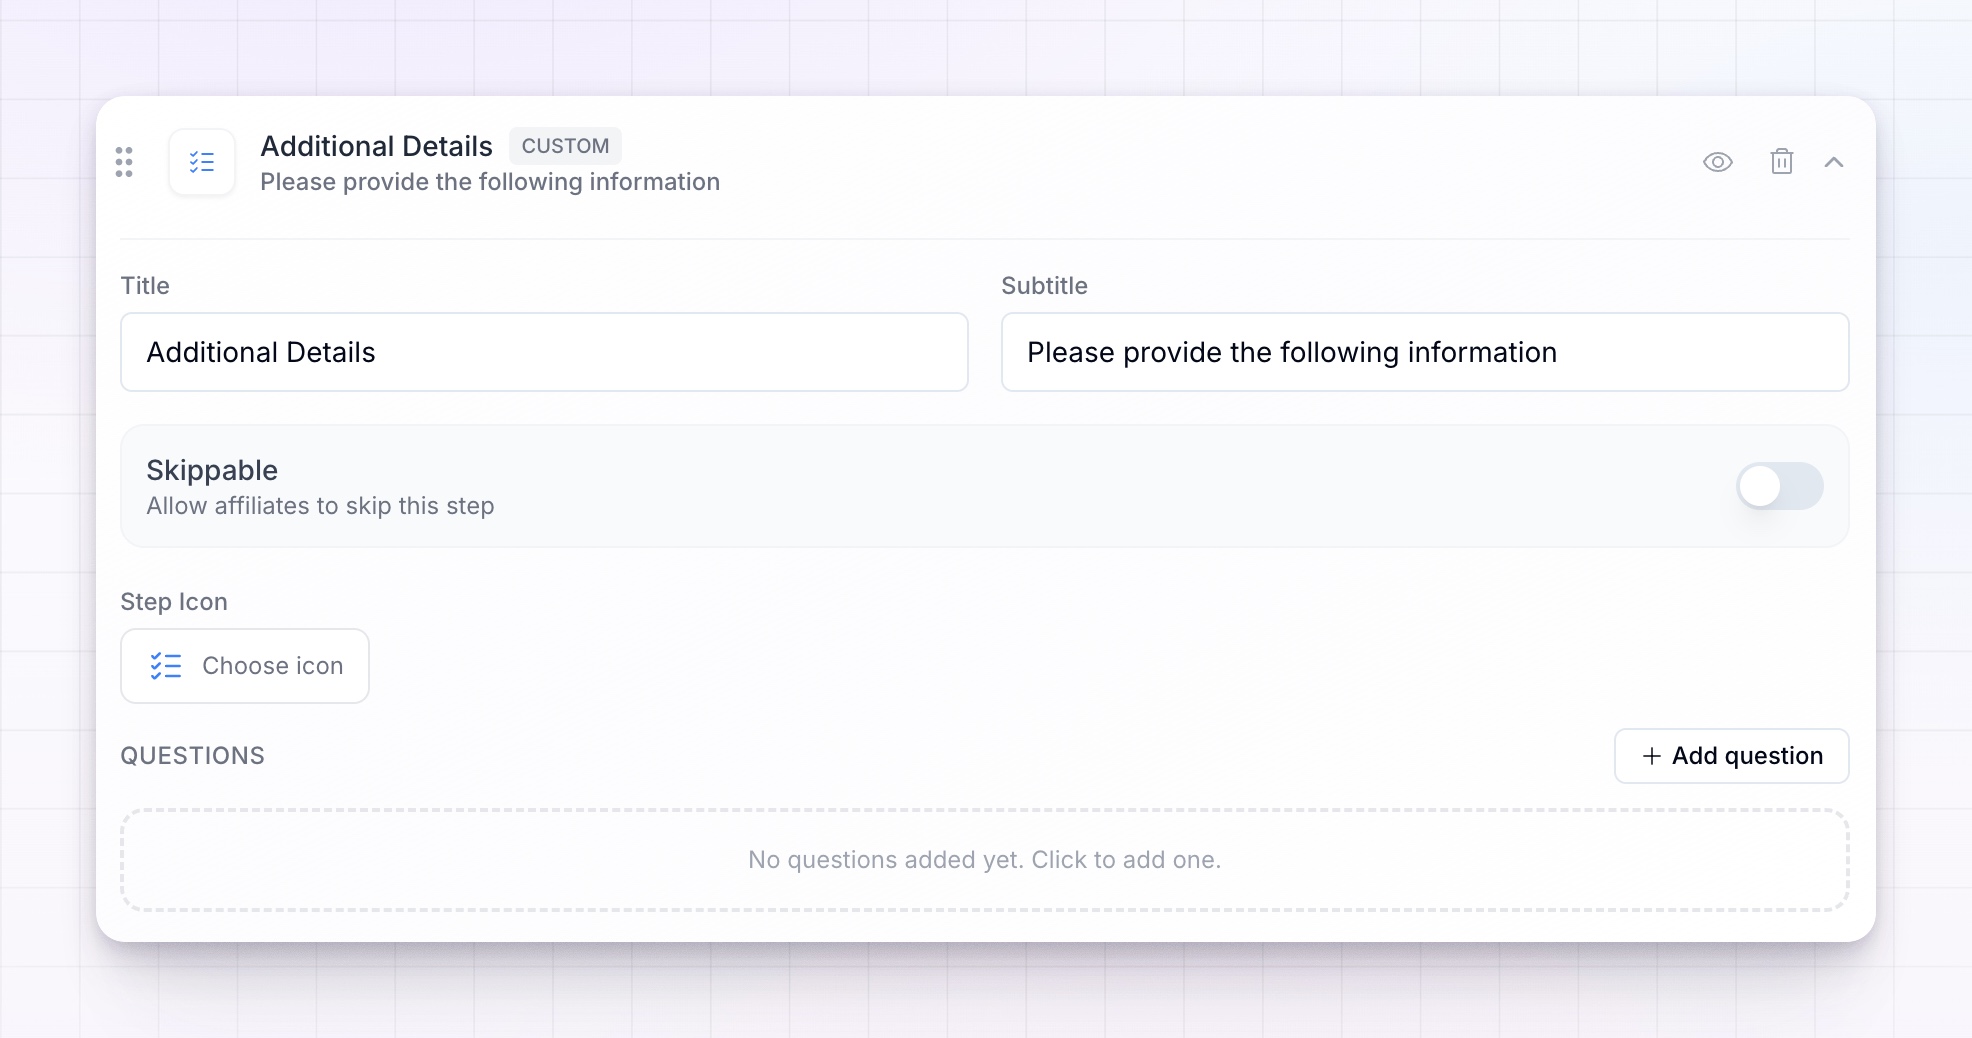
Give the step a **Title** and **Subtitle**. These are the heading and the line of helper text the affiliate reads at the top of the screen, so make them clear — for example, a title of "Tell us about your audience" with a subtitle of "This helps us support you better."
Choose a **Step Icon** to represent the step in the flow. It's a small touch that makes the step feel purposeful.
Turn on **Skippable** if affiliates should be able to move past this step without answering. Leave it off to make the whole step mandatory. Individual questions have their own required setting too, covered below.
## Choose a question type
Inside your custom step, select **Add question** and pick how the affiliate should answer. The type you choose decides what the input looks like and what kind of answer you get back.
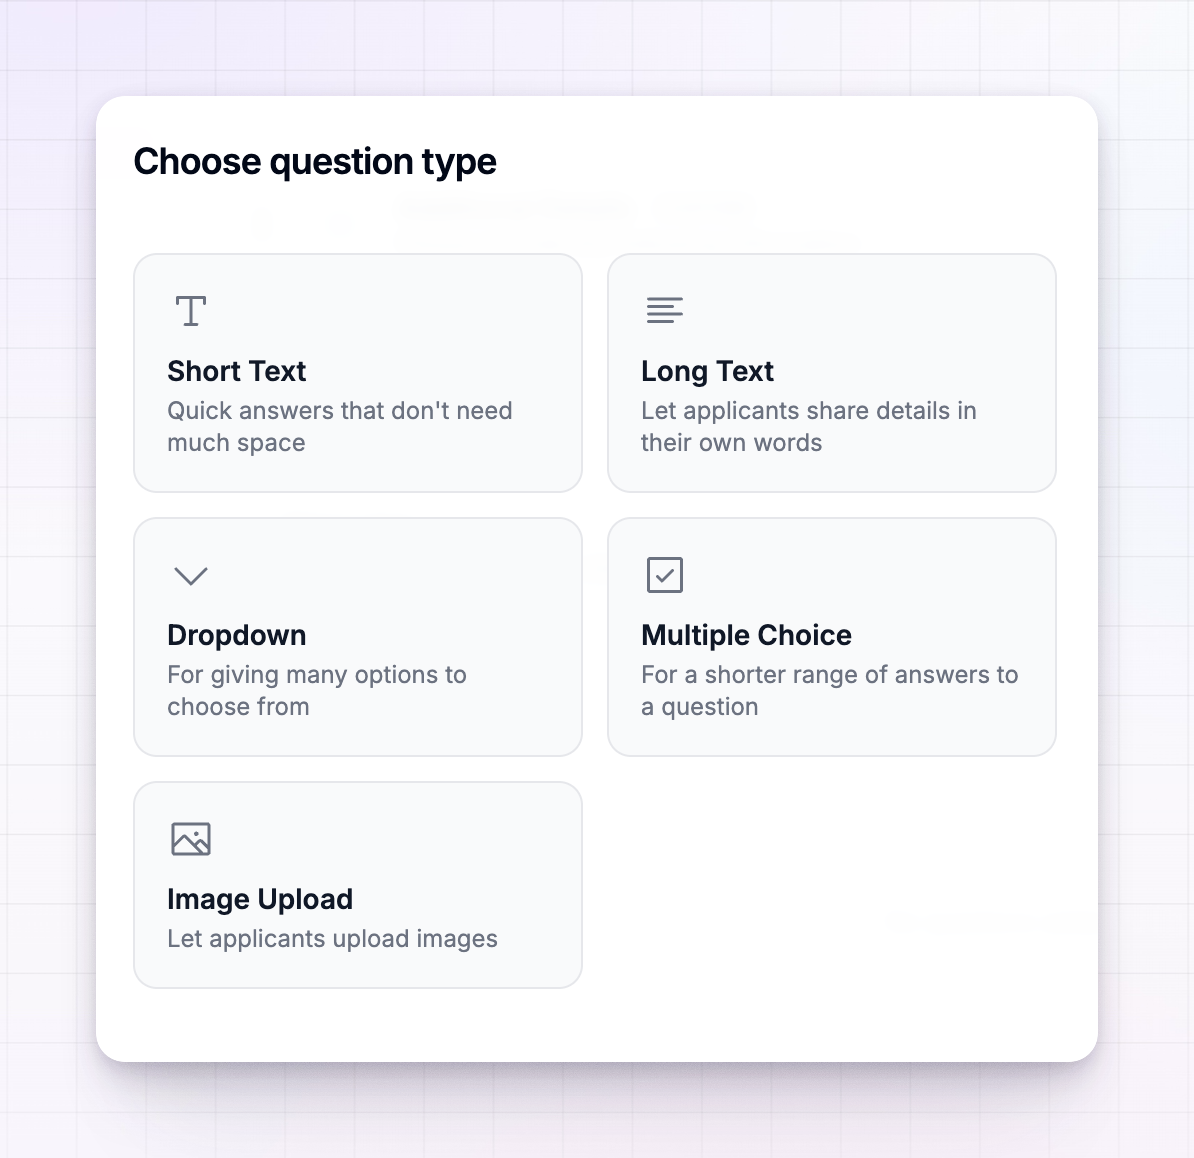
There are five types:
| Type | Best for | What the affiliate sees |
| ------------------- | ------------------------------------------------------------------------------- | ------------------------------------- |
| **Short Text** | Quick answers that don't need much space, like a handle or a company name | A single-line text box |
| **Long Text** | Letting applicants share details in their own words, like why they want to join | A larger, multi-line text box |
| **Dropdown** | Giving many options to choose one from, like a country or a category | A dropdown menu of options you define |
| **Multiple Choice** | A shorter range of answers to a question | Selectable options you define |
| **Image Upload** | Having applicants upload a file, like an ID or a media kit | An upload box |
Despite its name, **Image Upload** accepts both images and PDFs. Each file can be up to 10 MB. If you allow more than one file (see below), affiliates can upload up to four.
## Set each question's options
Select a question to expand it and set it up. Every question has a **Label** — the actual question the affiliate reads, such as "Which platforms do you post on?" Beyond the label, the settings you see depend on the type you picked:
* **Placeholder** (Short Text and Long Text) — faint example text shown inside the empty box to hint at what to type.
* **Options** (Dropdown and Multiple Choice) — the choices you offer. Select **Add option** to add each one; you need at least one. For Multiple Choice, turn on **Multiple selections** to let affiliates pick more than one answer instead of just one.
* **Multiple files** (Image Upload) — allow more than one file for the question, up to four.
Two settings apply to every question, whatever its type:
* **Required** — the affiliate must answer before they can continue. Leave it off to make the question optional.
* **Editable** — the affiliate can change their answer after they've submitted it. Turn this off to lock an answer once it's given, which is useful for things you don't want changed after review, like an uploaded ID. More on this in [How affiliates update their answers](#how-affiliates-update-their-answers) below.
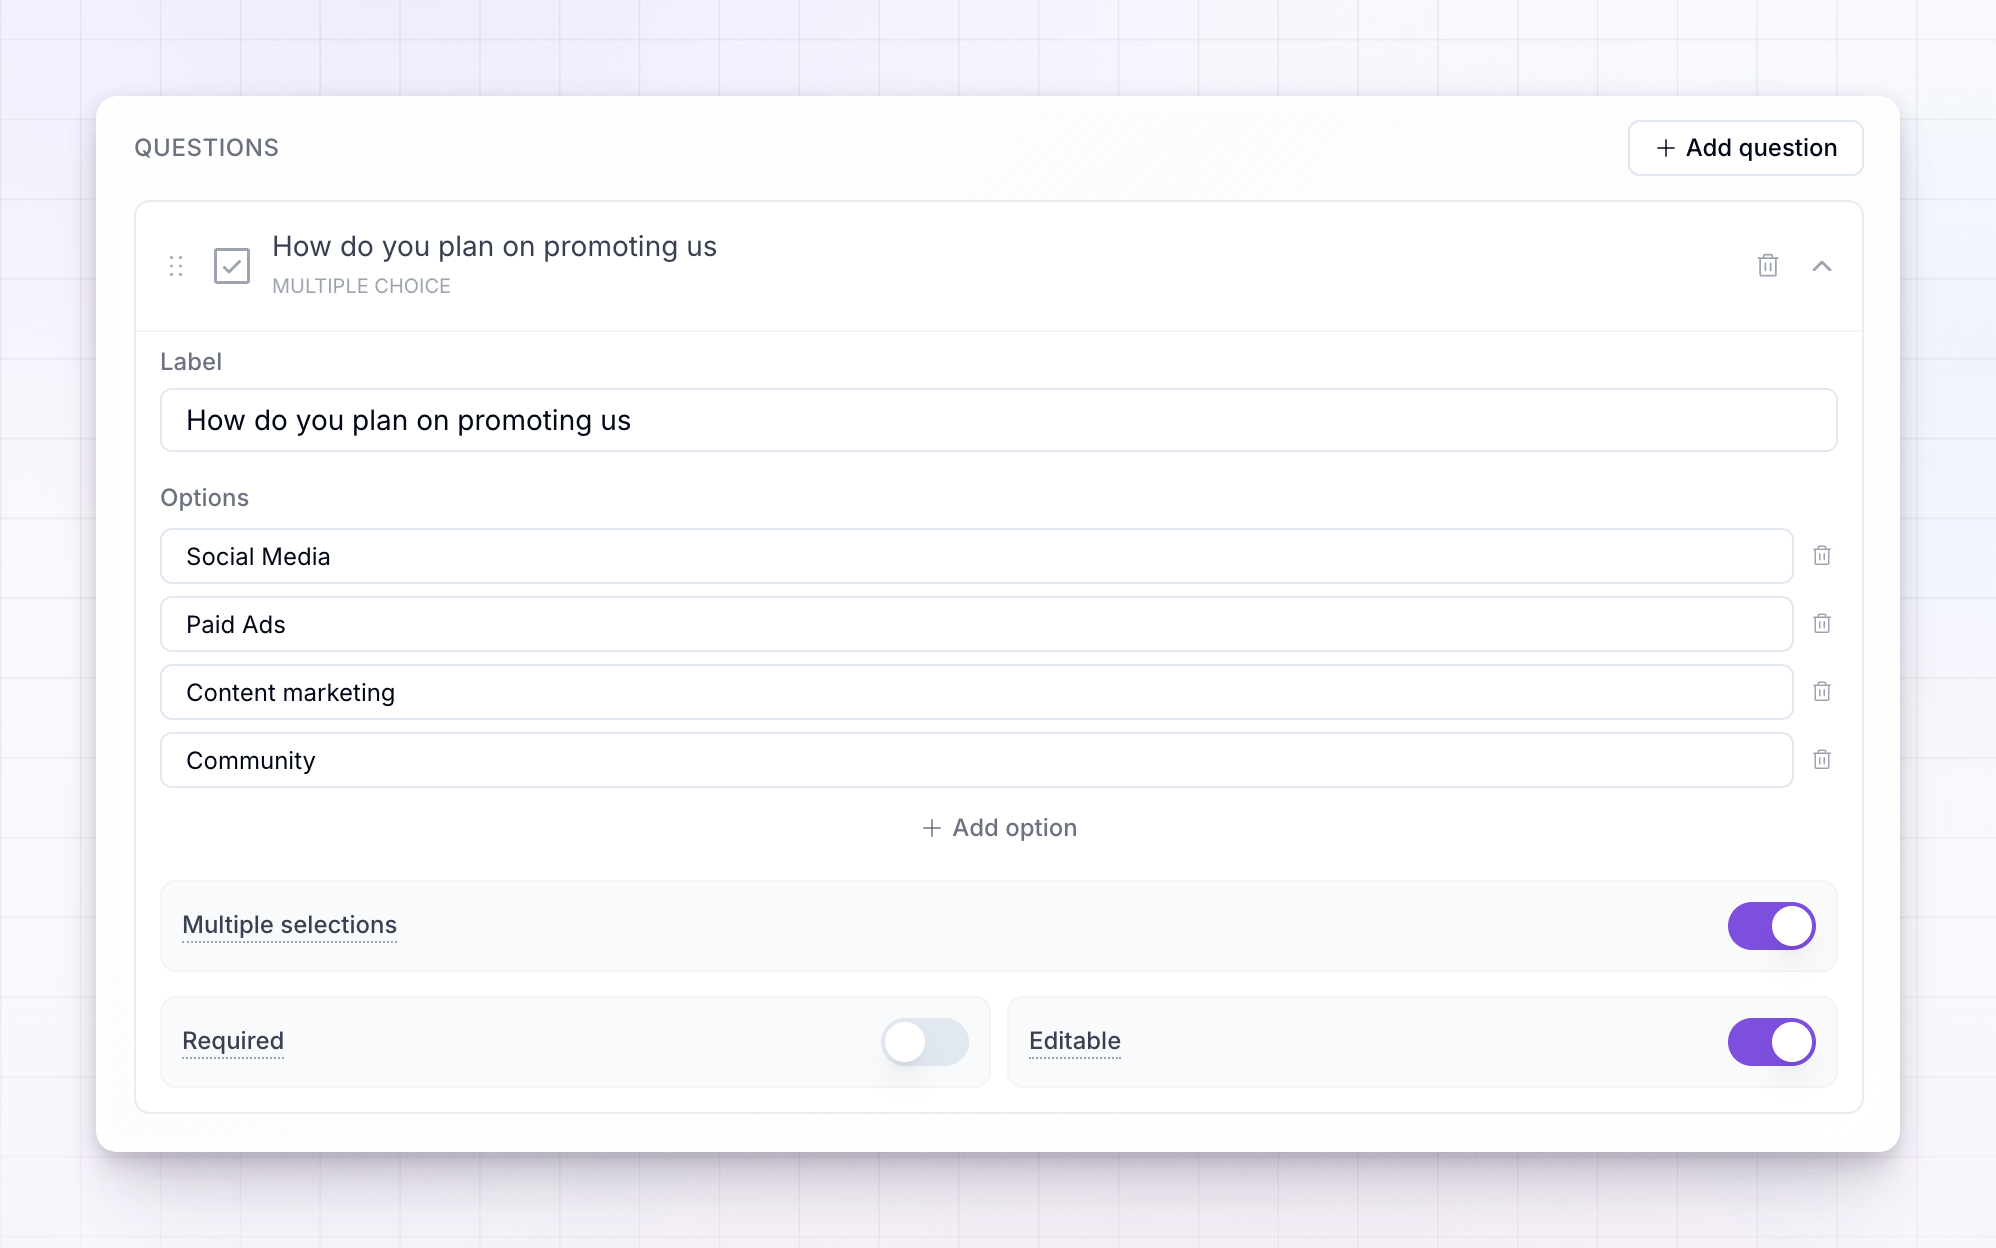
Add as many questions to the step as you need. You can also add several custom steps — for example, one step for audience details and another for verification documents.
## Reorder, hide, or remove steps
The **Steps** section is a list you can rearrange. Drag any step by its grip handle to change where it falls in the flow, so your questions come exactly where you want them. The **Summary** step is always pinned to the end.
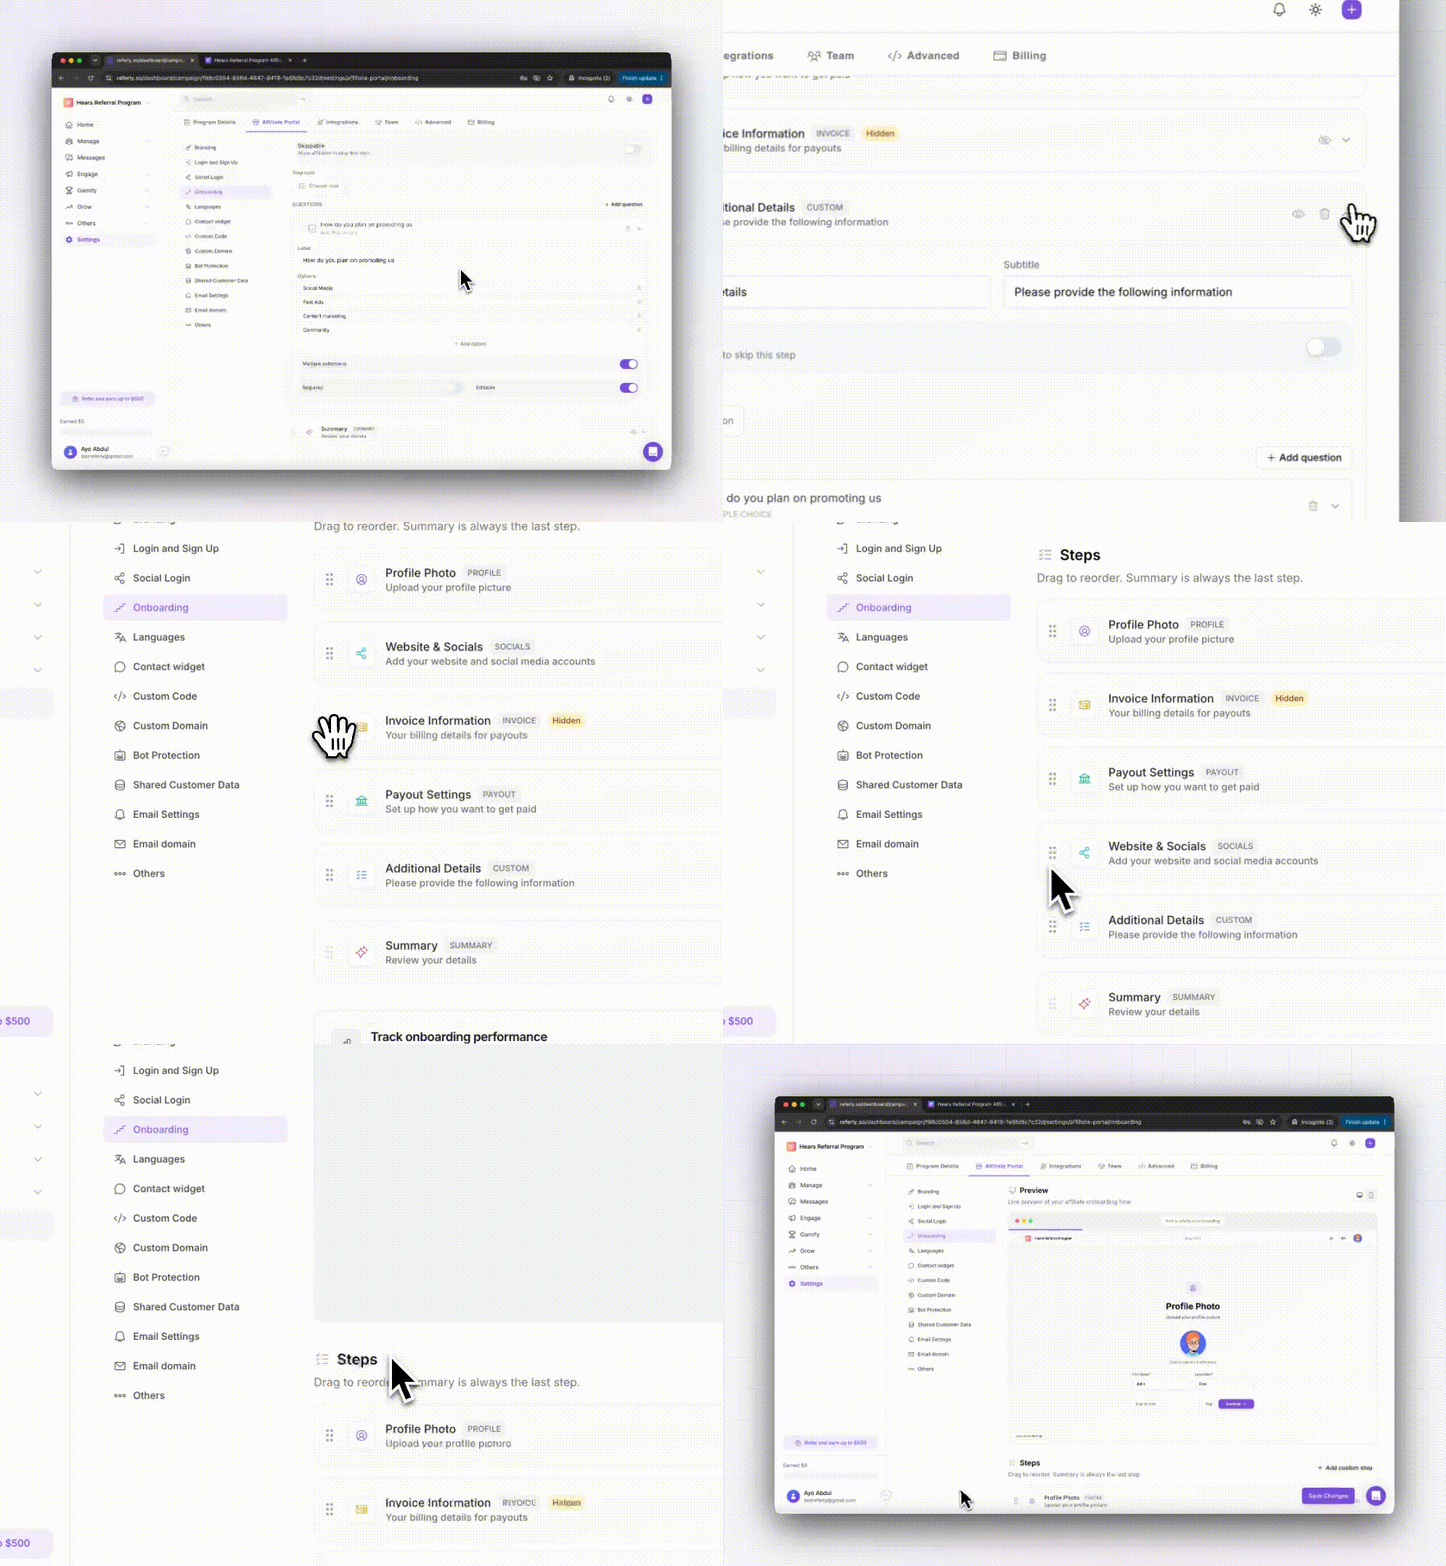
A few more controls on each step:
* **Hide a step** with the eye icon. A hidden step keeps its settings but stops showing to affiliates — handy for pausing a question set without deleting it. Built-in steps can only be hidden, not removed.
* **Delete a custom step** with the trash icon. Only custom steps can be deleted, since the built-in ones are part of every program.
* **Reorder questions** inside a step by dragging them, the same way you reorder steps.
You can preview the whole flow as you build it. The **Preview** panel on the same page shows your onboarding exactly as an affiliate would see it, and you can switch between a desktop and a mobile view.
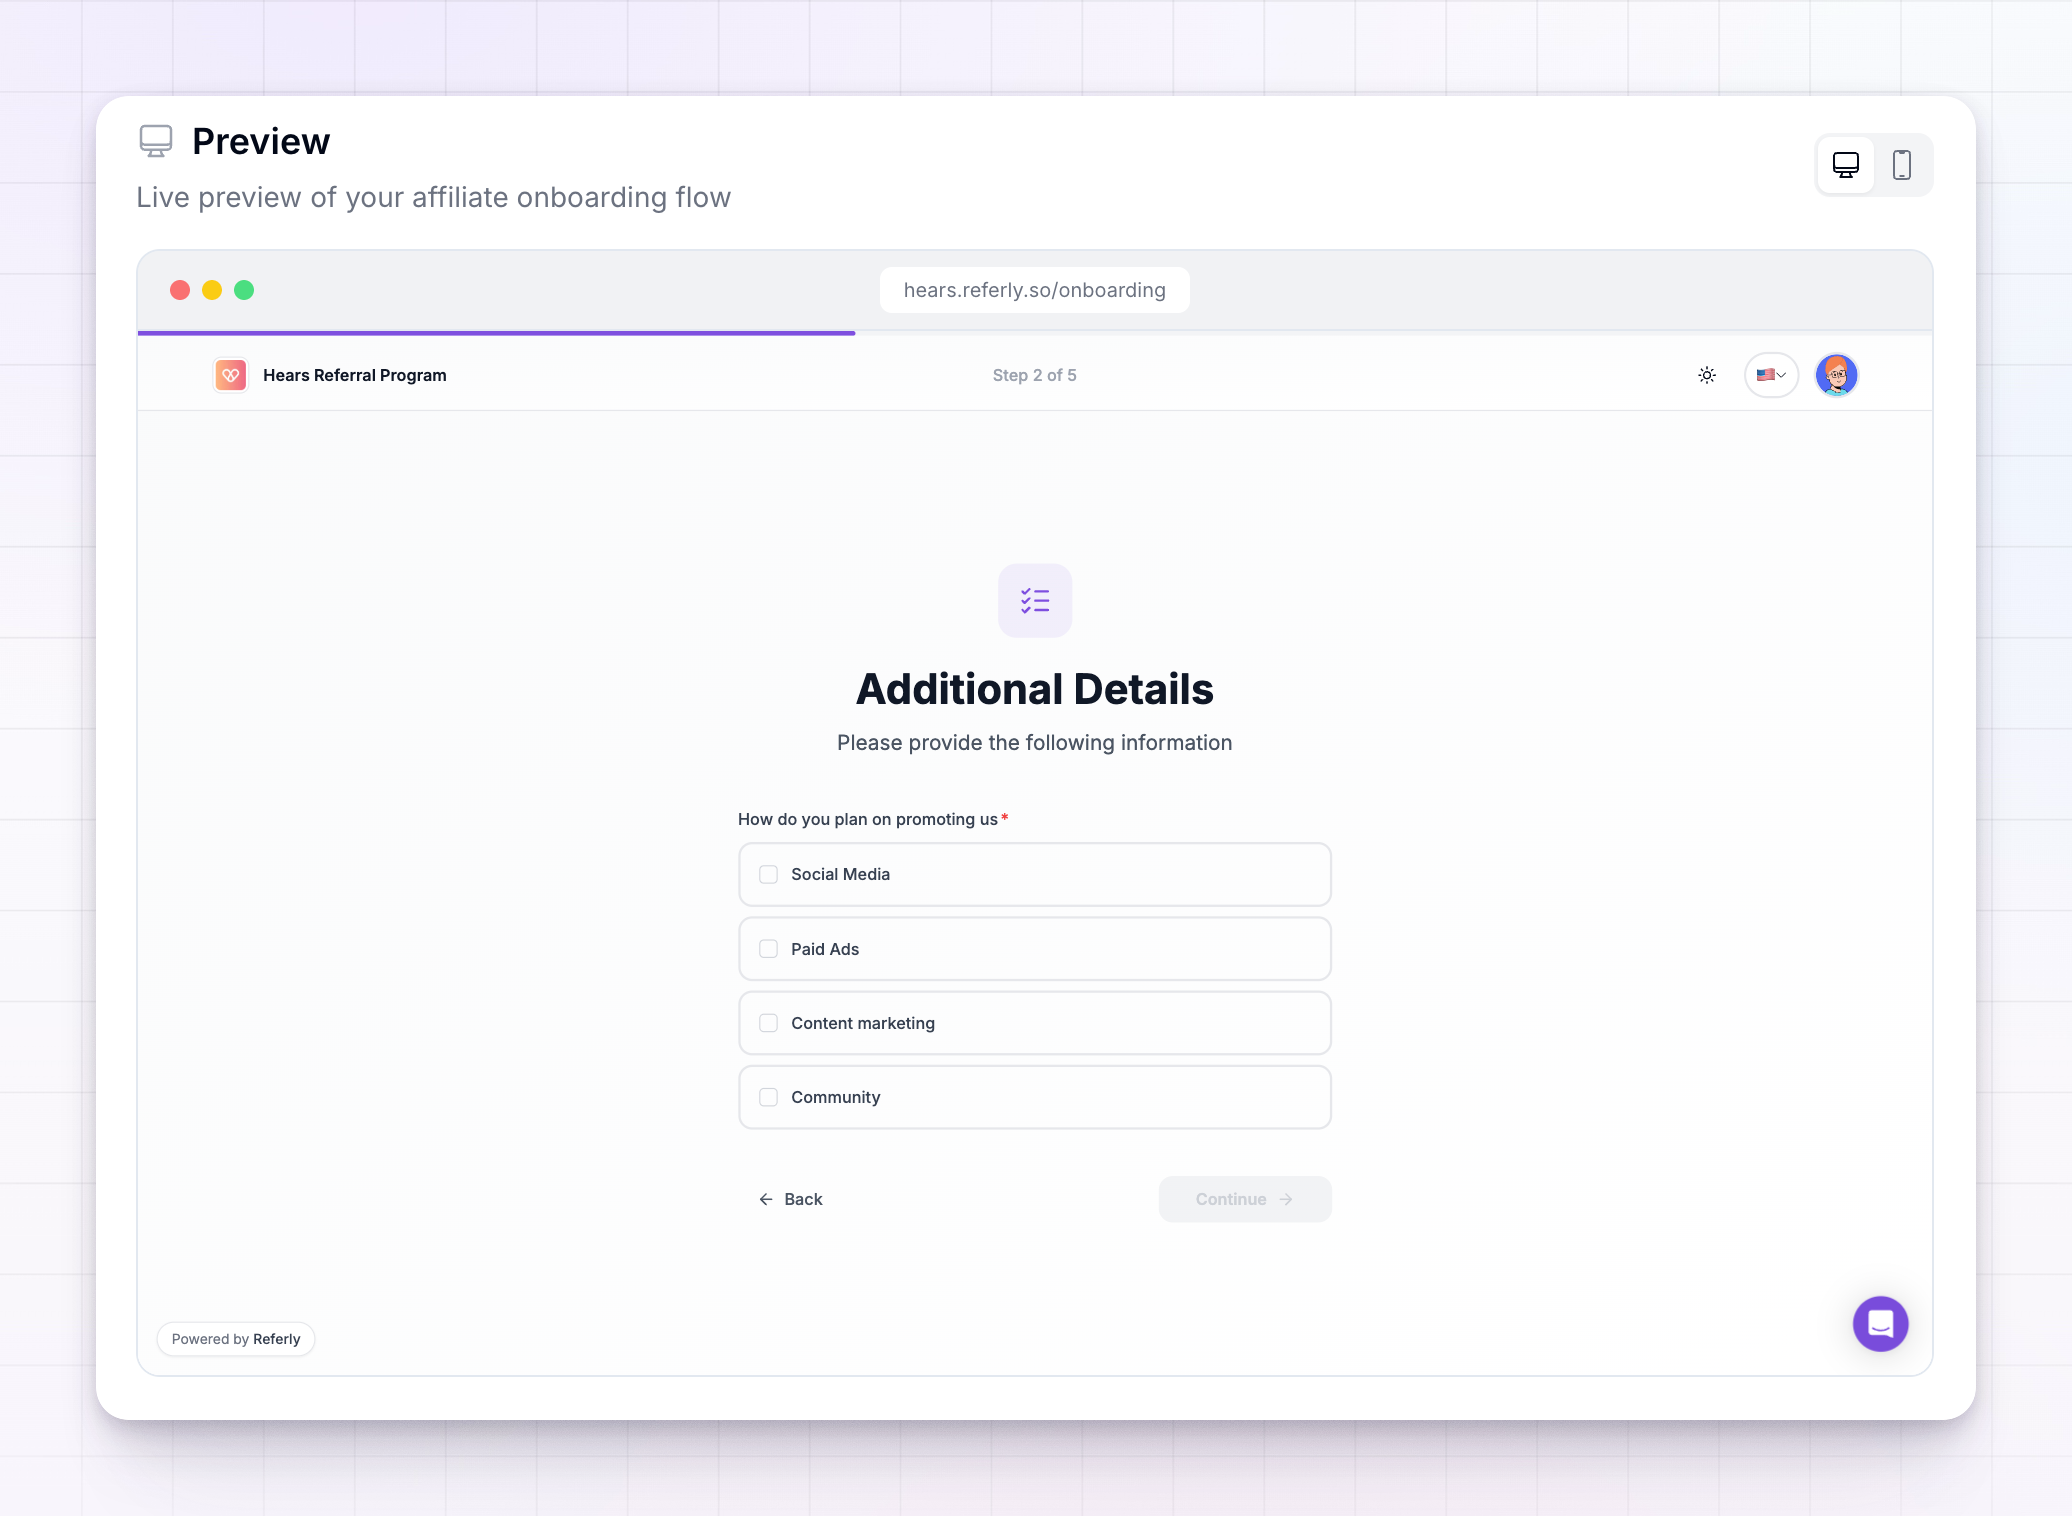
When you're happy with your changes, select **Save Changes**.
## What affiliates see when they sign up
After someone signs up through your [sign-up page](/docs/help-center/getting-started/recruit/let-affiliates-sign-up), they're walked through your onboarding steps one screen at a time. Your custom step appears as its own screen with the title, subtitle, and questions you set. Required questions must be answered before they can move on, and any question you left optional can be skipped. If you made the whole step skippable, a skip option is offered.
For more on the affiliate's side of this, see [The affiliate onboarding flow](/docs/help-center/affiliates/onboarding).
## Where to see the answers
Every answer an affiliate gives is saved to their record. To read them, open the affiliate from your [affiliates list](/docs/help-center/manage/affiliates/overview) and go to the **Answers** tab on their detail page.
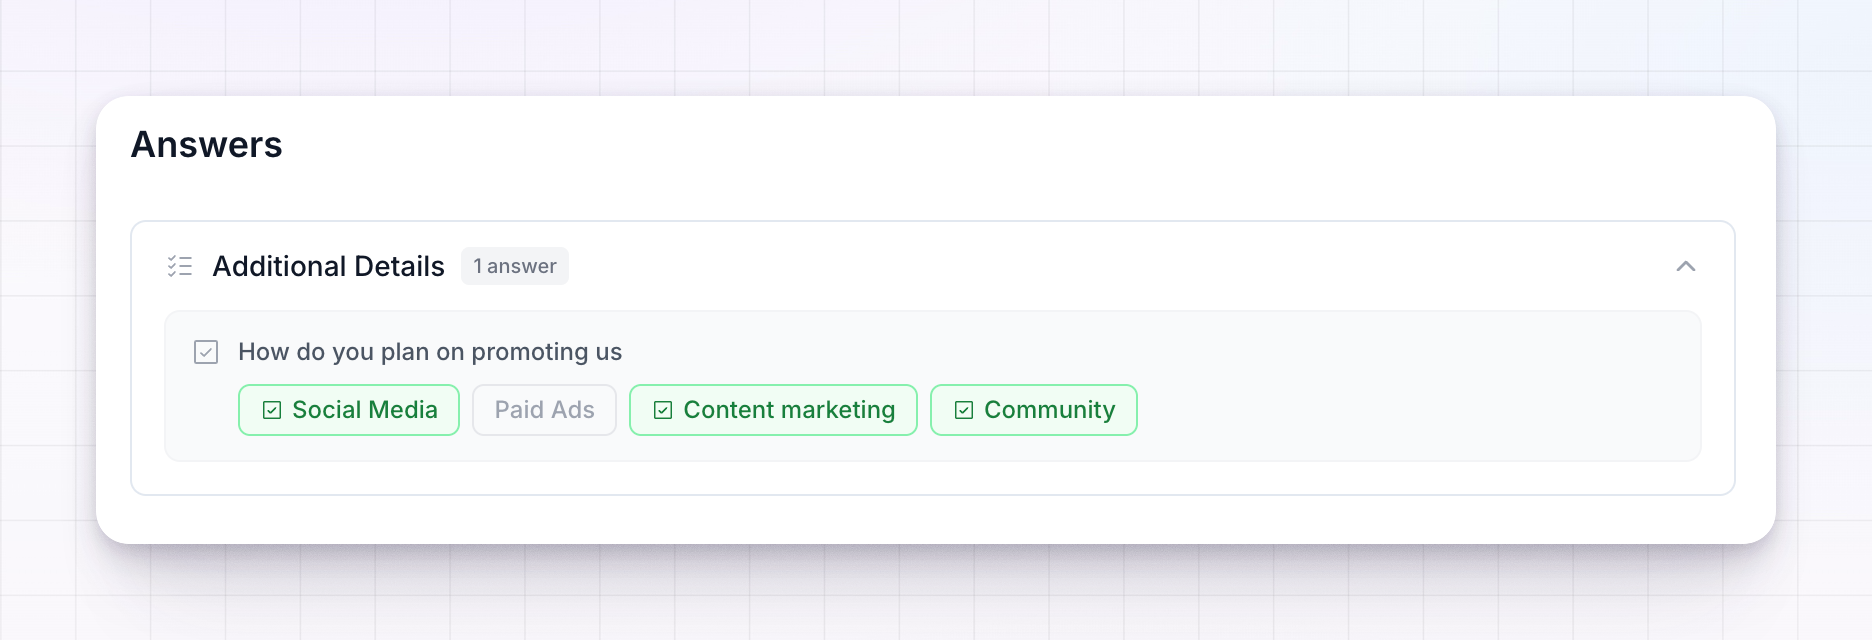
Answers are grouped by the step they came from, so a step you named "Tell us about your audience" shows up as its own section with every question and answer under it. Each entry shows the question you asked and the affiliate's response beneath it. Text answers appear as written, dropdown and multiple-choice answers show what was selected, and uploaded files appear as thumbnails you can open to view full size.
This is also where you'll find the details you need when [approving or declining an application](/docs/help-center/getting-started/recruit/approve-or-decline) — you can read what an applicant told you before you decide.
## How affiliates update their answers
Affiliates can revisit what they submitted from their own portal. In the affiliate portal, under **Settings**, each custom step you created appears in the **Personal info** area as its own page, named after the step's title. Opening it shows the affiliate the questions from that step alongside the answers they gave, ready to review.
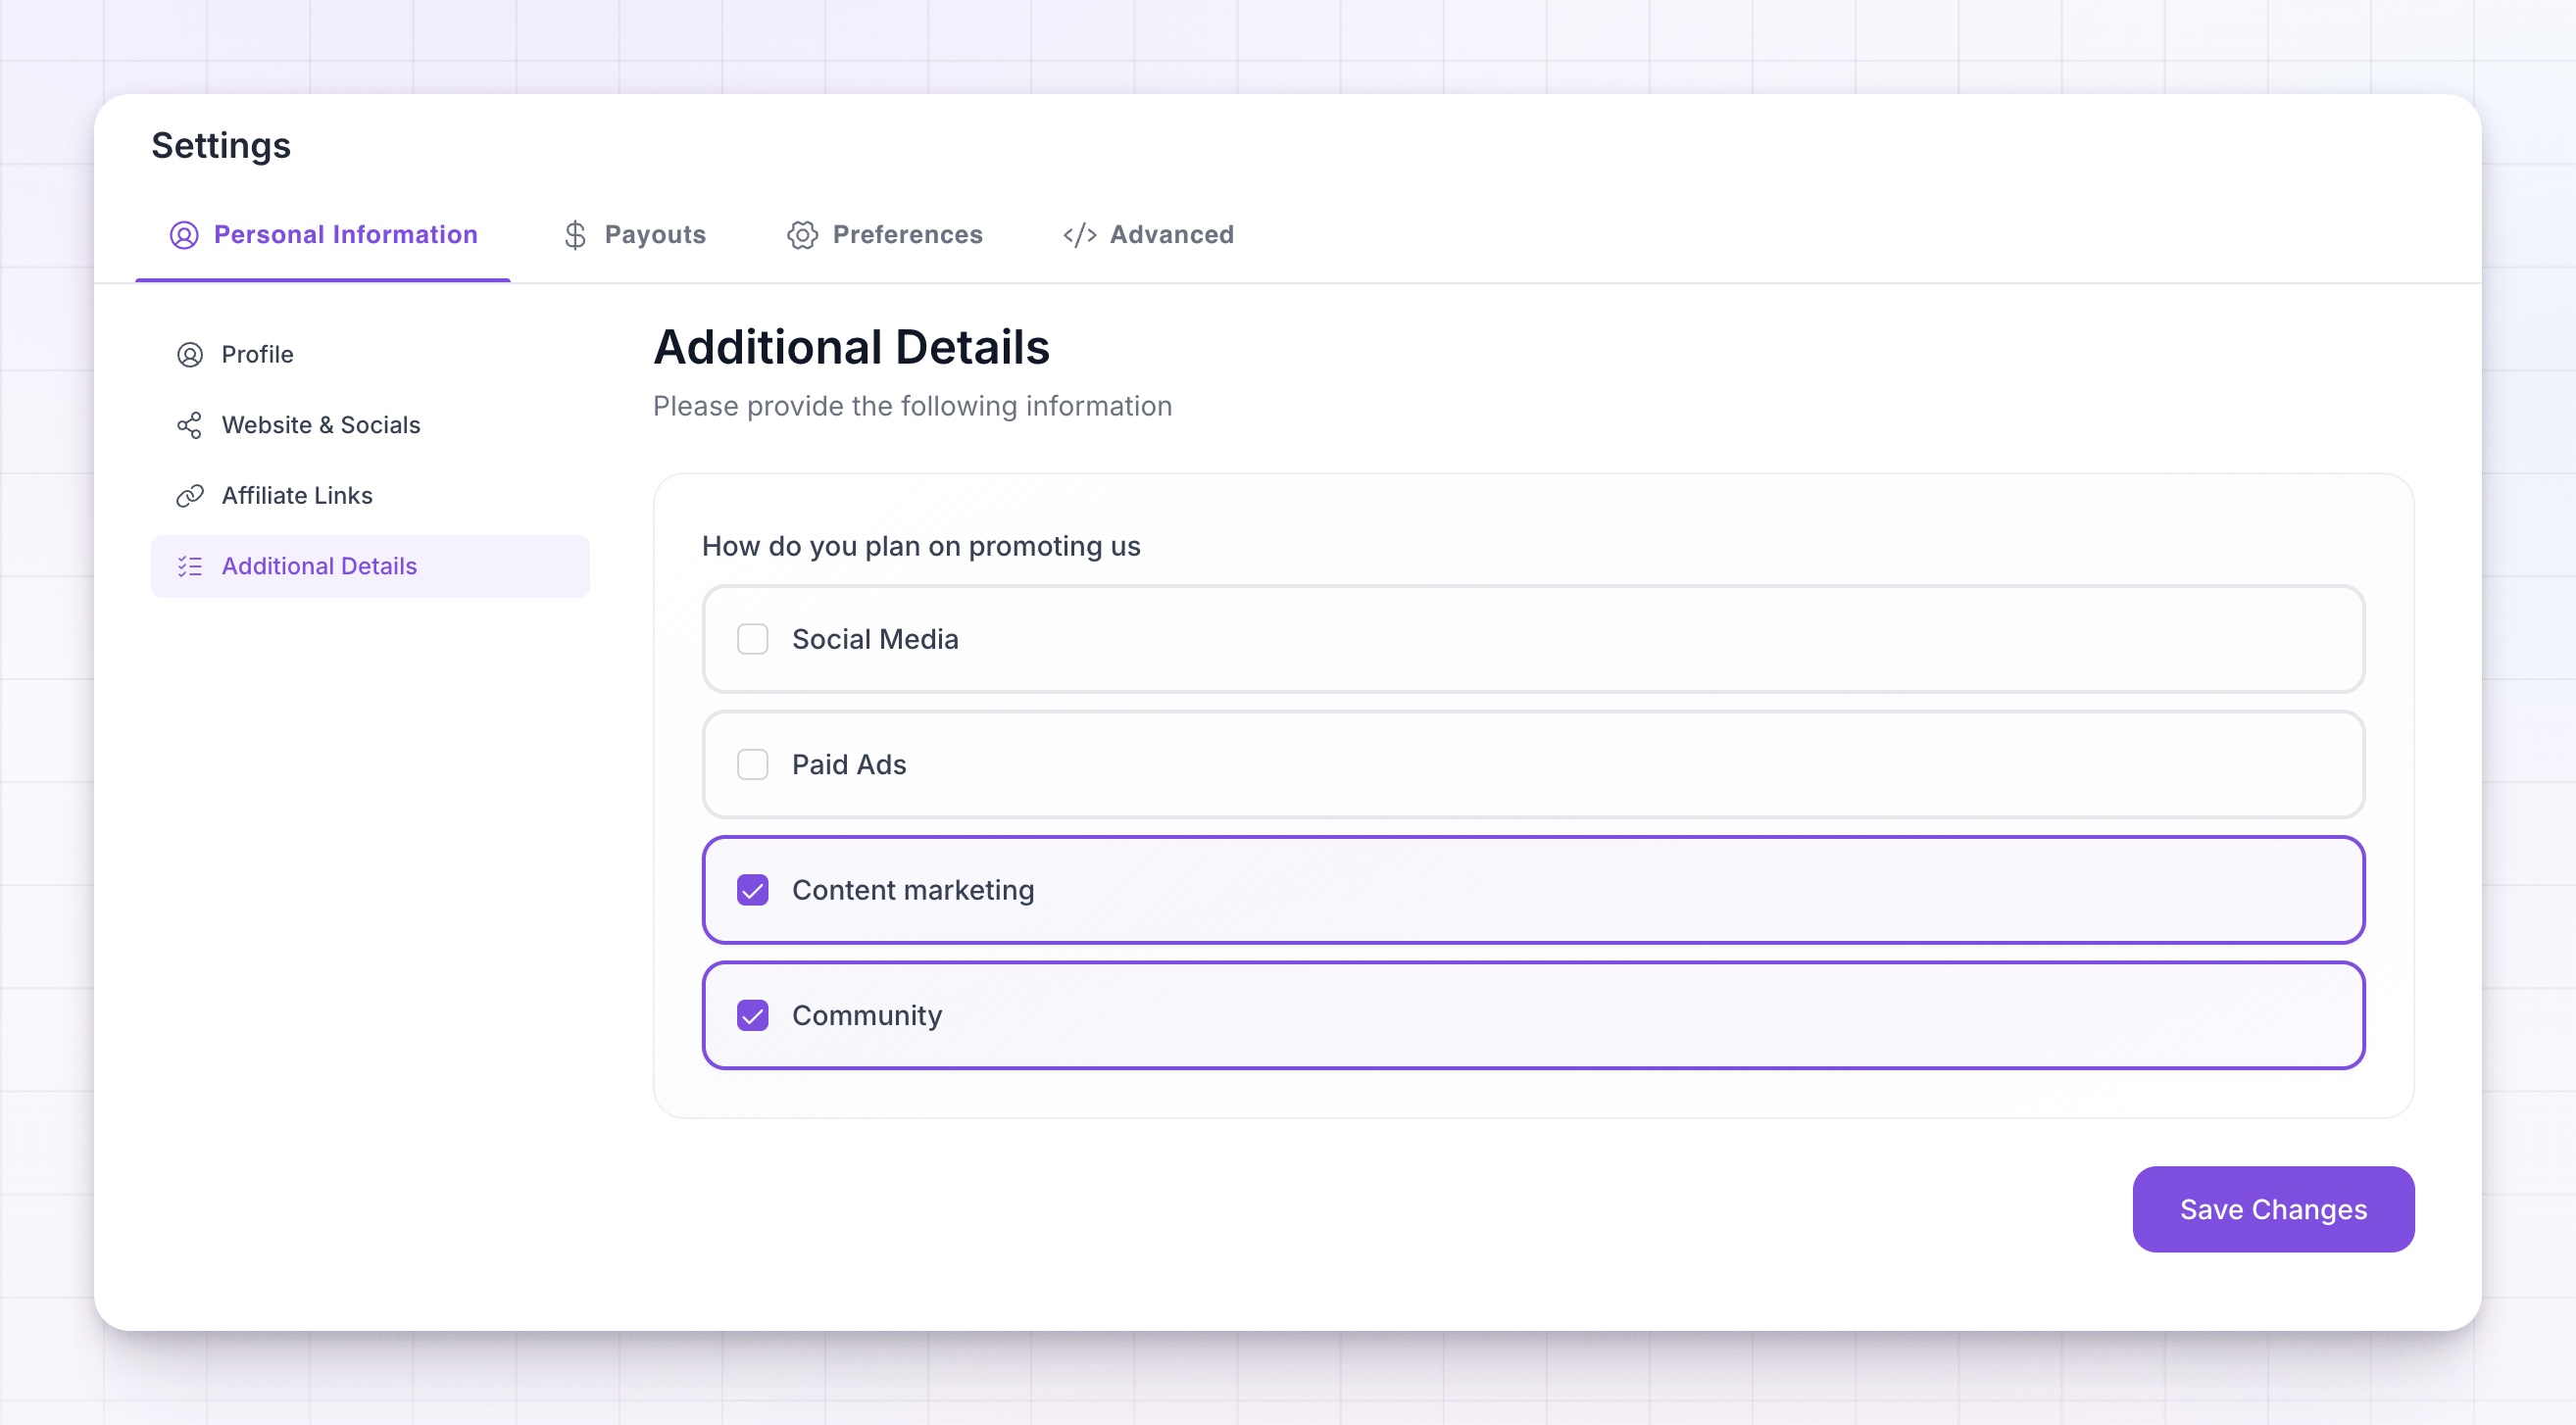
Whether an affiliate can actually change an answer depends on the **Editable** setting you chose for that question:
* If a question is **editable**, the affiliate can update their answer and select **Save Changes**.
* If a question is **not editable**, their original answer stays visible but is locked once given, so it can't be changed.
This lets you keep some answers open for affiliates to keep current — like their website or social handles — while locking down anything you've reviewed or need to stay fixed.
## Related
Open your portal so affiliates can apply on their own.
Review applications and decide who joins your program.
Configure the full onboarding flow new affiliates go through.
See everything you know about a single affiliate, including their answers.