

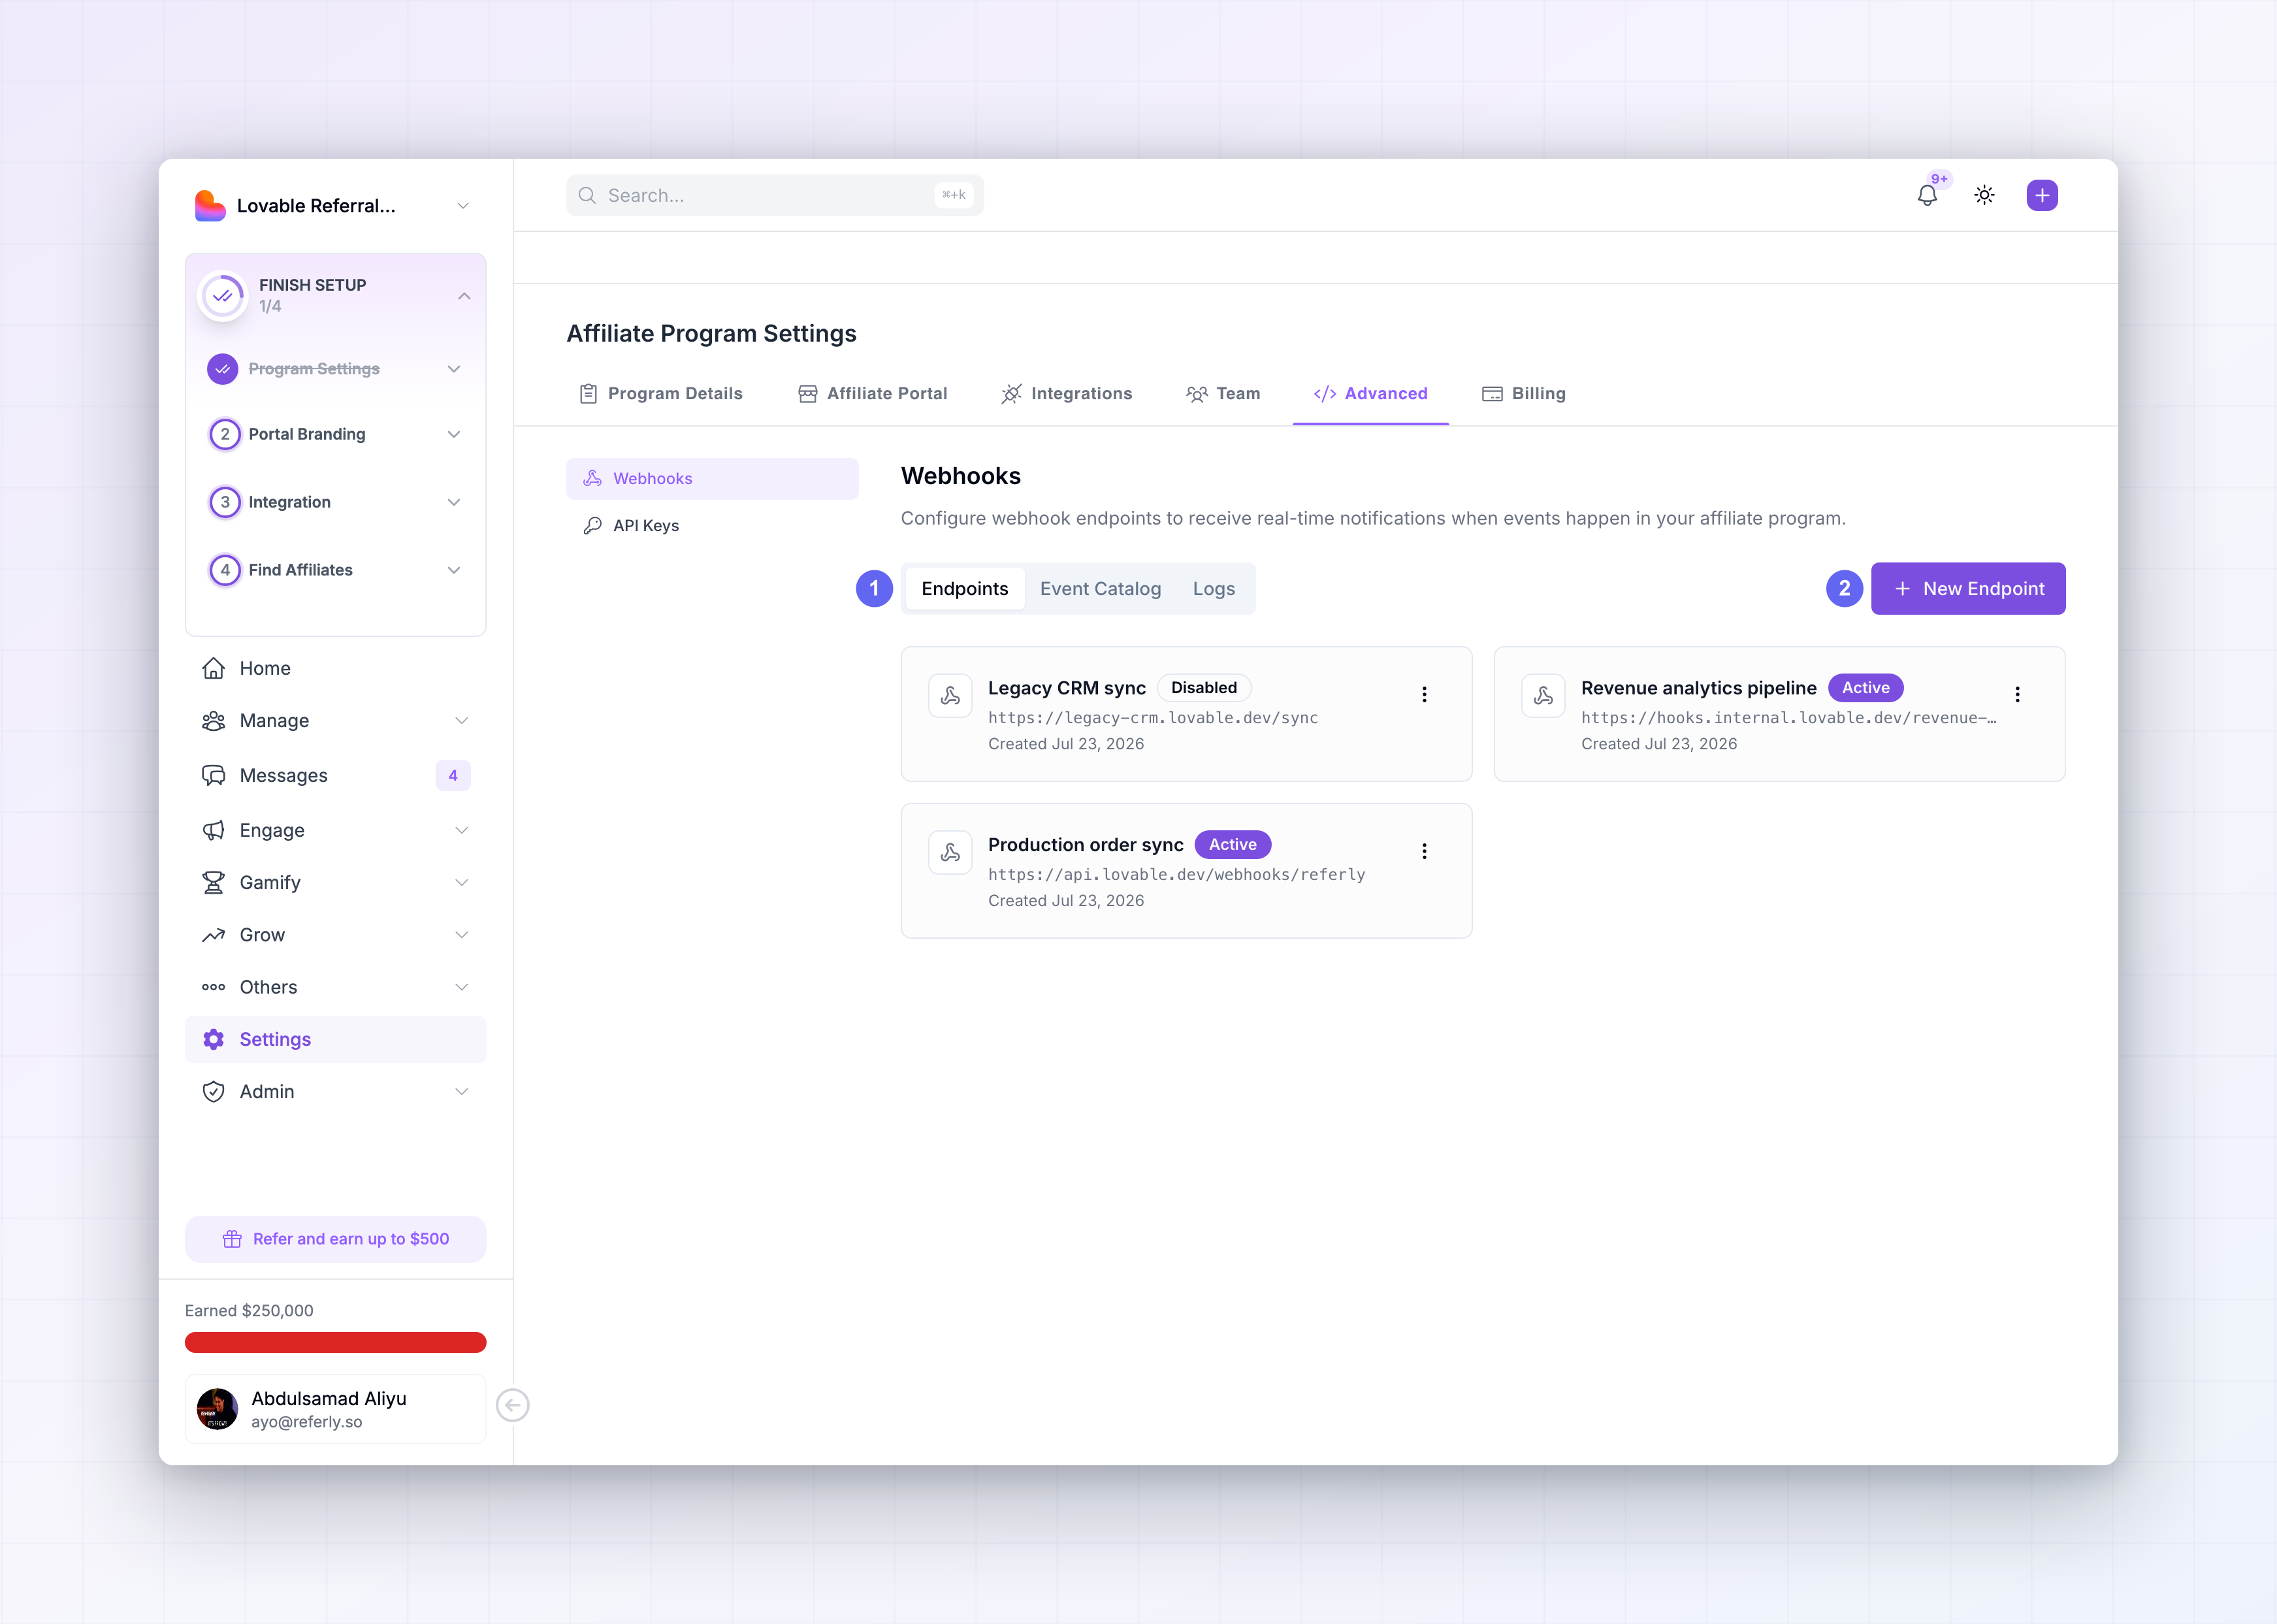
Creating endpoints requires a Business or Agency plan and is not available during a free trial. On
other plans the New Endpoint button is locked and opens an upgrade prompt instead. See
plans and features.
Before you create one
Have three things ready:- A public HTTPS URL. It has to resolve from the public internet.
localhostand private network addresses never receive anything — during development, expose your machine with a tunnel such as ngrok or Cloudflare Tunnel and register the public hostname it hands you. - A handler that returns a
2xxfast. Referly treats anything else, including a timeout, as a failed delivery. See Webhooks introduction for a minimal handler. - A decision about which events you need. You must subscribe to at least one, and you should subscribe to no more than you will act on.
Create an endpoint
On the Endpoints tab, select New Endpoint at the top right. If you have not created one yet the tab is empty and offers a Create Endpoint button in the middle of the screen instead — same dialog either way.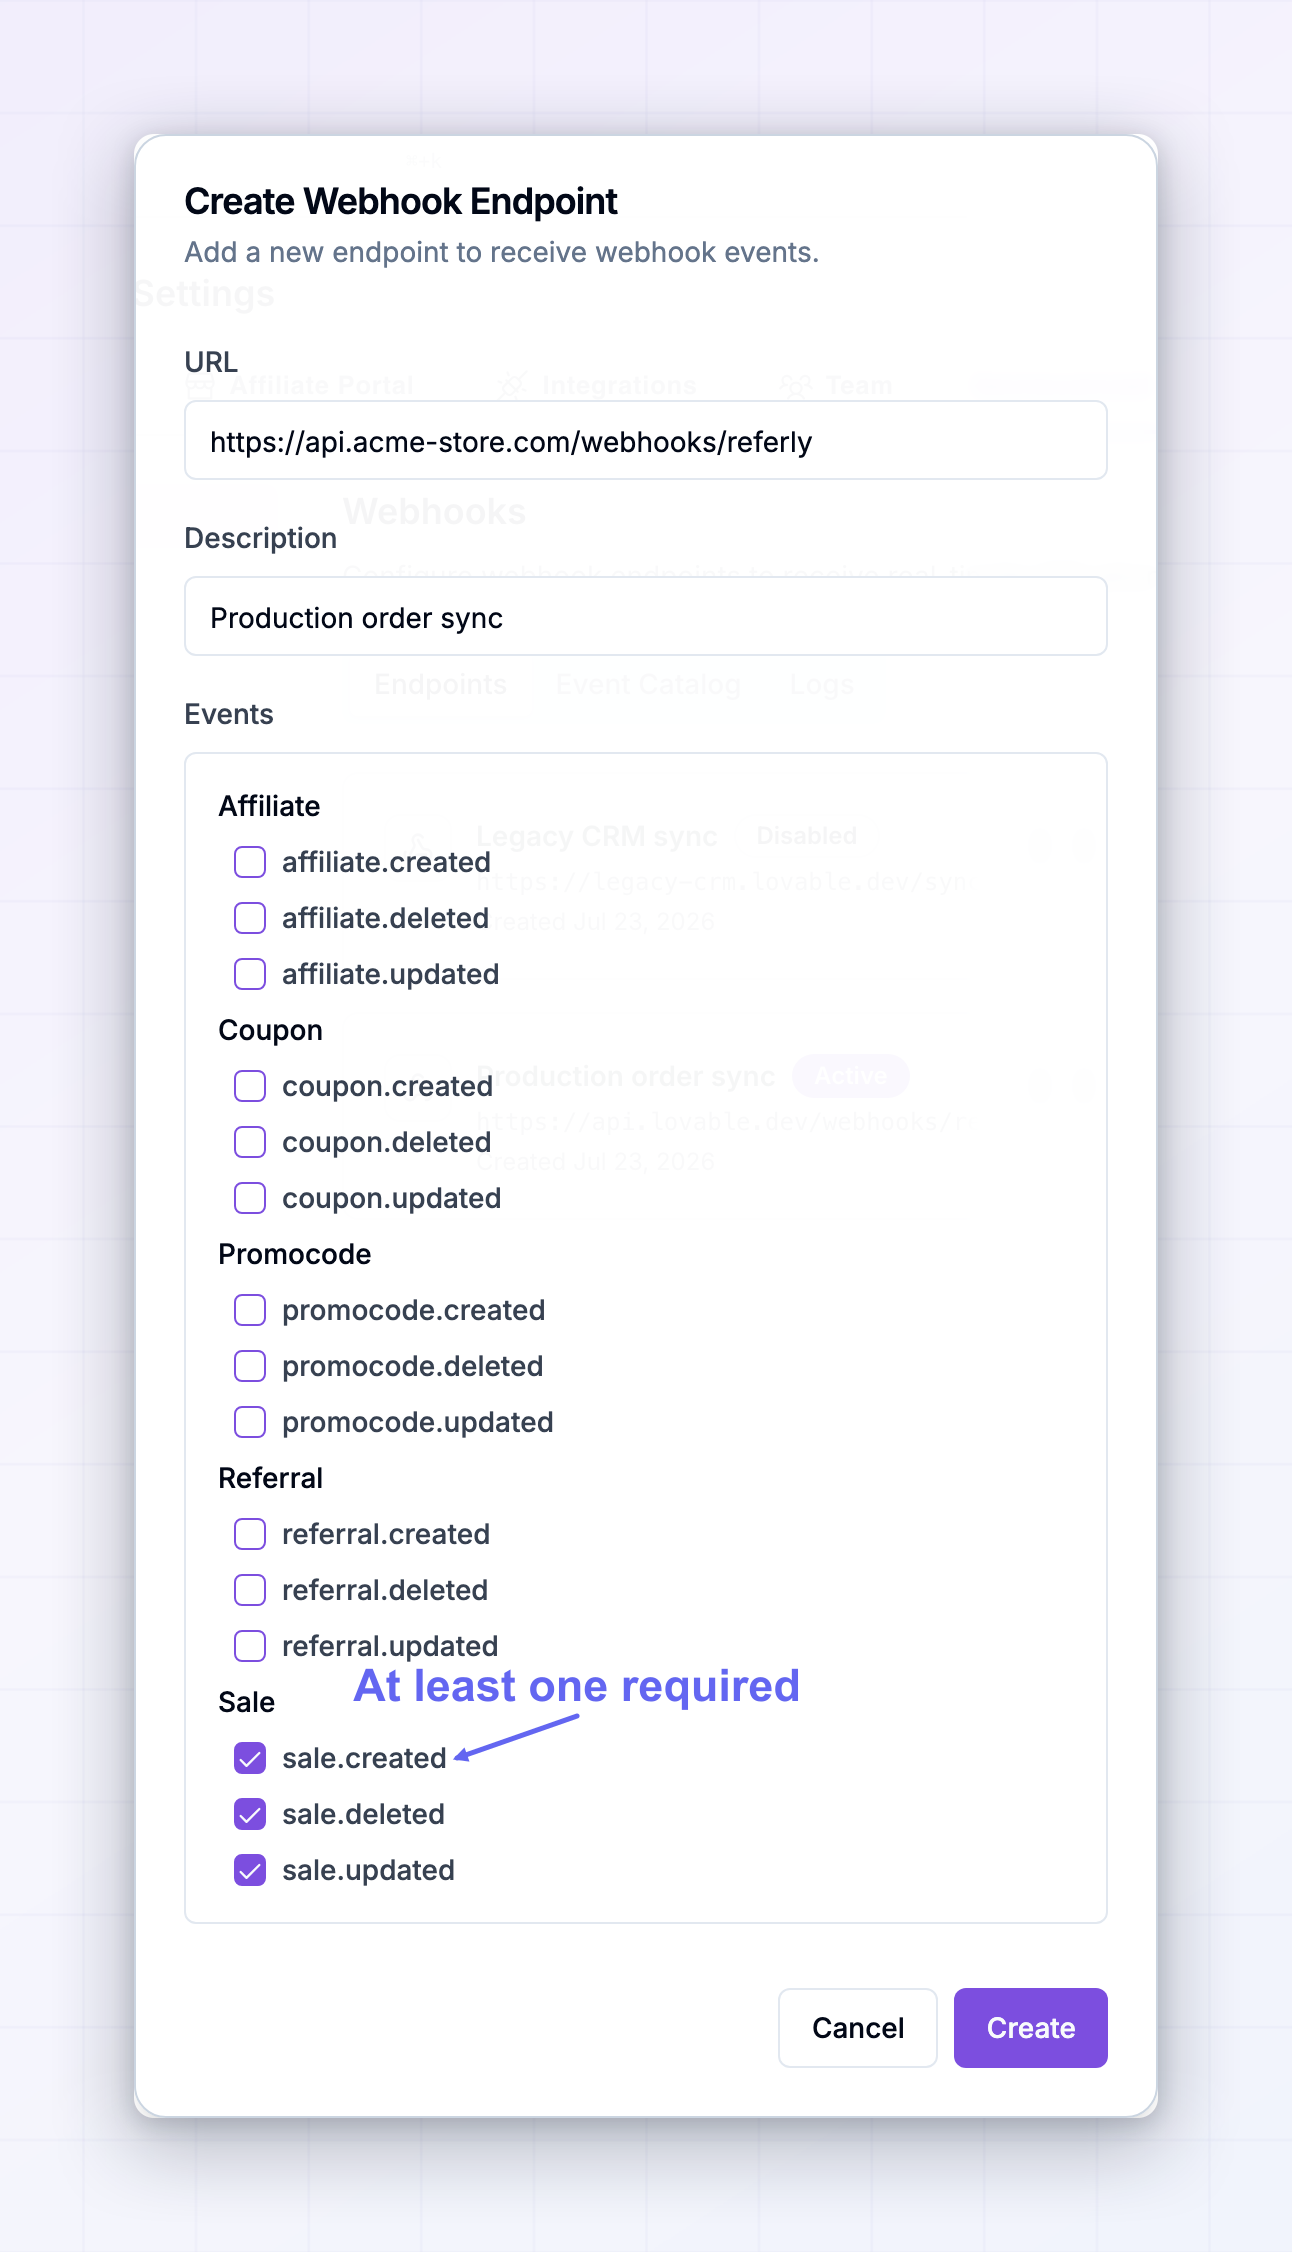
1
URL
The address that receives the
POST, for example https://api.example.com/webhooks/referly.2
Description
A label for the endpoint. This is what identifies it in the list, so name it after the system it
feeds —
Production order sync, Staging, Slack alerts. If you leave it blank, the list falls
back to the last path segment of the URL, which gets ambiguous quickly once you have more than
one endpoint.3
Events
A scrollable checklist of all fifteen event types, grouped by family — affiliate, referral, sale,
coupon, promocode. Tick the ones this endpoint should receive.
4
Create
Create stays disabled until you have entered a URL and ticked at least one event. Once you
select it the endpoint appears in the list marked Active and starts receiving matching
events immediately — there is no confirmation ping or activation step.
Open an endpoint’s details
Select the … button on a card and choose View Details.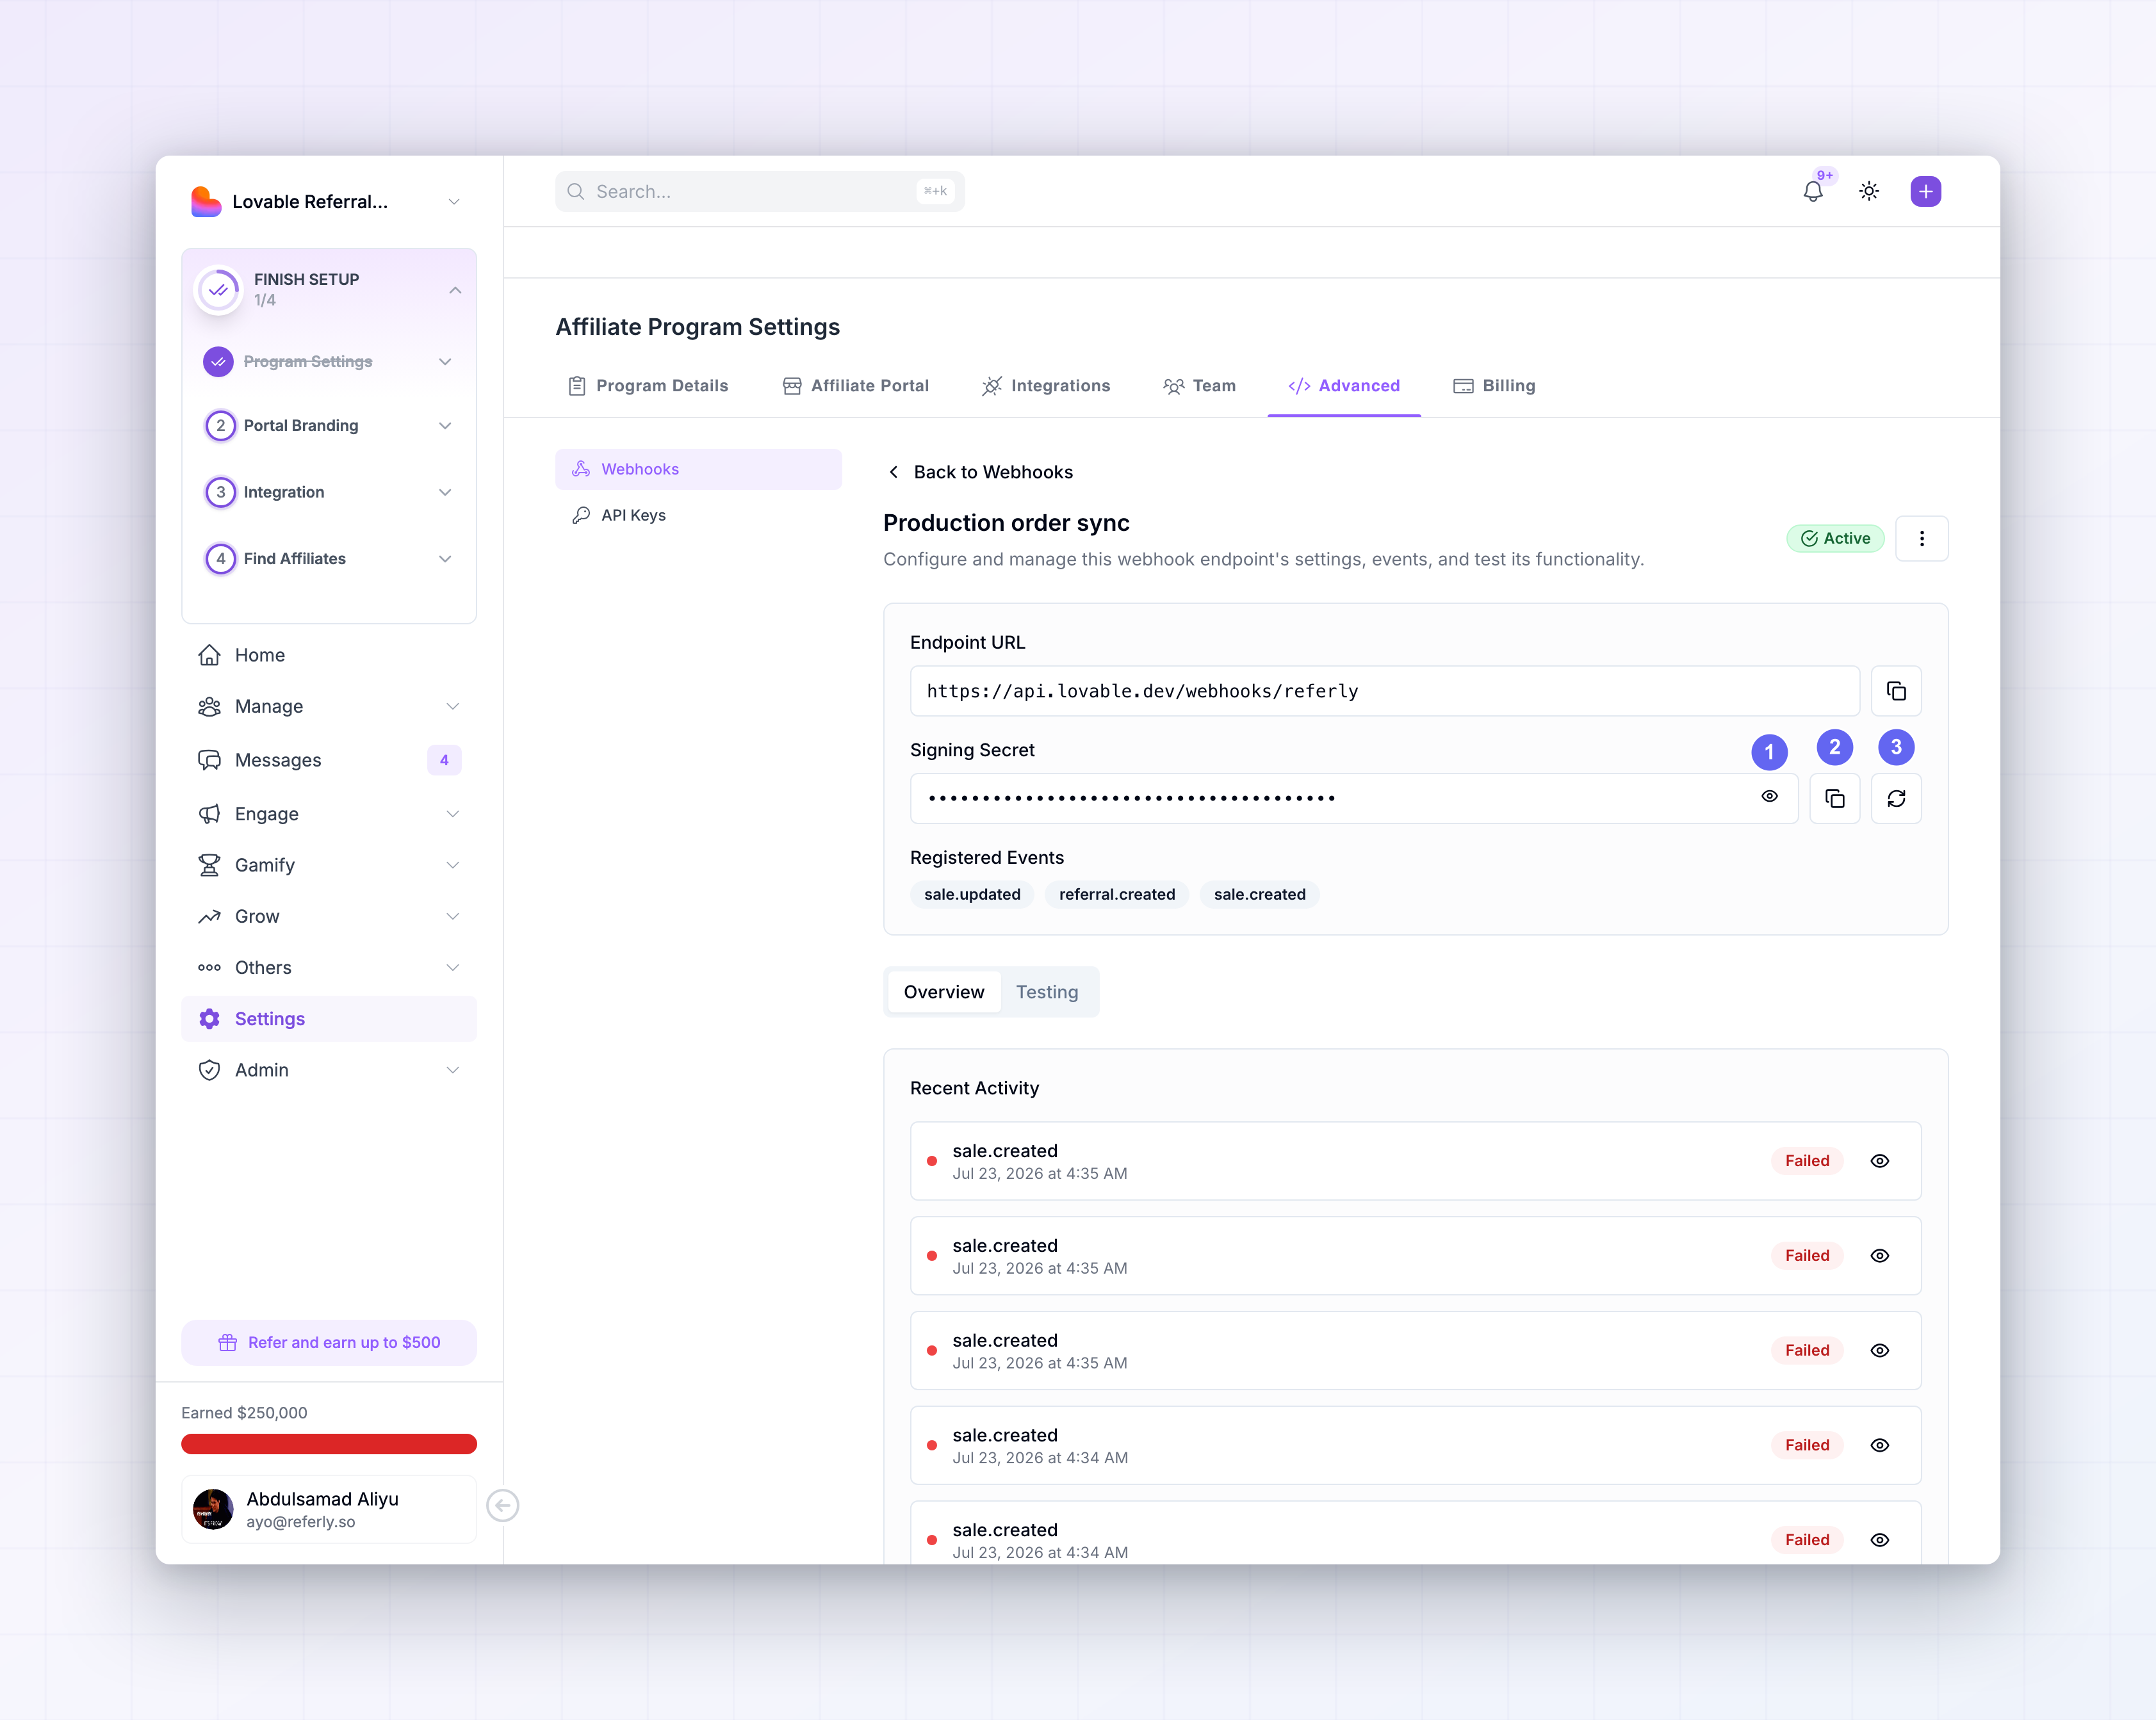 The detail screen gives you:
- Endpoint URL — read-only, with a copy button.
- Signing Secret — masked until you select the eye icon, with buttons to copy it and to rotate it. This is the secret your handler verifies against; see Verify signatures.
- Registered Events — the subscribed event types as tags.
- An Active or Disabled badge and a … menu with Disable, Edit, and Delete.
Edit lives only on the detail screen. The … menu on a card in the list offers View
Details, Disable or Enable, and Delete.
Edit an endpoint
From the detail screen’s … menu, choose Edit. You can change the URL, the description, and the subscribed events. The dialog opens pre-filled with the current values. Changes apply to deliveries from that point on. Messages already queued or mid-retry keep going to the old URL, so when you are moving an endpoint to a new host, leave the old one serving until the log stops showing traffic for it. Editing does not touch the signing secret. Point a new URL at the same endpoint and your existing verification code keeps working.Rotate the signing secret
Select the rotate icon next to Signing Secret. Referly issues a new secret and shows it in place of the old one. The safest sequence is to deploy a handler that accepts either secret, rotate, confirm the log is clean, then remove the old one. Rotate whenever a secret may have leaked — a committed.env, a
former contractor, a compromised logging pipeline.
Disable an endpoint
Choose Disable from the … menu on the card or the detail screen. The endpoint stops receiving events but keeps its URL, description, subscribed events, signing secret, and full delivery history. Enable on the same menu turns it back on. This is what you want during a planned outage, a migration, or a noisy debugging session — far better than deleting and recreating, which loses the secret and the history.Events that occur while an endpoint is disabled are not queued up and delivered on re-enable. If
you need them afterwards, resend them from the Logs tab — see
Retries and logs.
Delete an endpoint
Choose Delete from the … menu and confirm in the Delete Webhook Endpoint dialog.How to structure your endpoints
A few patterns worth following.One endpoint per consuming system
Resist the single catch-all URL that fans out internally. Separate endpoints mean separate secrets, separate subscriptions, and separate delivery logs — so when your CRM sync breaks you can disable it without also stopping order fulfilment, and the log shows you exactly which consumer is failing.One endpoint per environment
Give staging its own endpoint pointing at your staging host. Because endpoints are scoped to a program, the cleanest setup is a second program for testing with its own endpoint, so test traffic never touches production data.Subscribe narrowly
Filtering happens at the endpoint, before delivery. An endpoint subscribed tosale.created alone
never has to receive, verify, and discard affiliate profile edits. This keeps your log readable and
your handler cheap.
One endpoint per program
Endpoints never cross programs — a program’s events only reach endpoints registered on that program. If you run several campaigns and want them all in one place, register the same URL on each program. Each registration is a separate endpoint with its own secret, so your handler needs to pick the right secret per request, usually by giving each program its own path such as/webhooks/referly/program-a.
Related
Event types
All fifteen events and exactly what triggers each one.
Payload structure
Field-by-field reference for every object you can receive.
Verify signatures
Use the signing secret to prove a request came from Referly.
Retries and logs
Read a failed delivery and resend it.
Test and replay
Send sample events from the Testing tab while you build.
Webhooks in the Help Center
The same screens, explained without code.