

notifications@your-domain.com rather than a Referly one. Emails from your own domain look more professional, build trust with your affiliates, and are less likely to land in spam.
A custom sending domain is available on the Business plan.
Before you start
You’ll need a domain you own and access to its DNS settings — the place where you manage records for your domain, usually at whoever you bought the domain from (for example your domain registrar or hosting provider). Setting this up involves adding a few records there, which usually takes a few minutes.Add your domain
In the left sidebar, select Settings, open Affiliate Portal, then Email domain. In the Custom Sending Domain section, type your domain into the Domain Name field — for exampleyour-domain.com — and select Connect.
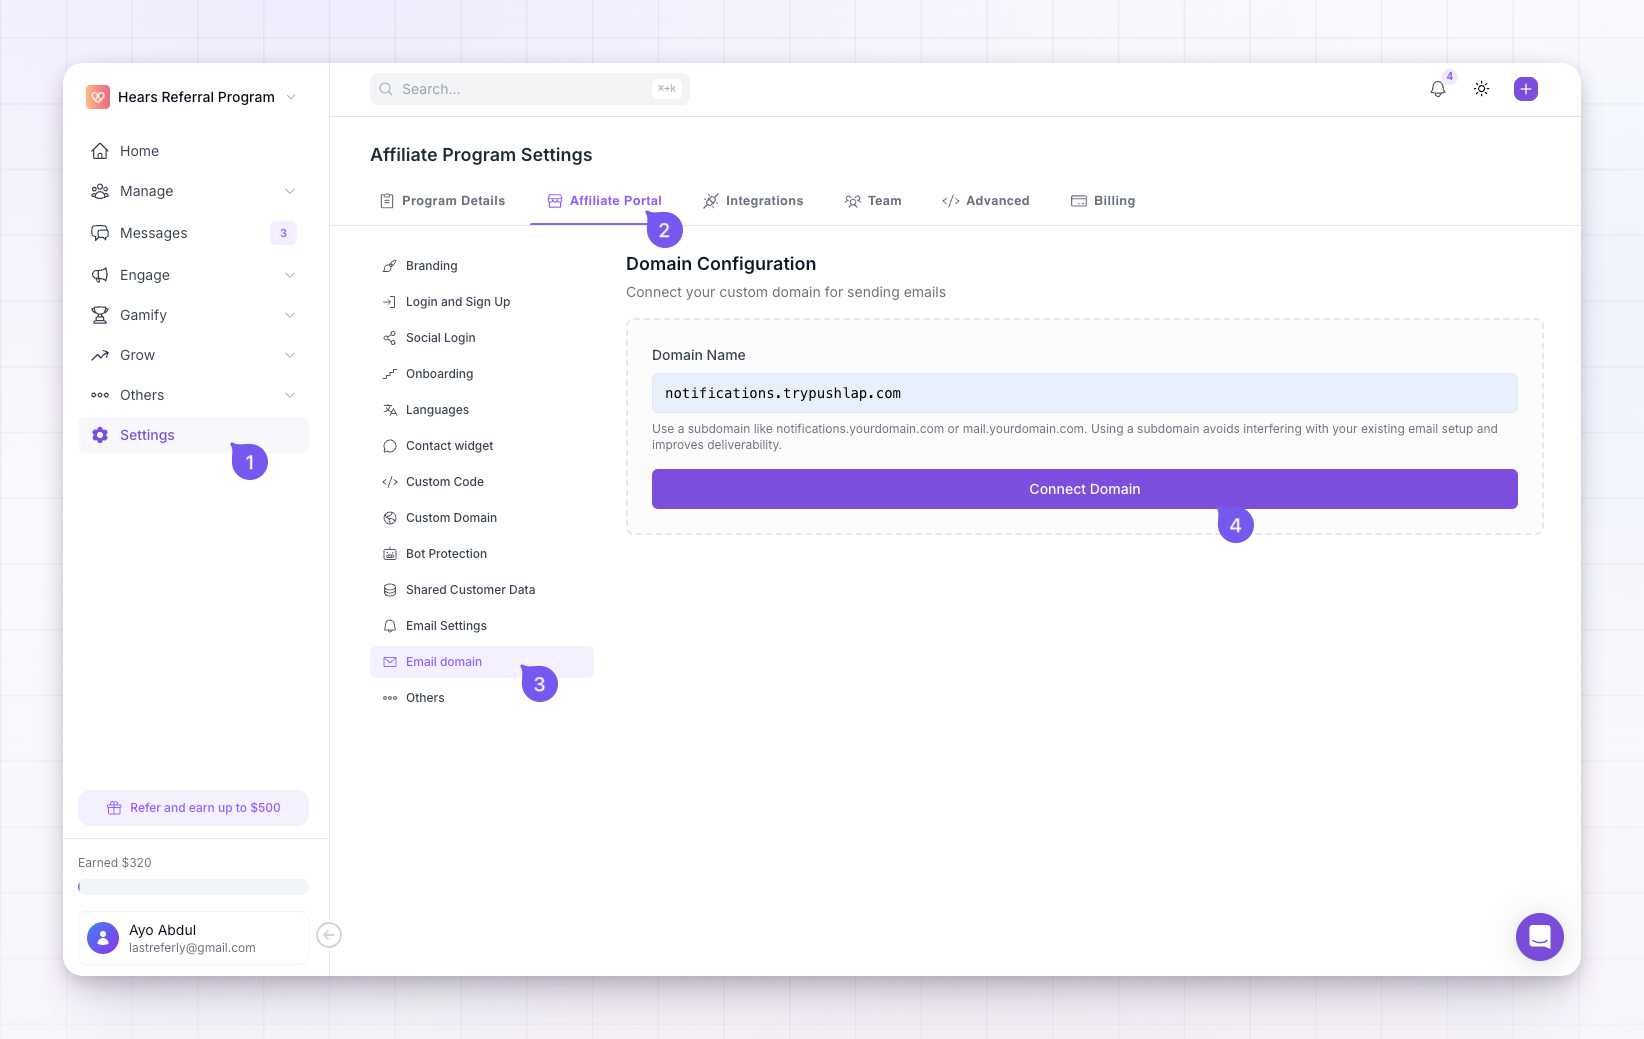 Your domain now appears with an Unverified badge. The next step tells Referly your domain is really yours.
Add the DNS records
Select How to verify (or the refresh icon) to open the Verify Your Domain window. It lists a set of DNS records you need to add at your domain provider, grouped into Sending Records and MX Records.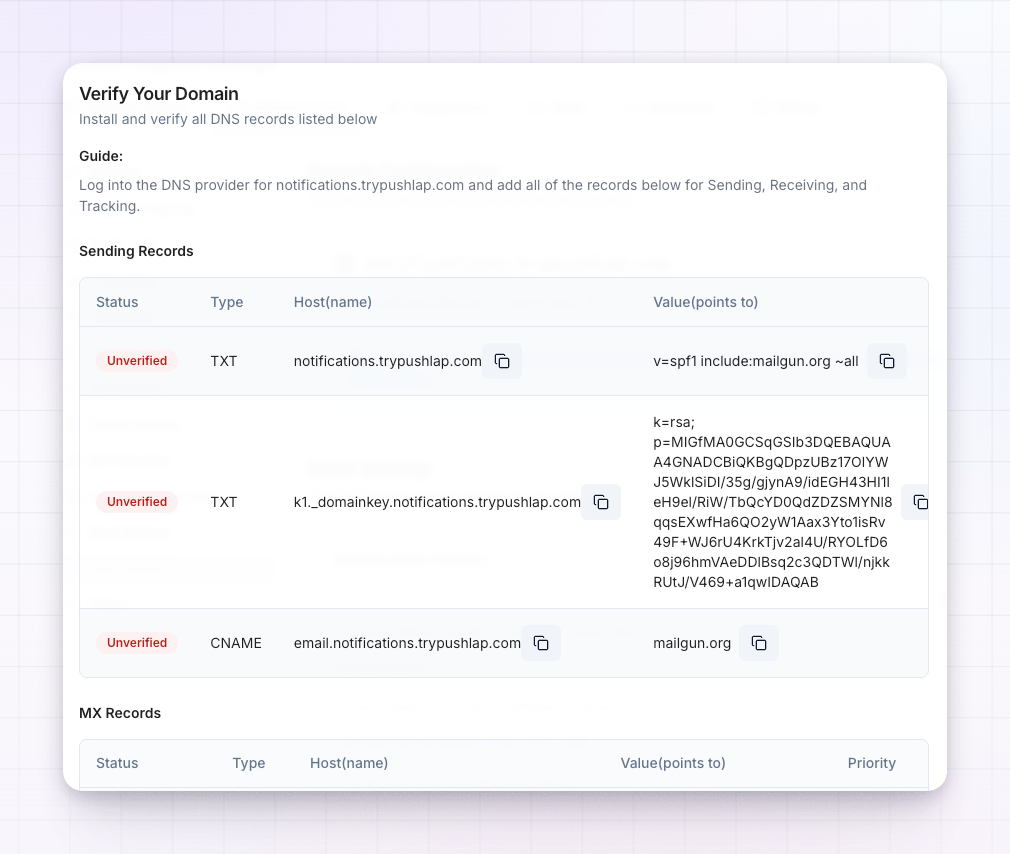 To add them:
1
Open your DNS provider
In a separate tab, log in to wherever you manage your domain’s DNS and go to its DNS records.
2
Copy each record across
For every row in the window, add a matching record at your provider using the Type, Host (name), and Value (points to) shown. Select the copy icon next to each value so you paste it exactly — a single wrong character will stop the domain from verifying. For MX records, also set the Priority shown.
3
Save at your provider
Save the records. They can take anywhere from a few minutes to a few hours to take effect, depending on your provider.
Verify your domain
Back in the window, select Verify DNS Records. Referly checks your domain and marks each record Verified once it finds it. When all the records check out, your domain shows a green Verified badge and your emails will start sending from it. If it doesn’t verify right away, wait a little longer for the records to take effect and select Verify DNS Records again. Double-check that each record’s host and value match exactly, with no extra spaces, and that you didn’t accidentally add your domain name twice in the host field.Set your sending address and sender name
Once your domain is connected, choose how emails appear:- Sending Email Address — the part before the
@. For example, enteringnotificationssends emails fromnotifications@your-domain.com. - Sender Name — the name affiliates see as the sender, such as
Acme Affiliate Program.
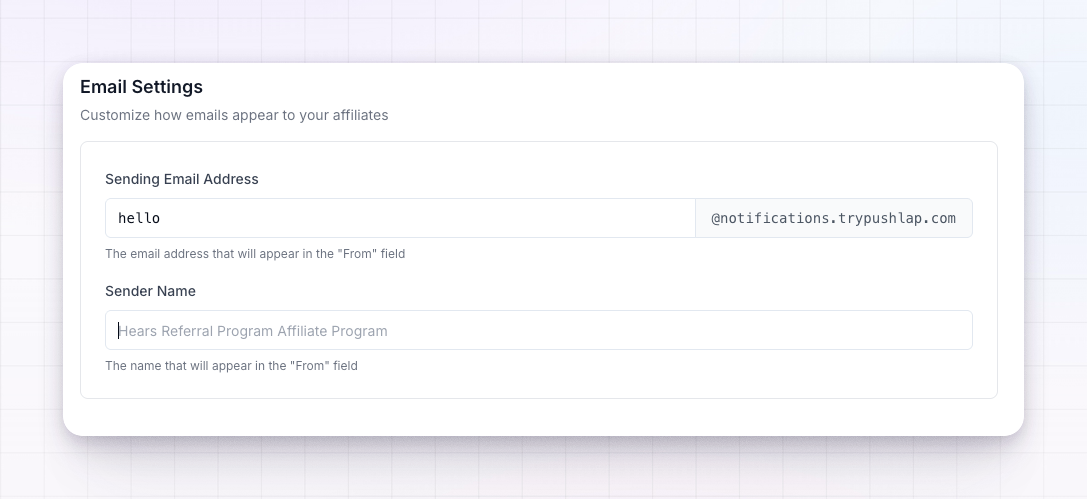
Remove a domain
To stop using your own domain, select the trash icon next to it and confirm. Referly goes back to sending from its default address. You can connect a domain again at any time.Related
Track opens and clicks
See how your emails perform once you’re sending from your own domain.
Custom email builder
Match the email content to your brand, too.
Emails your affiliates receive
The emails that will now come from your domain.
Email settings overview
See how all of Referly’s email settings fit together.