

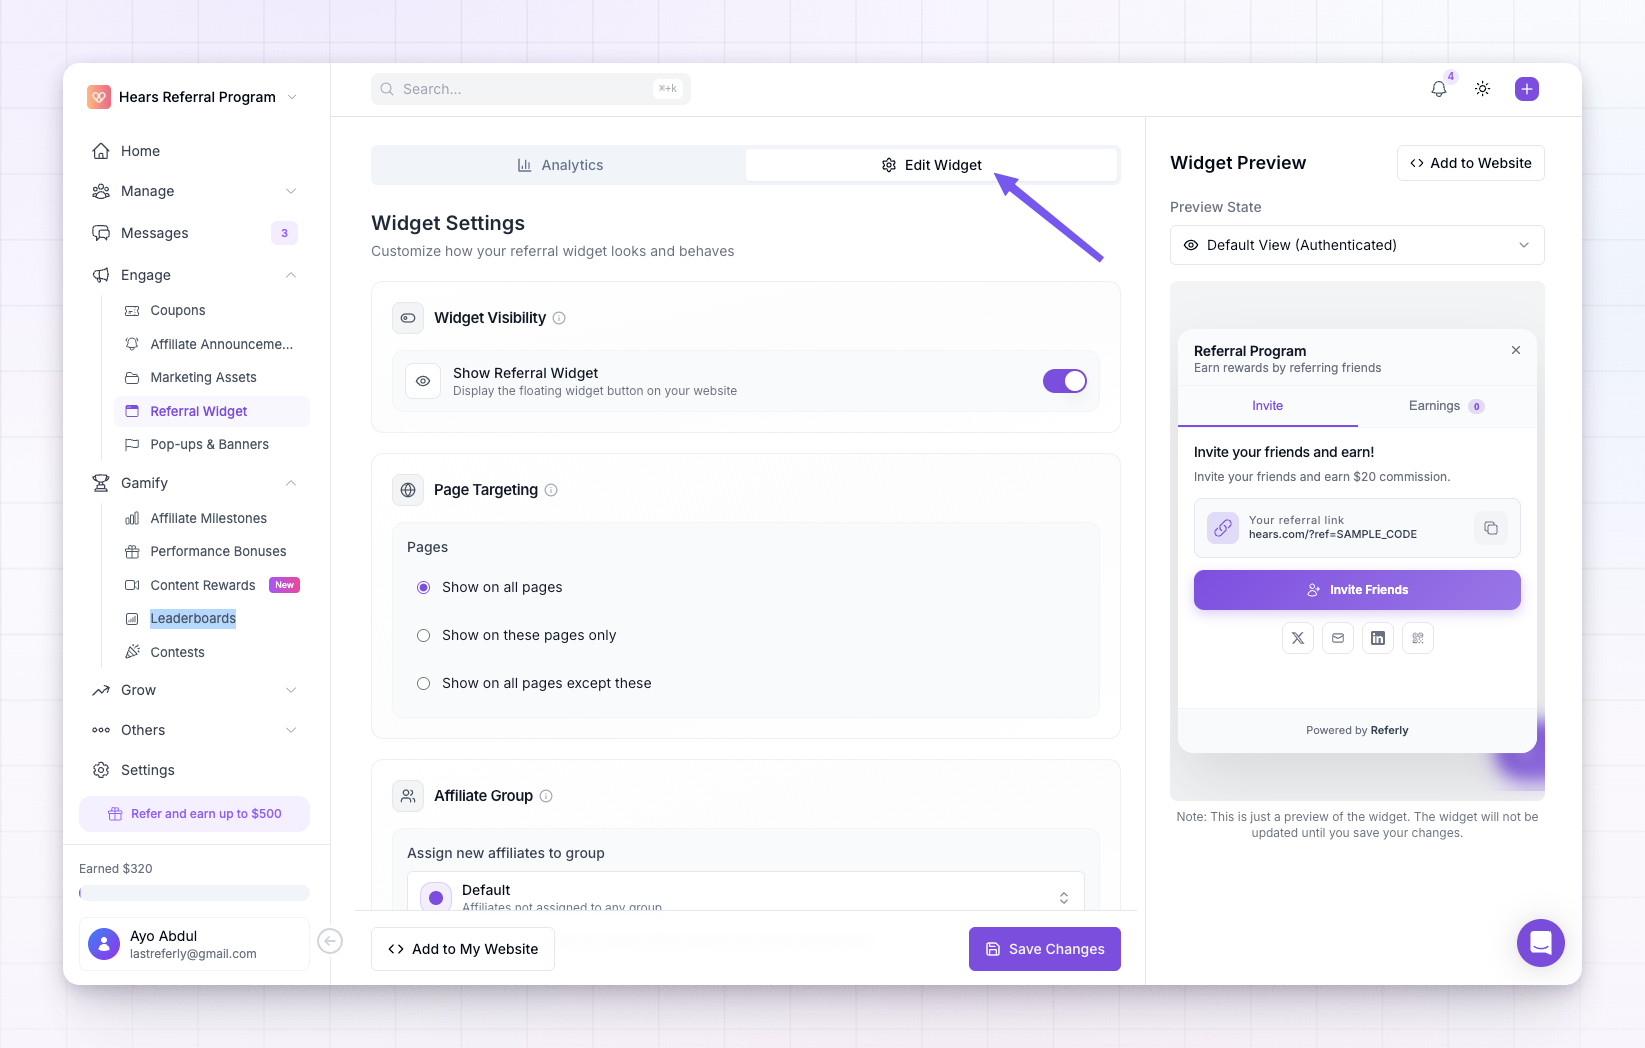
Your changes aren’t live until you save. A Save Changes button sits at the bottom of the settings — the preview updates as you go, but your customers won’t see anything new until you select it.
Preview as you go
The Widget Preview panel shows the widget with your current settings. Use the Preview State dropdown above it to look at each part in turn — the floating button on its own, the Invite tab, the email and verification screens, the Earnings tab, and the invitation popup. It’s the quickest way to check a color or a piece of wording without loading your real site.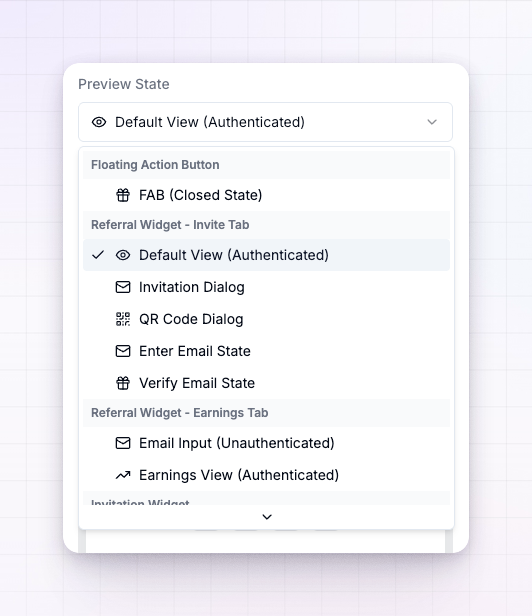
Turn the widget on
The Widget Visibility section has a single switch, Show Referral Widget, that controls whether the floating button appears on your site at all. Turn it on to show the widget. If you’d rather open the widget only from your own button, you can leave this off — see Install the widget for the custom button option.Choose which pages it appears on
The Page Targeting section decides where the floating button shows up. Under Pages, pick one of:- Show on all pages — the button appears everywhere the widget script is installed.
- Show on these pages only — the button appears only on the pages you list.
- Show on all pages except these — the button appears everywhere apart from the pages you list.
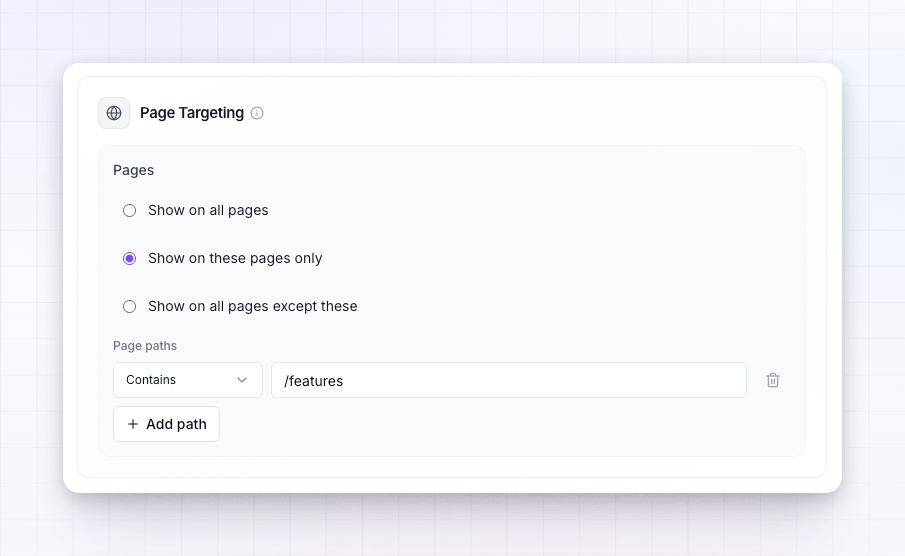 When you choose one of the last two, you add one or more path rules. For each rule, pick how it should match — Is, Is not, Contains, or Does not contain — and type the page path, like
 /dashboard. Select Add path to add more rules, and use the And / Or control to decide whether they all have to match or just one.
Page targeting applies to the floating button. The invitation popup that greets referred visitors can still appear on any page, since its job is to welcome people the moment they arrive.
Assign new affiliates to a group
When a customer signs up through the widget, they’re added to your program automatically. Under Assign new affiliates to group, choose which affiliate group they should land in. It’s set to Default to start, which means they aren’t placed in any particular group. Picking a group is handy when you want widget sign-ups to get their own commission plan or messaging.Set the colors and position
The Appearance section controls how the widget looks: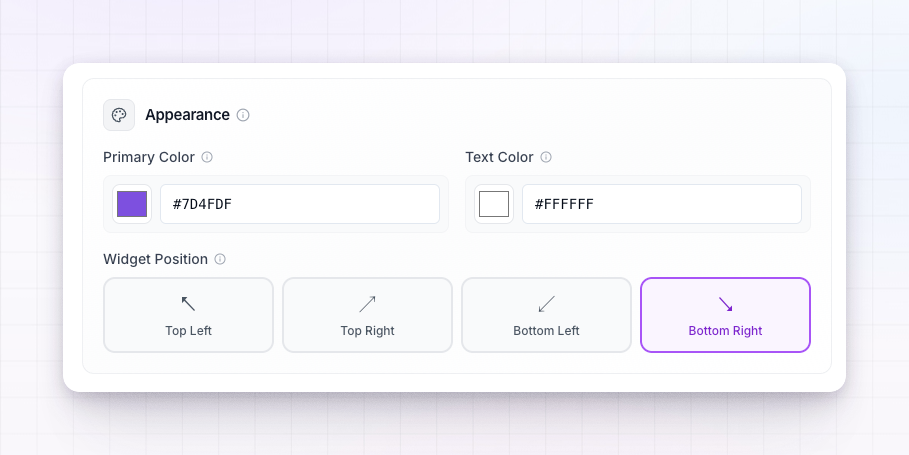
- Primary Color is used for the floating button and the buttons and accents inside the widget. Pick a color or paste a hex value like
#6366f1. - Text Color is used for text and icons that sit on top of the primary color — set it so your button labels stay readable.
- Widget Position places the floating button in a corner of the screen: Top Left, Top Right, Bottom Left, or Bottom Right. Bottom right is the usual choice.
Write the header text
The Widget Header section sets the title and description at the top of the widget panel.- Widget Title is the heading, such as “Referral Program”.
- Widget Description is the line beneath it, such as “Earn rewards by referring friends”.
Attach a coupon
Under Coupon Code, use the Select Coupon dropdown to show a discount code inside the widget alongside the referral link, giving affiliates something extra to share. Choose No coupon to show only the link. If the list is empty, create a code first — see Coupons overview — and it’ll appear here.Set up the invitation popup
The Invitation Widget section controls the popup a visitor sees when they arrive through a referral link. It’s a chance to welcome them and highlight their discount.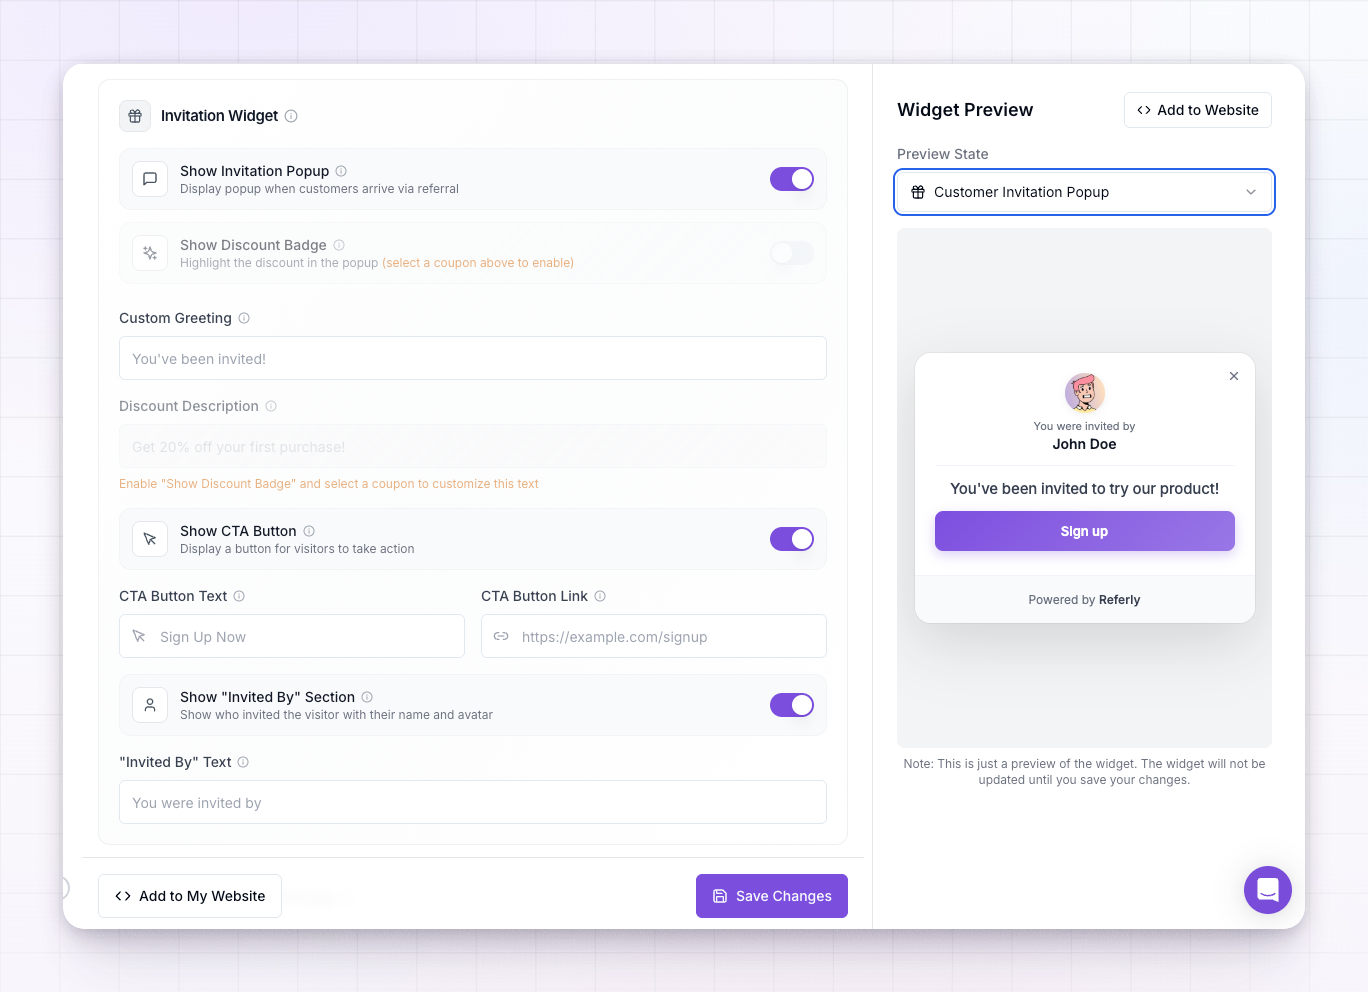
1
Turn the popup on
Use Show Invitation Popup to display the welcome when customers arrive via a referral. Everything below only matters once this is on.
2
Write the greeting
Set Custom Greeting to the headline visitors see, like “You’ve been invited!”.
3
Highlight the discount
Turn on Show Discount Badge to feature the discount, then set the Discount Description, such as “Get 20% off your first purchase!”. The badge needs a coupon attached above to switch on.
4
Add a call-to-action button
Turn on Show CTA Button to add a button to the popup, then set its CTA Button Text (for example “Sign Up Now”) and the CTA Button Link it points to.
5
Show who invited them
Turn on Show ‘Invited By’ Section to display the referring affiliate’s name and avatar, and set the ‘Invited By’ Text that introduces it, like “You were invited by”.
Rewrite any of the wording
Every piece of text in the widget can be changed. Open the Advanced: Custom Copy section to find the widget’s wording grouped by where it appears — the tab labels, the Invite tab, the invitation and QR dialogs, the email and verification screens, and the Earnings tab.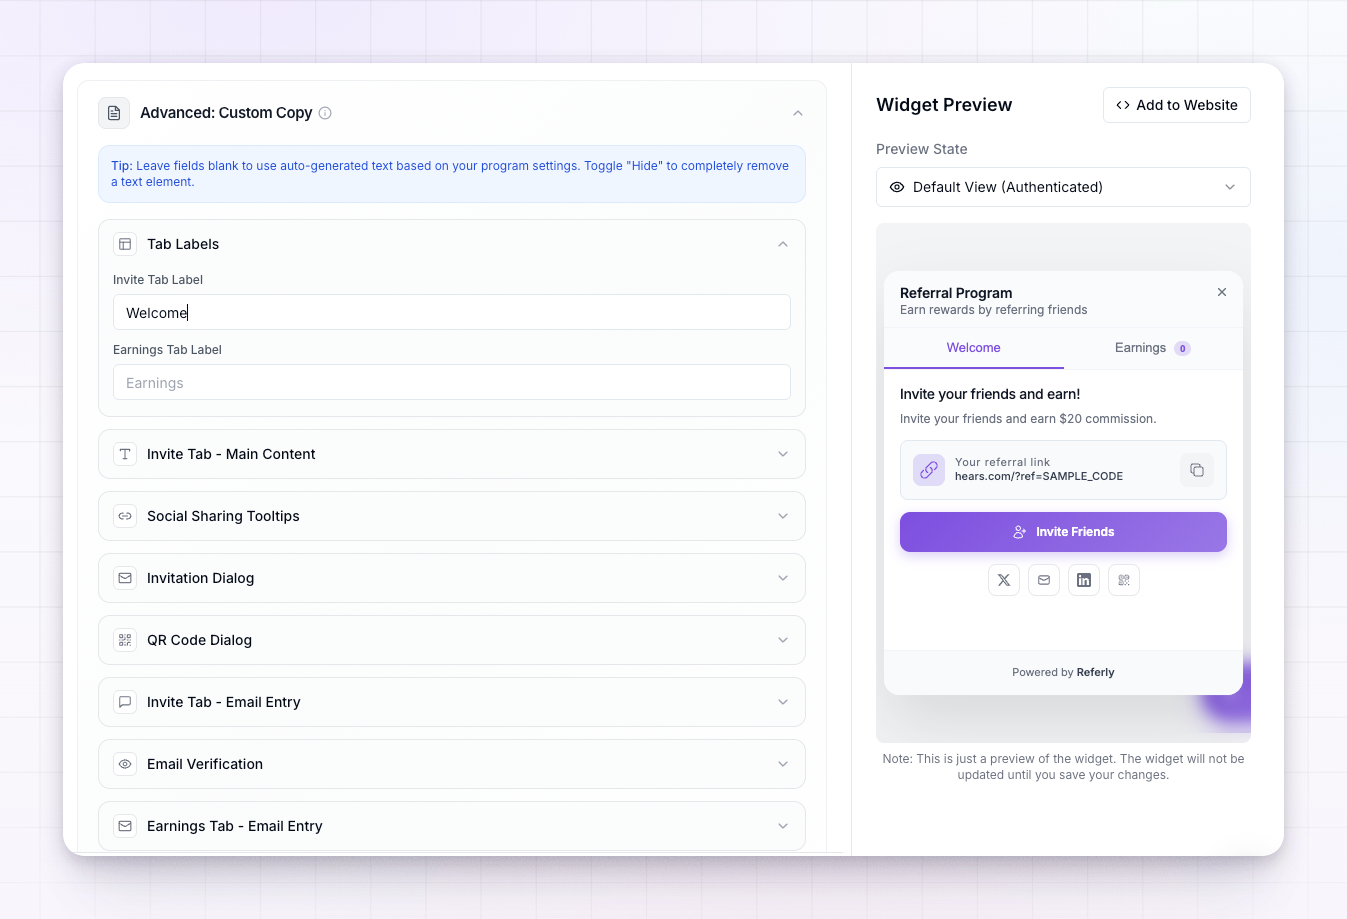 Type your own wording into any field to replace the default. Leave a field blank and Referly uses text generated from your program and coupon settings, so you only need to touch the lines you actually want to change.
Save your changes
When the preview looks right, select Save Changes at the bottom of the settings. You’ll see a “Widget settings updated successfully” confirmation, and your live widget picks up the new look and wording.Saved changes apply to the widget already on your site — there’s no need to reinstall the code after a customization.
Related
Install the widget
Add the widget to your site once you’ve set it up.
Email verification
How affiliates confirm their email in the widget.
Affiliate groups
Where widget sign-ups land when you assign a group.
Coupons overview
Create the discount code you attach to the widget.