

The referral widget is available on the Business plan and higher. Before you install, it’s worth customizing the widget so it looks right the moment it goes live.
Open the installer
From your campaign dashboard, open Widget in the left sidebar and stay on the Edit Widget tab. At the bottom of the settings, select Add to My Website.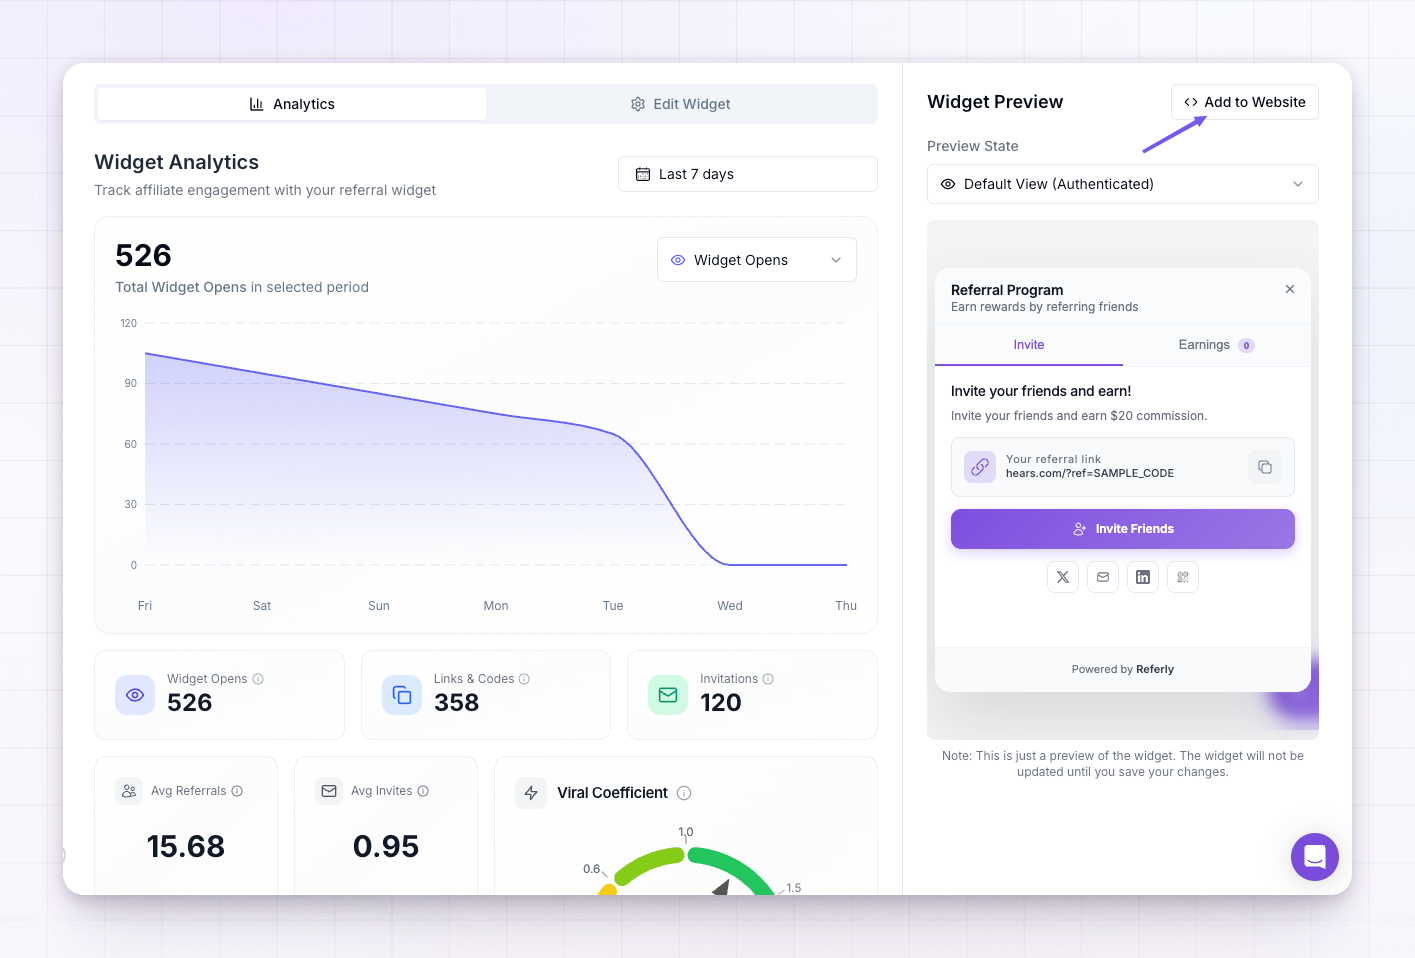 A window titled Add Referral Widget to Your Website opens. It walks you through three steps — Tracking, Widget, and Custom Trigger — with the code you need at each one. Every snippet already has your program’s details filled in, so copy it straight from the window using the Copy code button rather than typing it out.
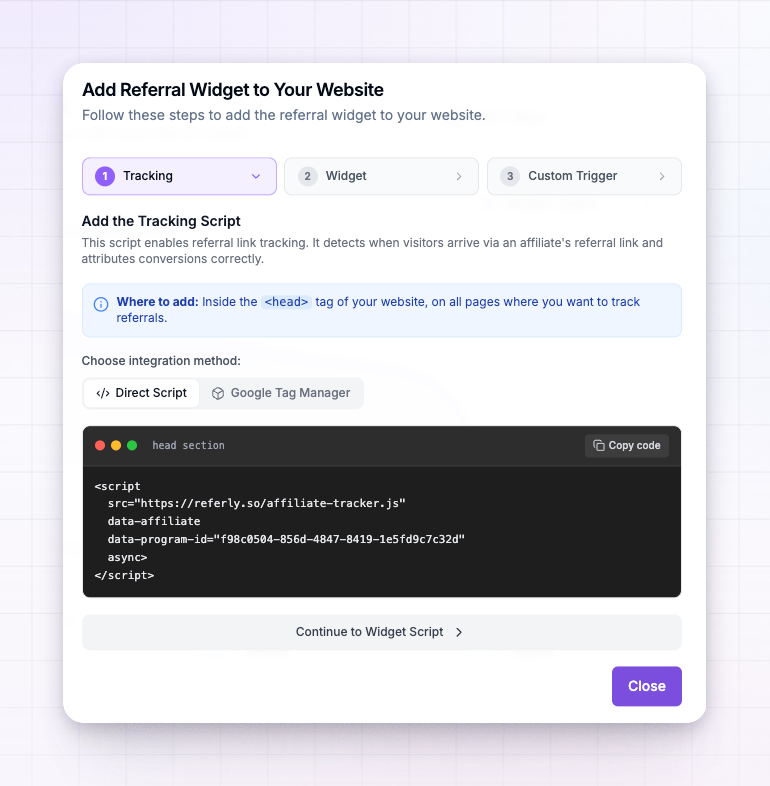 Each step offers two ways to add the code:
- Direct Script — paste the code into your site’s HTML yourself.
- Google Tag Manager — add the code as a tag if you manage your site’s scripts through Google Tag Manager.
Step 1: Add the tracking script
The tracking script is what lets Referly know when someone arrives through a referral link and credit the right affiliate. Copy the snippet from the Tracking step and paste it inside the<head> of your site, on every page.
YOUR_PROGRAM_ID value is already filled in for you in the dashboard — that’s why it’s best to copy the code from there. When you’re done, select Continue to Widget Script.
Step 2: Add the widget script
The widget script is what actually shows the floating button and its panel. Copy the snippet from the Widget step and paste it just before the closing</body> tag, on the pages where your customers are signed in — for example, anywhere behind your login.
Identify your customers automatically
Inside the Widget step there’s a toggle called Auto-register logged-in users. It decides how a customer reaches their referral link and earnings: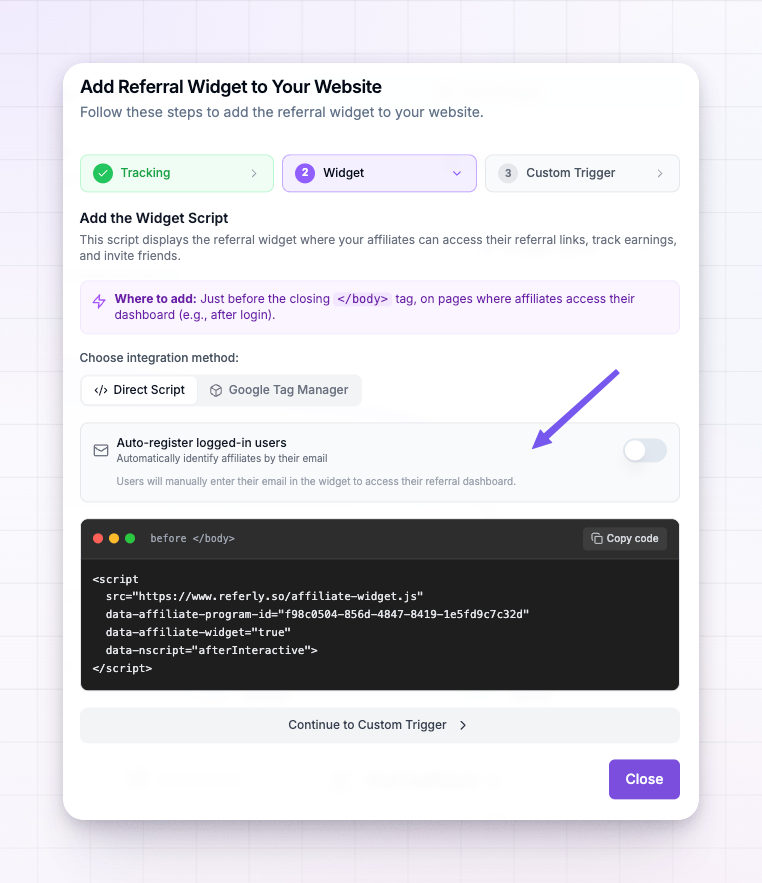
- On — Referly identifies each signed-in customer by their email address, so they open the widget and see their referral link straight away, with nothing to type. When you turn this on, the snippet gains an extra
data-user-emailattribute:
LOGGED_IN_USER_EMAIL with whatever your website uses to output the signed-in person’s email. The dashboard shows examples for common setups.
- Off — customers enter their email in the widget and confirm it with a code before they see their dashboard. See Email verification for what that looks like.
Auto-register only removes the email step for people who are already logged in to your product. If your customers aren’t signed in when they open the widget, leave it off and they’ll verify by email instead.
Step 3: Add your own button (optional)
By default the widget opens from its floating button. If you’d rather open it from a button of your own — a “Refer a friend” or “Earn rewards” link in your menu, say — the Custom Trigger step gives you a small snippet for that:Save your settings
Close the window when you’ve added your snippets, then select Save Changes on the Edit Widget screen so your latest settings are live. Load a page where you added the widget script and you should see the floating button appear.If the button doesn’t show up, check that the widget script is on a page where your customer is signed in, that both scripts were pasted in the right place, and that the widget is turned on under Show Referral Widget in your settings.
Related
Customize the widget
Set the widget’s colors, position, wording, and which pages it shows on.
Email verification
What customers see when auto-register is off.
Referral widget overview
A tour of what the widget is and does.
Install the tracking snippet
Developer details on the tracking script.