

When to add an affiliate manually
Add an affiliate manually when you already have an agreement in place and simply want them set up and active. Because the account is created and activated instantly, there is no approval step and nothing for the affiliate to accept first. Reach for a different path when:- You want to reach out and let the person decide whether to join. Invite them instead so they receive an email invitation.
- You have a whole list of partners to bring over. Import them from a CSV rather than adding one at a time.
- You would rather people apply to you. Open your sign-up page and review applications.
Add an affiliate
You can add an affiliate from anywhere in your dashboard using the quick actions button.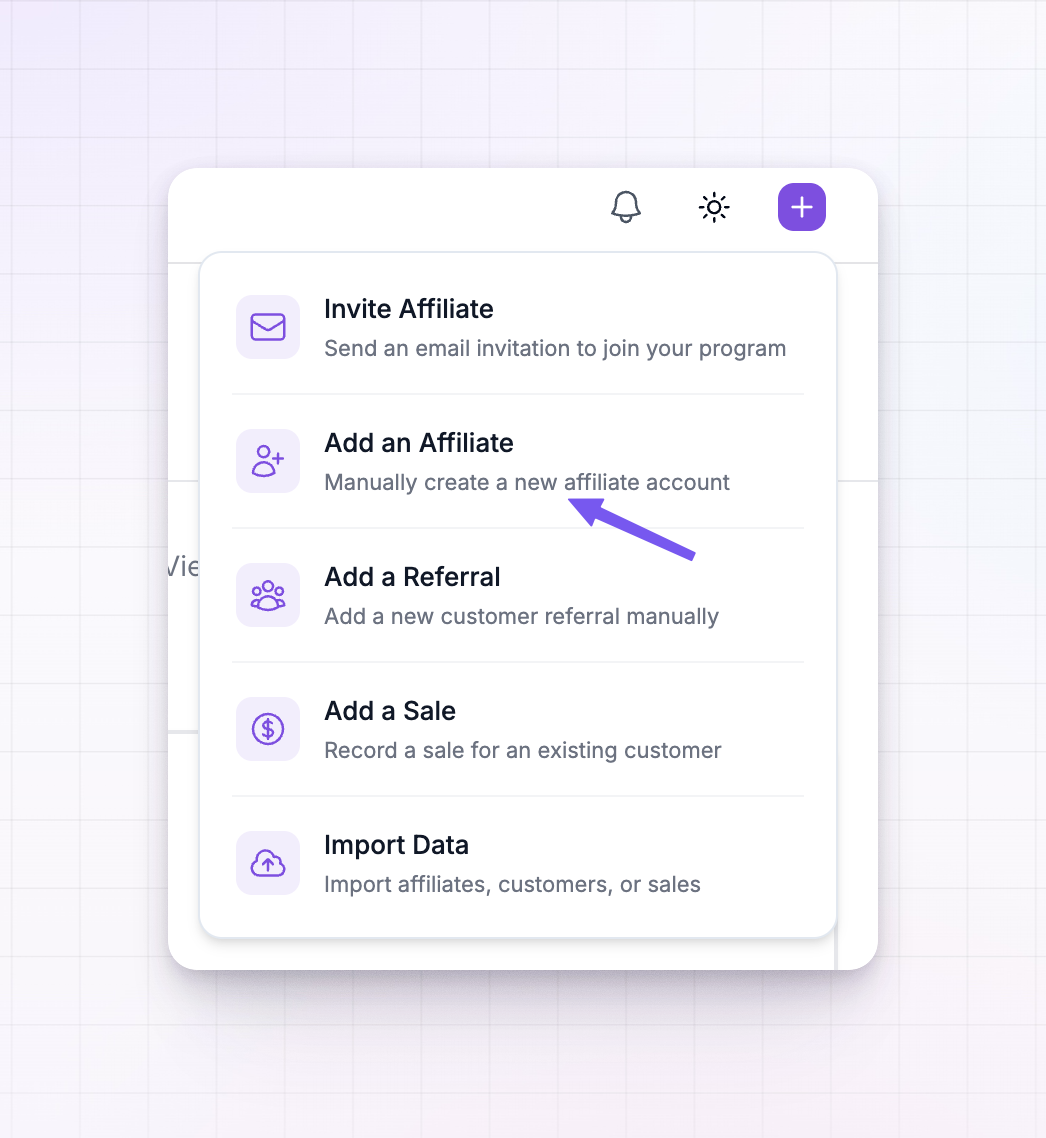
1
Open quick actions
Select the plus (+) button in the top bar, then choose Add an Affiliate.
2
Enter their details
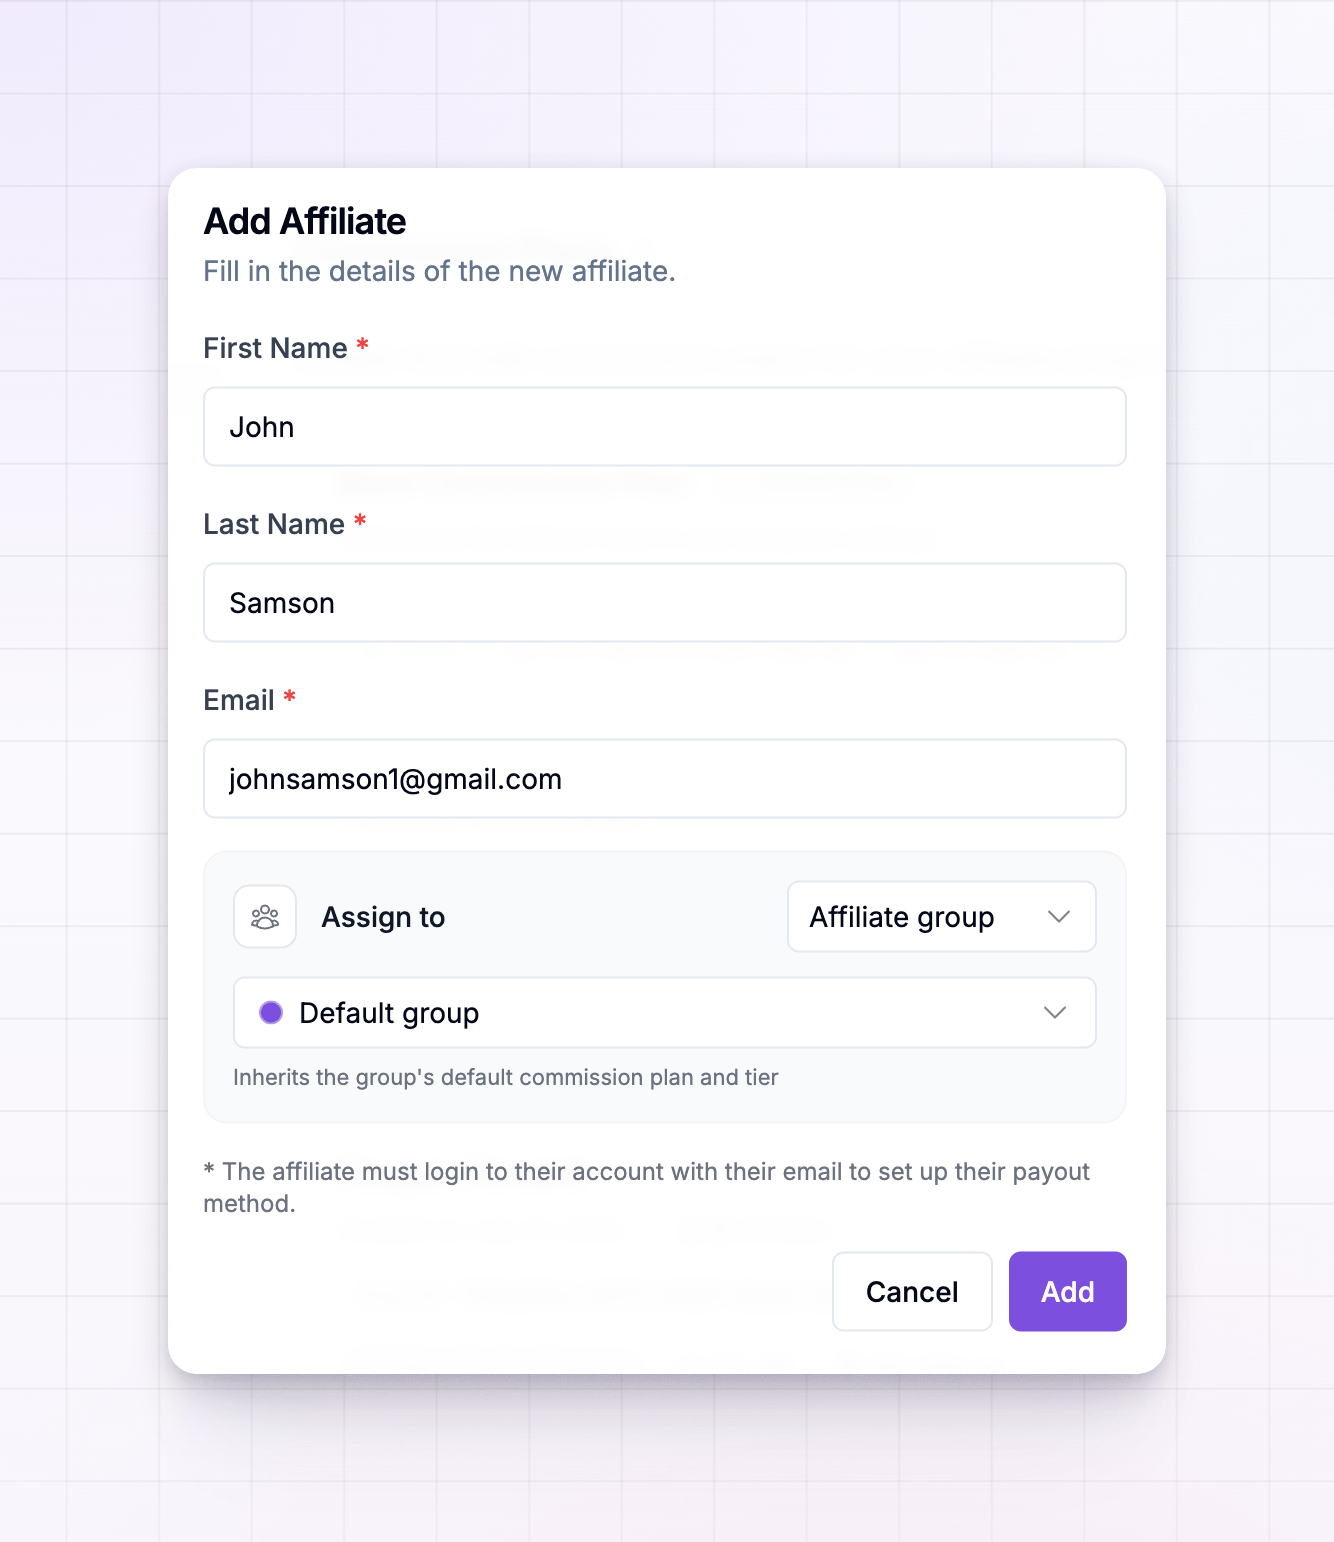
Fill in the affiliate’s First Name, Last Name, and Email. All three are required. The email is the address they will use to log in, so make sure it is correct.
3
Choose how they're assigned
Under Assign to, decide which commission the affiliate starts on (explained in the next section).
4
Create the account
Select Add. The affiliate is created and set to Active immediately, and appears in your affiliates list.
If someone with that email already exists in this program, Referly tells you the affiliate already exists instead of creating a duplicate. It also checks your plan’s affiliate limit before adding a new one.
Choose how they’re assigned
The Assign to box decides what the affiliate earns. Pick one of two options: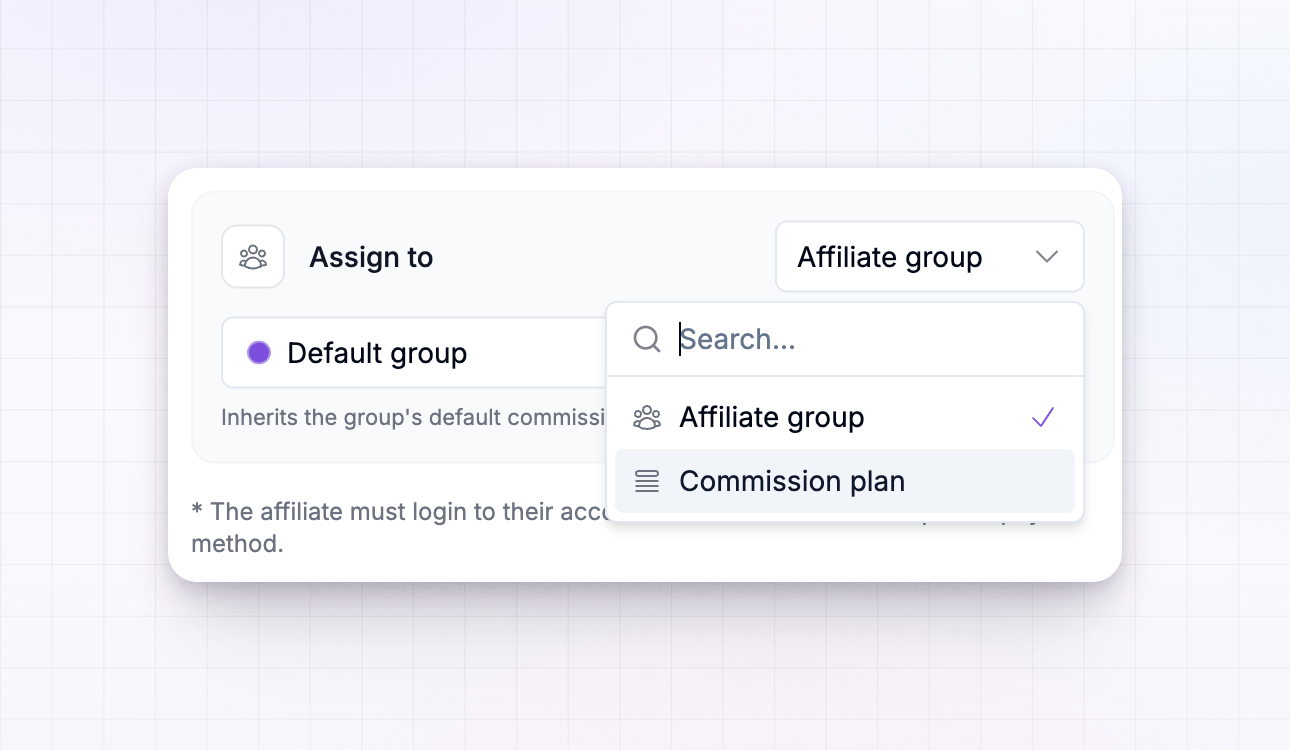
- Affiliate group — place the affiliate in one of your groups. They inherit that group’s default commission plan and tier, and they will follow the group as it changes over time (for example, when a milestone moves them up).
- Commission plan — assign a specific commission plan directly. This is a fixed choice: the affiliate stays on that plan and is not affected by milestone changes.
What happens after you add them
Creating the affiliate does a few things at once:- The account goes live as Active. There is no pending or invited stage — a manually added affiliate can be paid and tracked right away. See the full list of affiliate statuses.
- A referral link is generated automatically, so the affiliate has something to share the moment they log in.
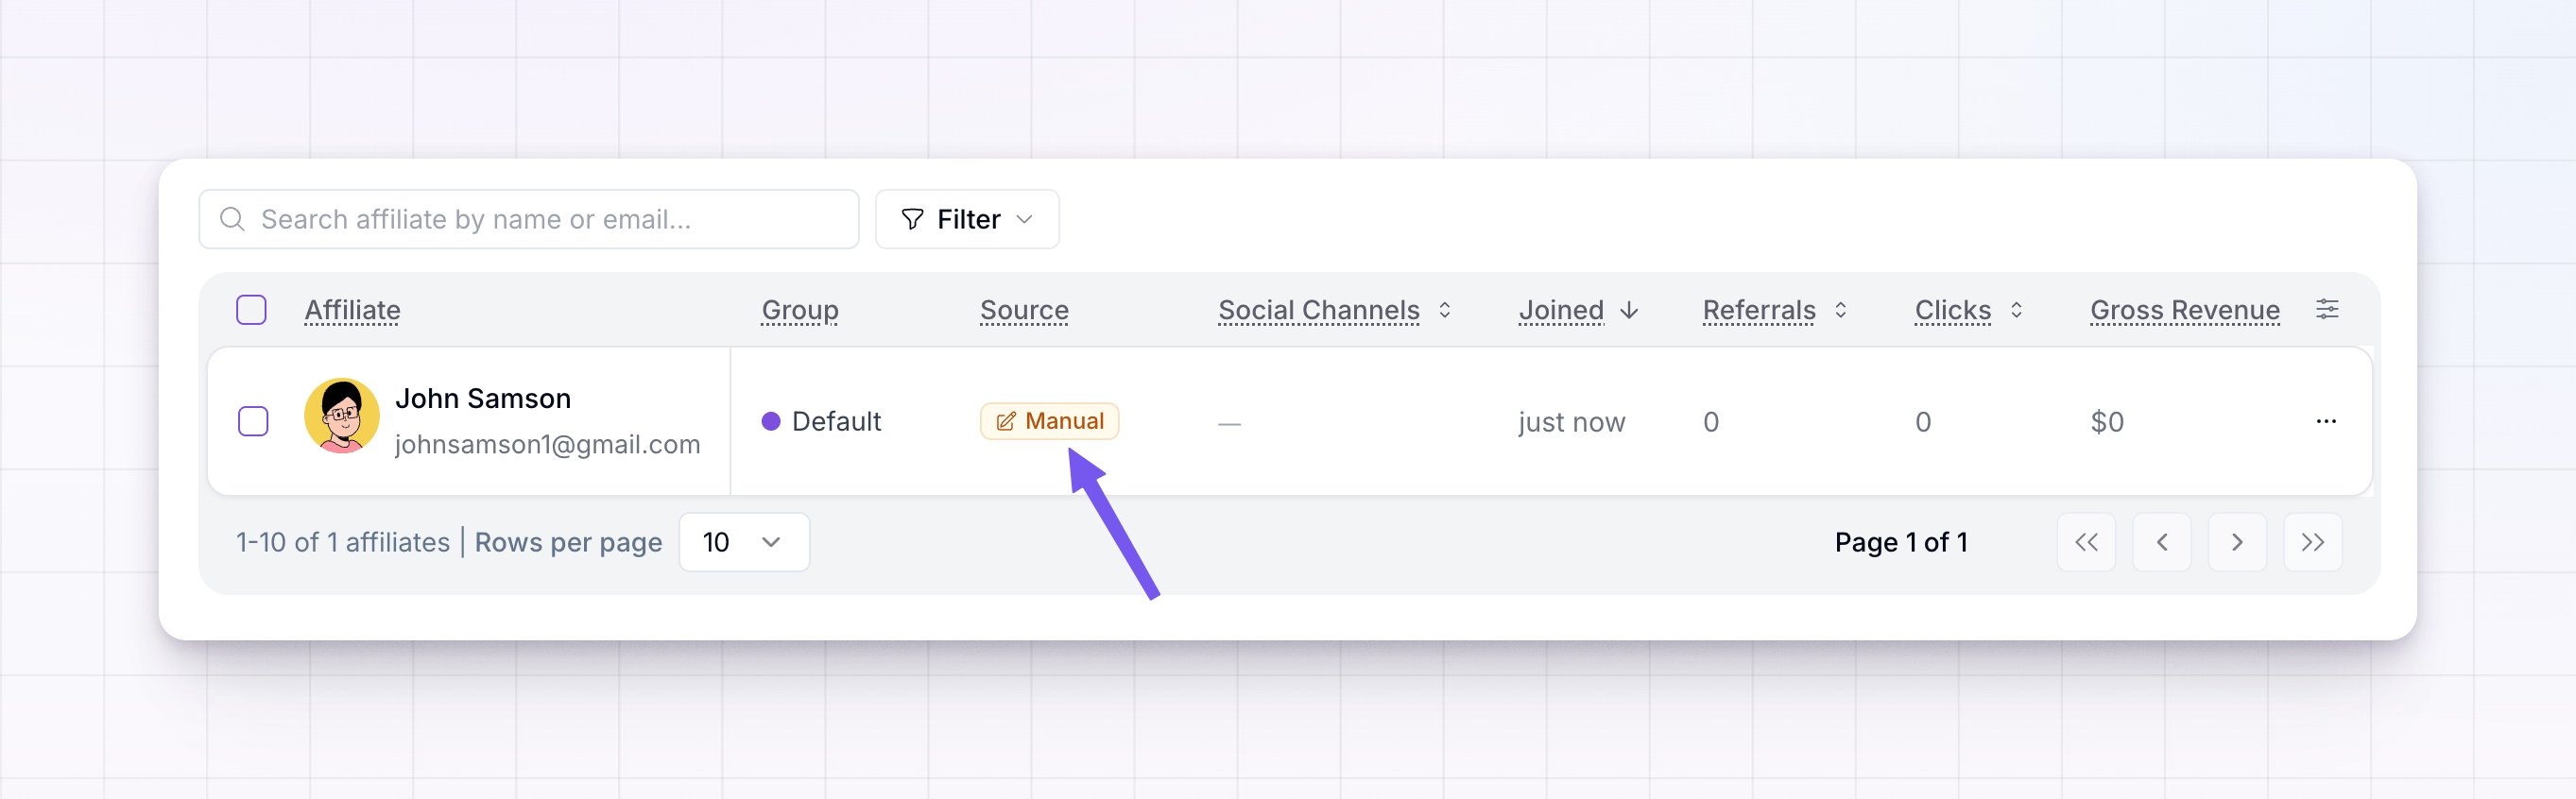
- Their source is recorded as Manual. In your affiliates list, the Source column shows Manual, which tells you this account was created by you from the dashboard rather than through an invite, sign-up, import, or the API.
- They receive a welcome email letting them know their account is ready.
A manually added affiliate has not set a password or payout method yet. They need to log in with their email at least once to finish setting up their account and choose how they get paid. The welcome email points them there.
Adding manually vs. inviting
Both options live in the same quick actions menu, and both let you assign a group or commission plan up front. The difference is the starting state of the account and who takes the next step.
In short: add an affiliate when the relationship is settled and you just want them set up; invite an affiliate when you want to reach out and let them opt in. You can read more about invitations in Invite affiliates.
Related
Invite affiliates
Send an email invitation and let partners accept on their own.
Import affiliates
Bring over a whole list of partners from a CSV at once.
Affiliate statuses
Understand Active, Invited, Pending, and every other status.
Affiliate groups
Organize affiliates and set default commissions by group.