

How grouping works
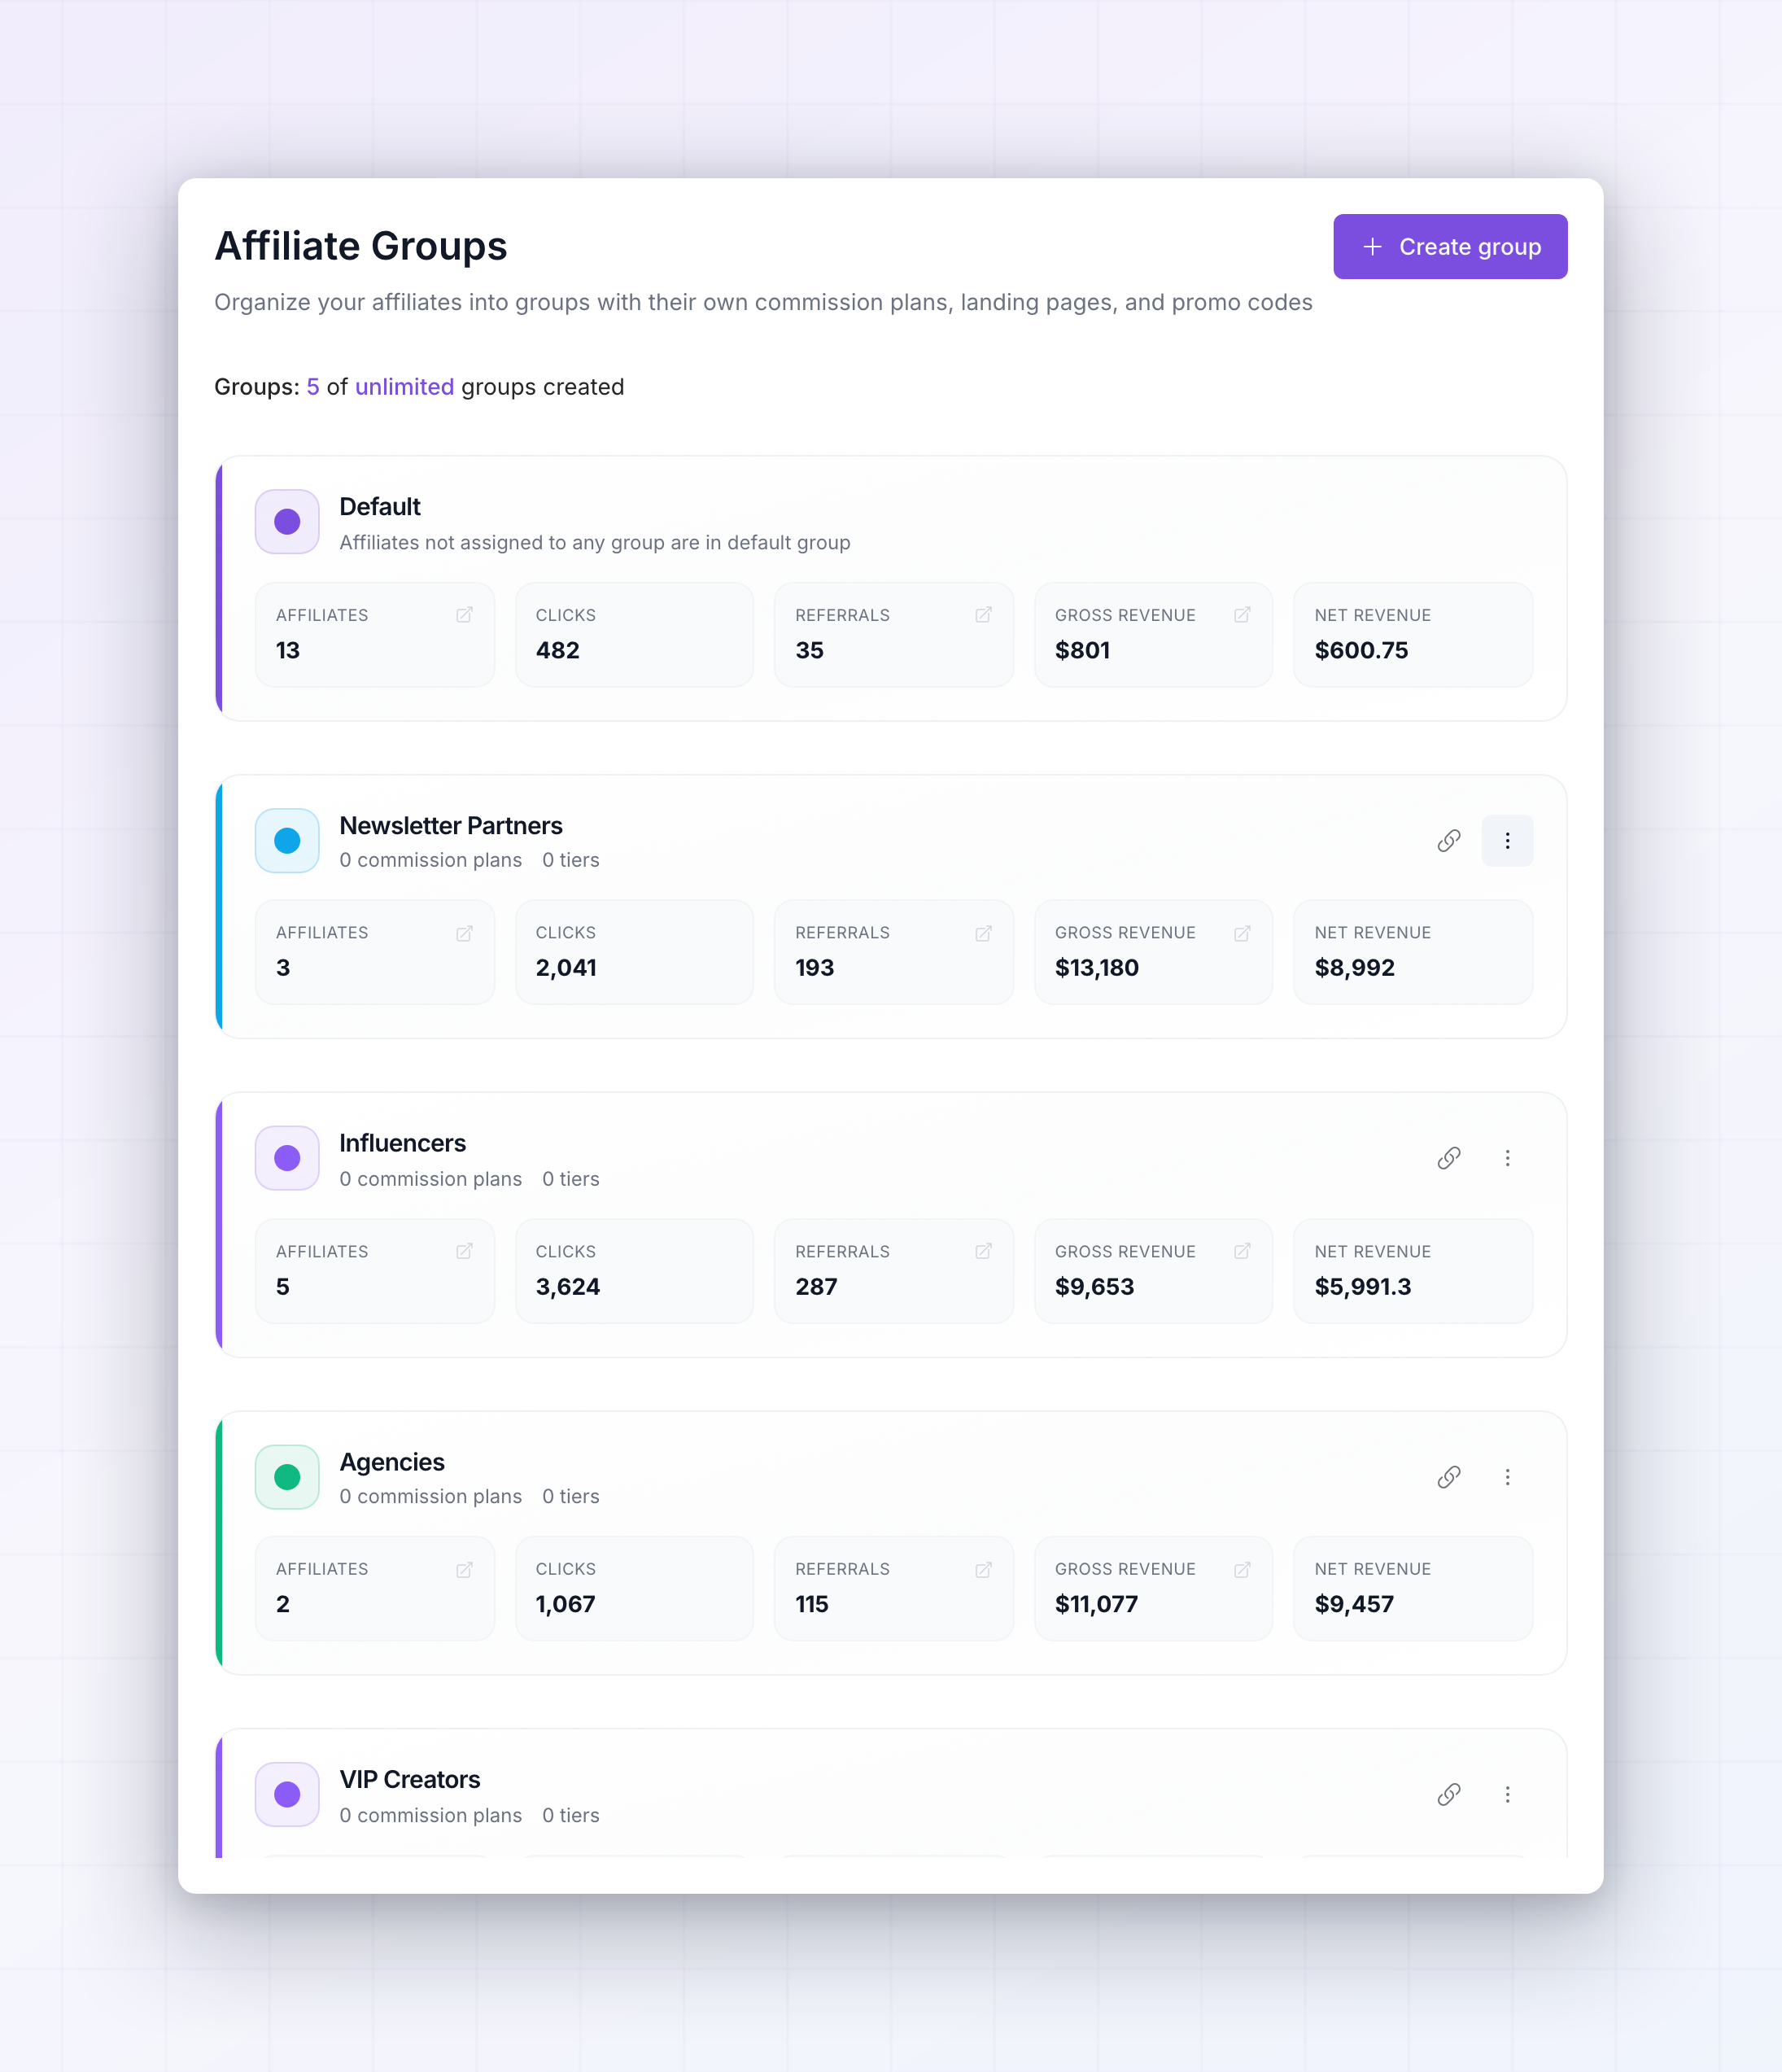
Every affiliate in your program belongs somewhere. Anyone you haven’t placed in a group sits in a built-in group called Default, described on screen as “Affiliates not assigned to any group are in default group”. You never create or manage this one — it’s simply where everyone starts. That makes grouping additive rather than something you have to plan up front. You can run a program for months with everyone in Default, then create a Top Performers group the day you’re ready to reward your best affiliates differently. Above the list you’ll see a counter reading Groups: followed by how many you’ve created. Most paid accounts show unlimited; accounts on an AppSumo plan are capped at two groups and show a Limit reached badge once they get there. Affiliate groups are a Business-plan feature, so on lower plans the create button prompts you to upgrade instead.Create a group
Select Create group at the top right. If you haven’t made one yet, there’s also a Create your first affiliate group button filling the empty space where the list will go.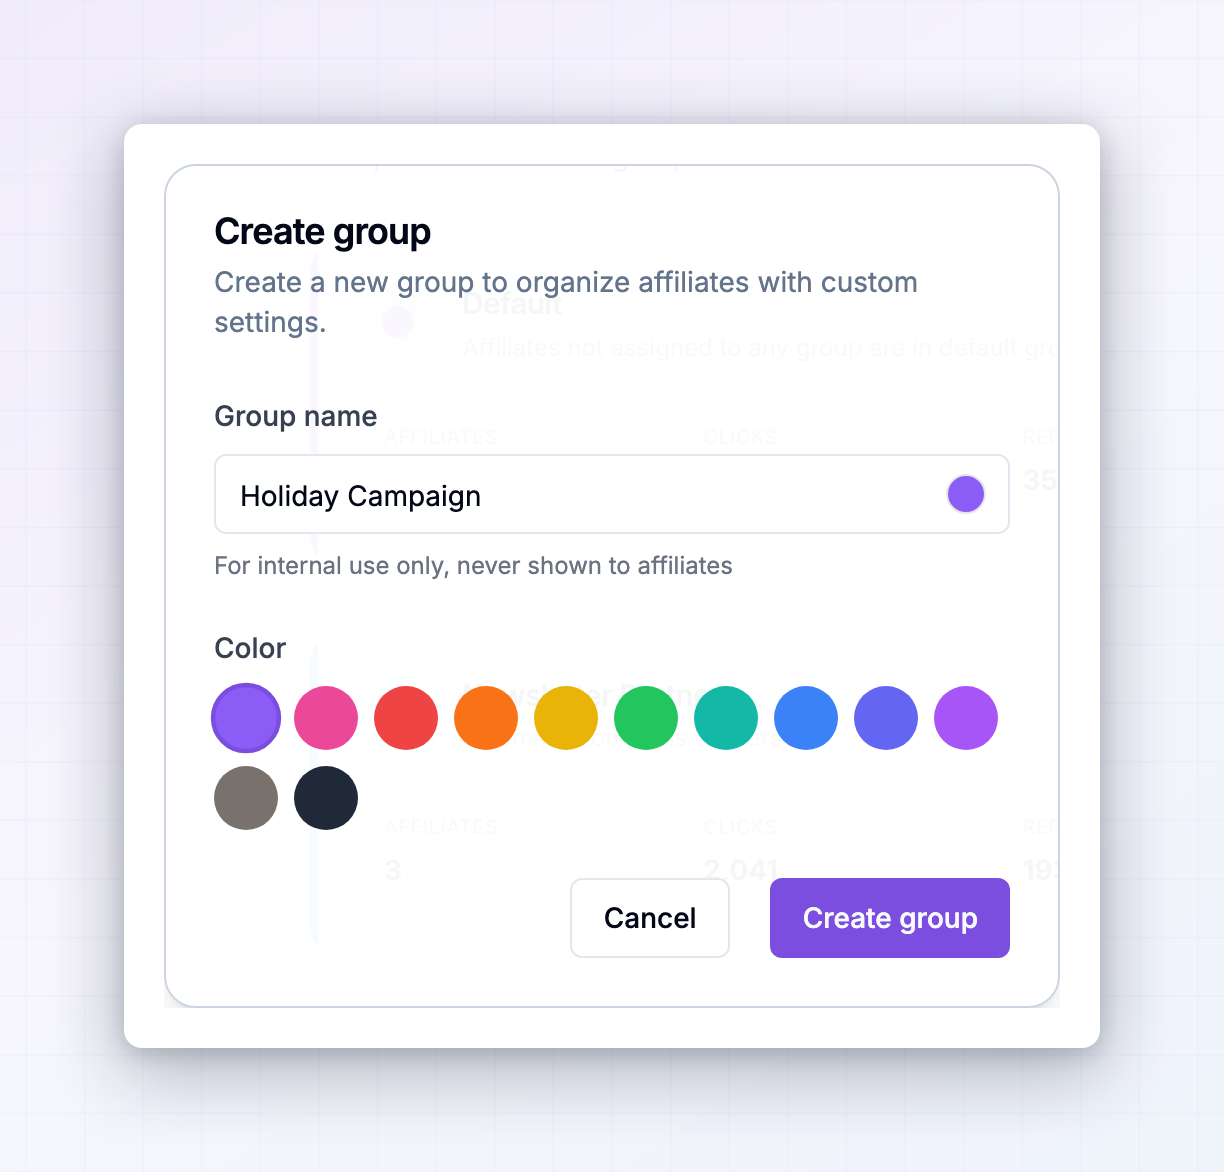 The dialog asks for two things:
- Group name — what you’ll call it, with a hint under the field reading “For internal use only, never shown to affiliates”. That’s worth taking literally: name it for your own clarity. High-volume EU partners is a perfectly good group name precisely because no affiliate will ever read it.
- Color — one of twelve preset swatches. The color becomes the accent bar and dot on the group’s card, which is the fastest way to tell groups apart at a glance. There’s no custom color entry.
Read a group’s card
Each group gets a card showing what’s happening inside it.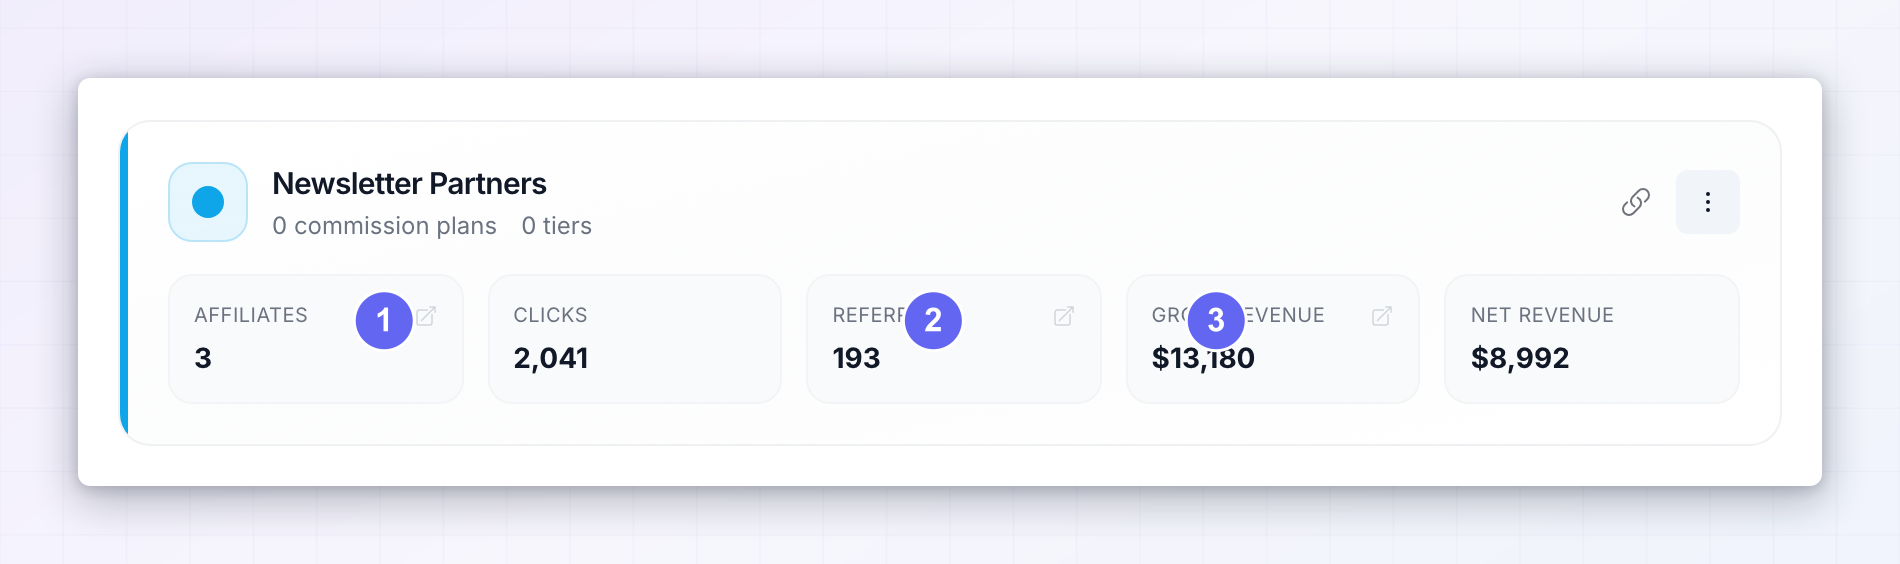 Under the group name, a line tells you how much is configured for it — for example “1 commission plan” and “3 tiers”. Below that are five figures:
- Affiliates — how many people are in the group
- Clicks — clicks on their links
- Referrals — referrals they’ve generated
- Gross Revenue — revenue before deductions
- Net Revenue — what’s left after them
Invite affiliates straight into a group
Each group card has a link icon with the tooltip Copy sign-up link. Selecting it copies a sign-up link tied to that specific group and confirms with Sign-up link copied to clipboard. This is the neatest way to fill a group. Send that link to the ten creators you recruited at a conference and they land in your Creators group when they join — no sorting afterwards. Use your normal sign-up link for everyone else and they arrive in Default as usual. For affiliates who have already joined, you change their group from your Affiliates list rather than from this page.Edit or delete a group
The three-dot menu on a group card holds Edit and Delete.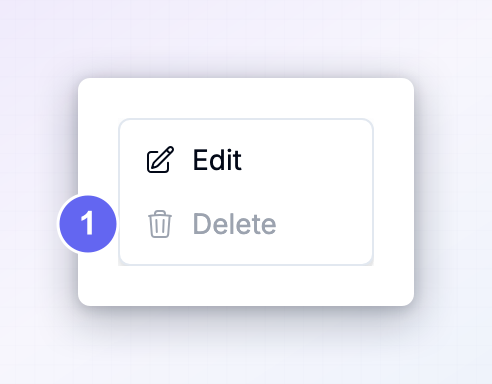 Edit reopens the same dialog so you can change the group’s Group name and Color — and only those two. A group’s commission plans, landing pages, and promo codes are set up on their own pages and pointed at the group from there, so you won’t find them in this dialog.
Delete is deliberately hard to reach. It only becomes available once a group is empty; while anyone is still in it, the option is greyed out with a tooltip telling you to remove the affiliates first, such as “Remove all 5 affiliates from this group before deleting”. Move those affiliates to another group from your Affiliates list, then come back.
Edit reopens the same dialog so you can change the group’s Group name and Color — and only those two. A group’s commission plans, landing pages, and promo codes are set up on their own pages and pointed at the group from there, so you won’t find them in this dialog.
Delete is deliberately hard to reach. It only becomes available once a group is empty; while anyone is still in it, the option is greyed out with a tooltip telling you to remove the affiliates first, such as “Remove all 5 affiliates from this group before deleting”. Move those affiliates to another group from your Affiliates list, then come back.
What to do with a group once you have one
A group on its own doesn’t change anything — it’s a label until you attach terms to it. The three things worth attaching:- A commission plan. Give the group its own rate so your best affiliates earn more without you editing accounts one at a time. See Commission plans.
- Landing pages. Restrict a landing page to a group so, say, only your agency partners can send traffic to a partner-specific page. You set this up in General program settings.
- Promo codes. Give a group its own discount codes to share.
Related
Commission plans
Give a group its own rate, tiers, and terms.
General program settings
Set the base plan and the landing pages groups can be pointed at.
Multi-level commissions
Pay affiliates on sales made by affiliates they recruited.
Payout settings
Decide how and when everyone actually gets paid.