

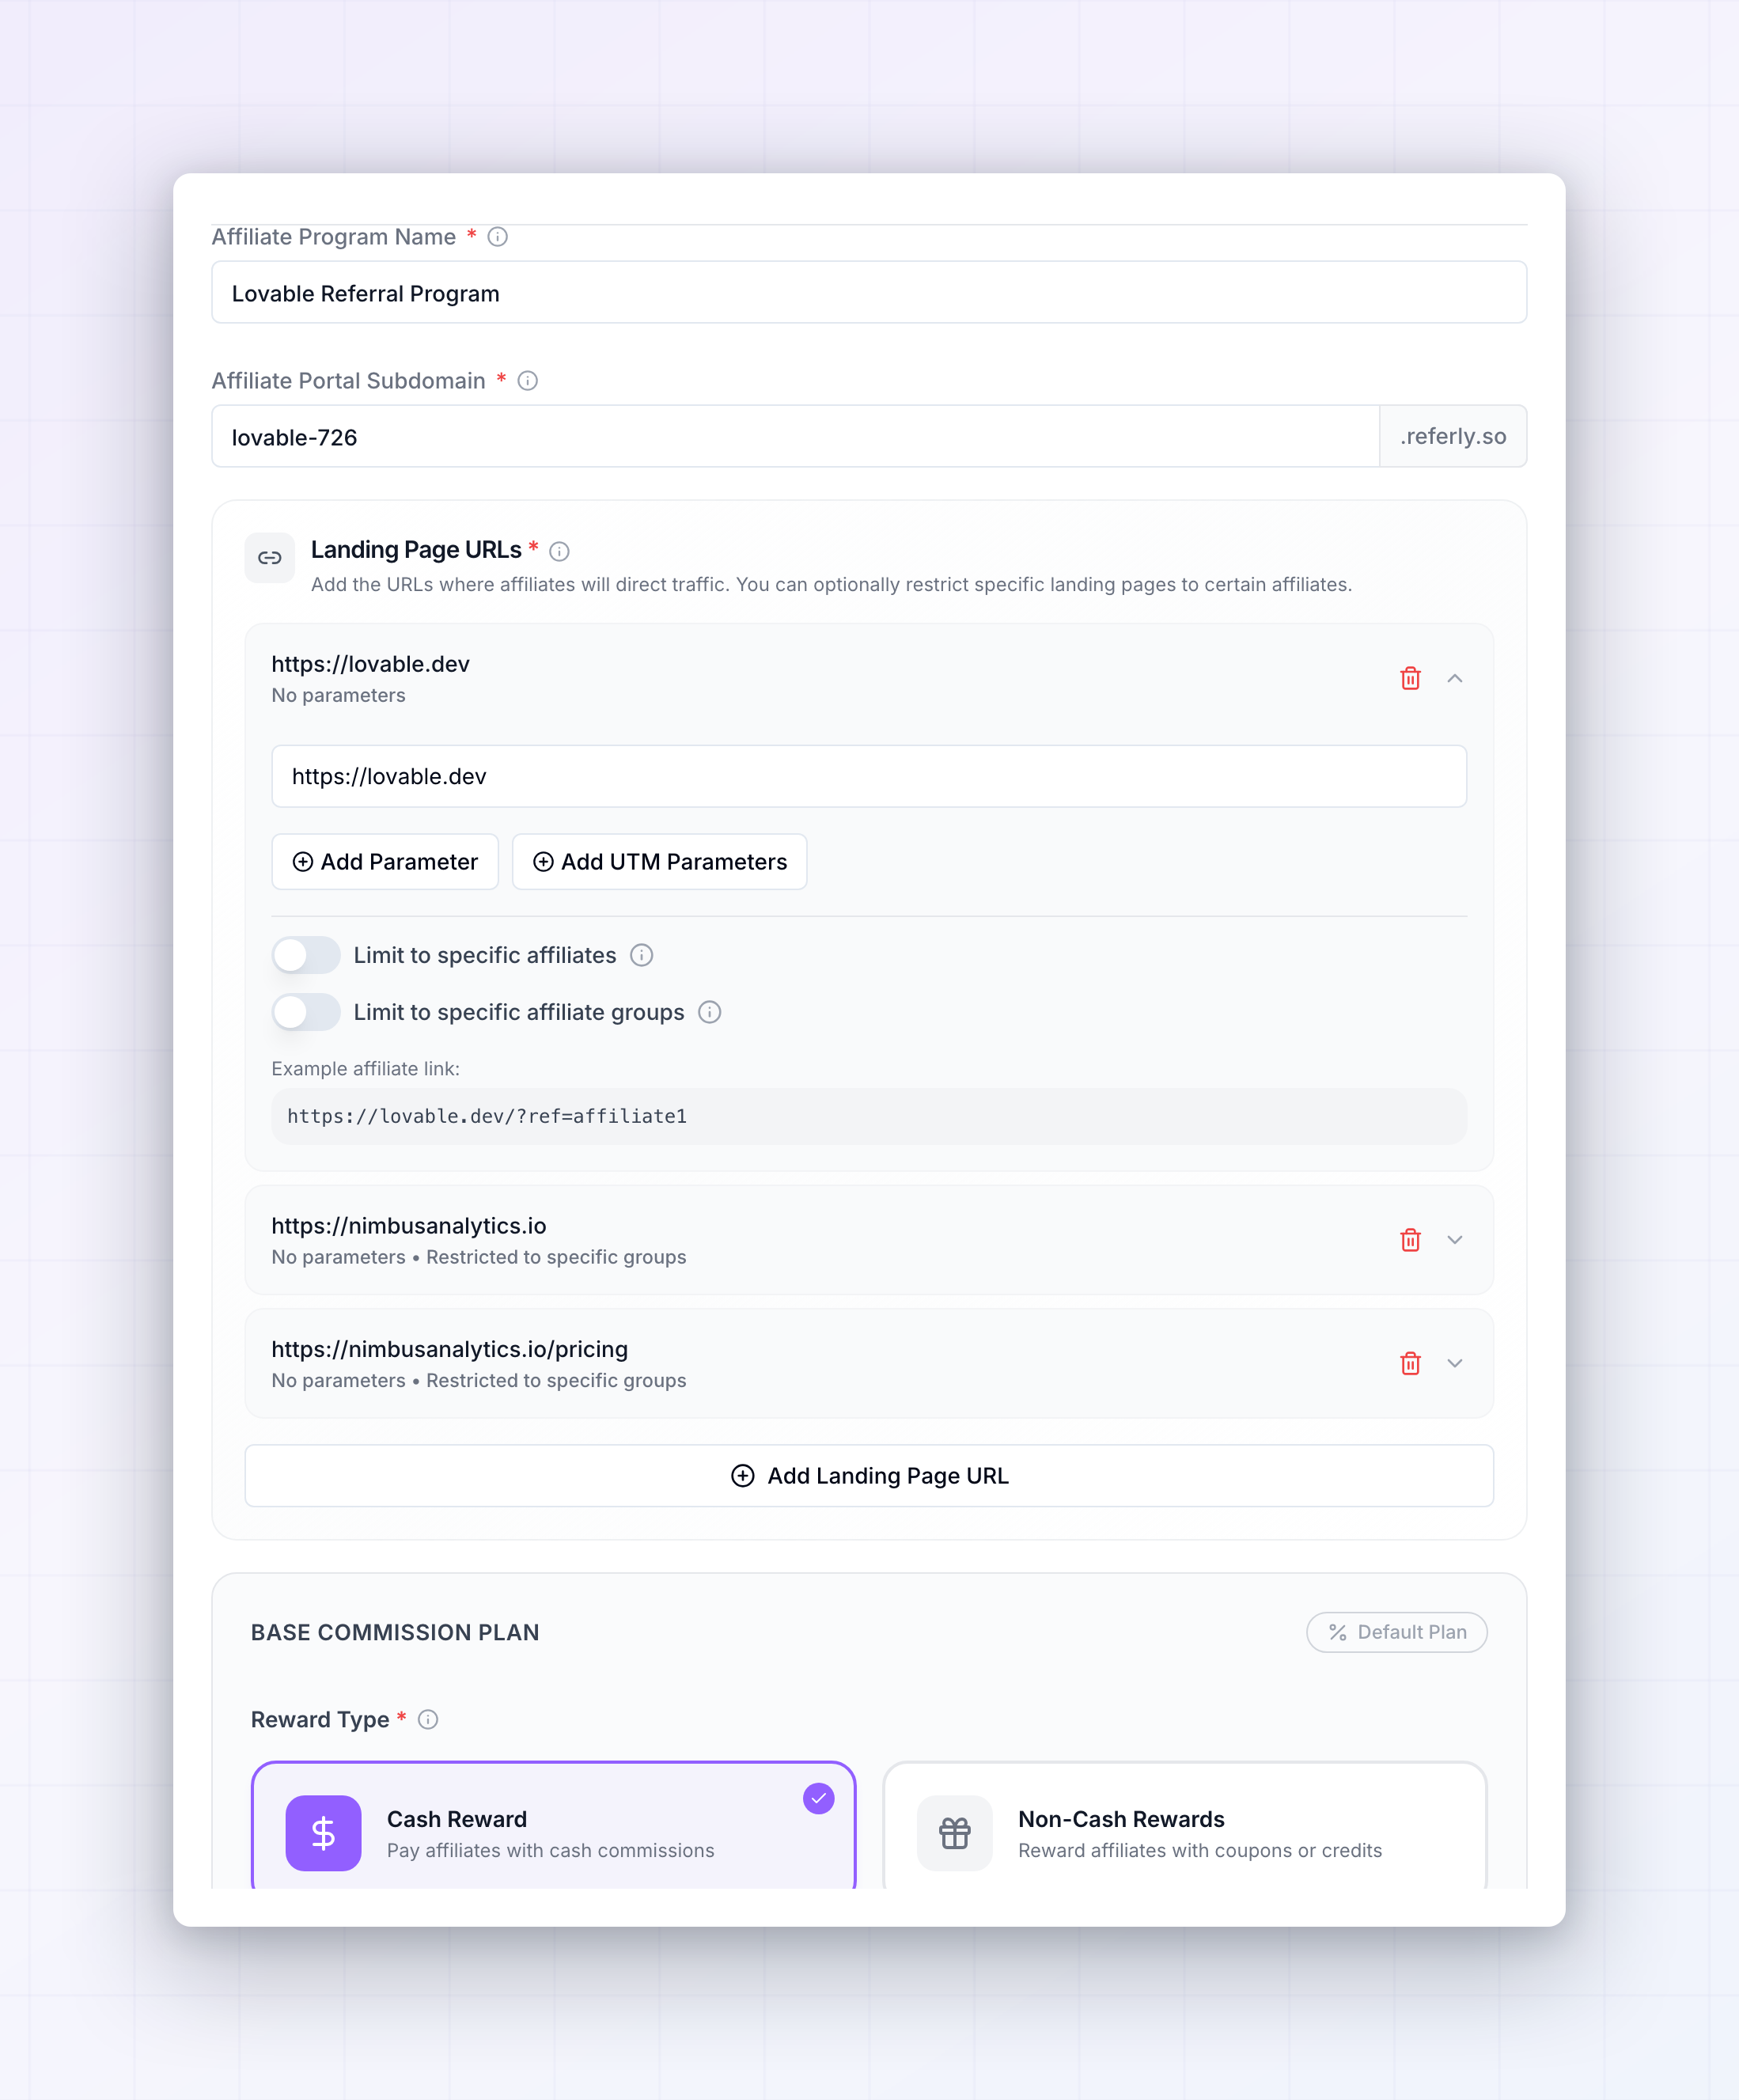
 One habit to learn before you start: a Save Changes button appears at the bottom right of the screen only once you’ve actually changed something. If you don’t see it, nothing is waiting to be saved. Two things on this page ignore that button and save the moment you touch them — the auto-approve settings and the tax and shipping deduction toggles — and both are called out below.
Name your program
Affiliate Program Name is what your affiliates see, and what identifies this program in your dashboard. Use the name people already associate with your brand rather than an internal codename — affiliates read it in their portal and in emails from you. The name can’t be left empty. If you clear it and try to save, you’ll be told Campaign name is required.Set your affiliate portal address
Affiliate Portal Subdomain is the web address where your affiliates sign in and manage their links. You choose the first part; Referly adds the rest, so a subdomain ofacme gives your affiliates acme.referly.so. If you’re on an agency account with your own verified domain, the suffix shows that domain instead.
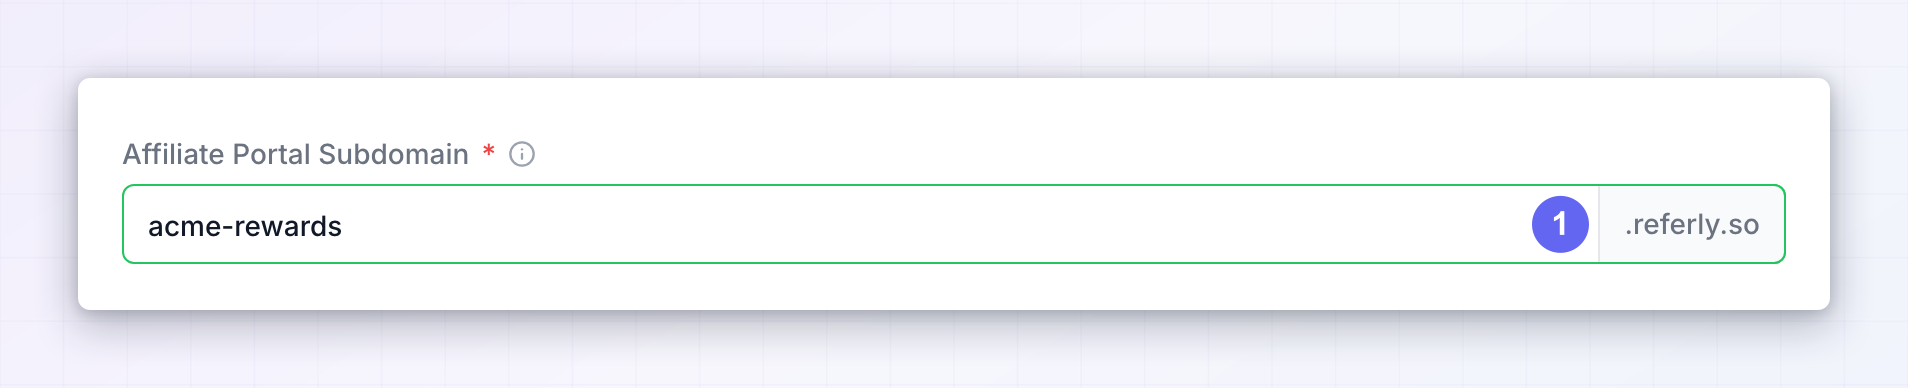 As you type, Referly checks whether the address is free. A moment after you stop typing, you’ll see either a green check mark (it’s yours) or a red X with a short explanation (someone already has it). Anything you type is lowercased automatically, since web addresses aren’t case sensitive.
Pick this carefully. It’s the address you’ll put in recruitment emails and on your affiliate landing page, so changing it later means every old link stops working.
As you type, Referly checks whether the address is free. A moment after you stop typing, you’ll see either a green check mark (it’s yours) or a red X with a short explanation (someone already has it). Anything you type is lowercased automatically, since web addresses aren’t case sensitive.
Pick this carefully. It’s the address you’ll put in recruitment emails and on your affiliate landing page, so changing it later means every old link stops working.
Choose where your affiliate links send people
The Landing Page URLs section sets the destination of every affiliate link in your program. When an affiliate shares their link, this is the page the visitor actually lands on — usually your homepage, a product page, or a campaign-specific page.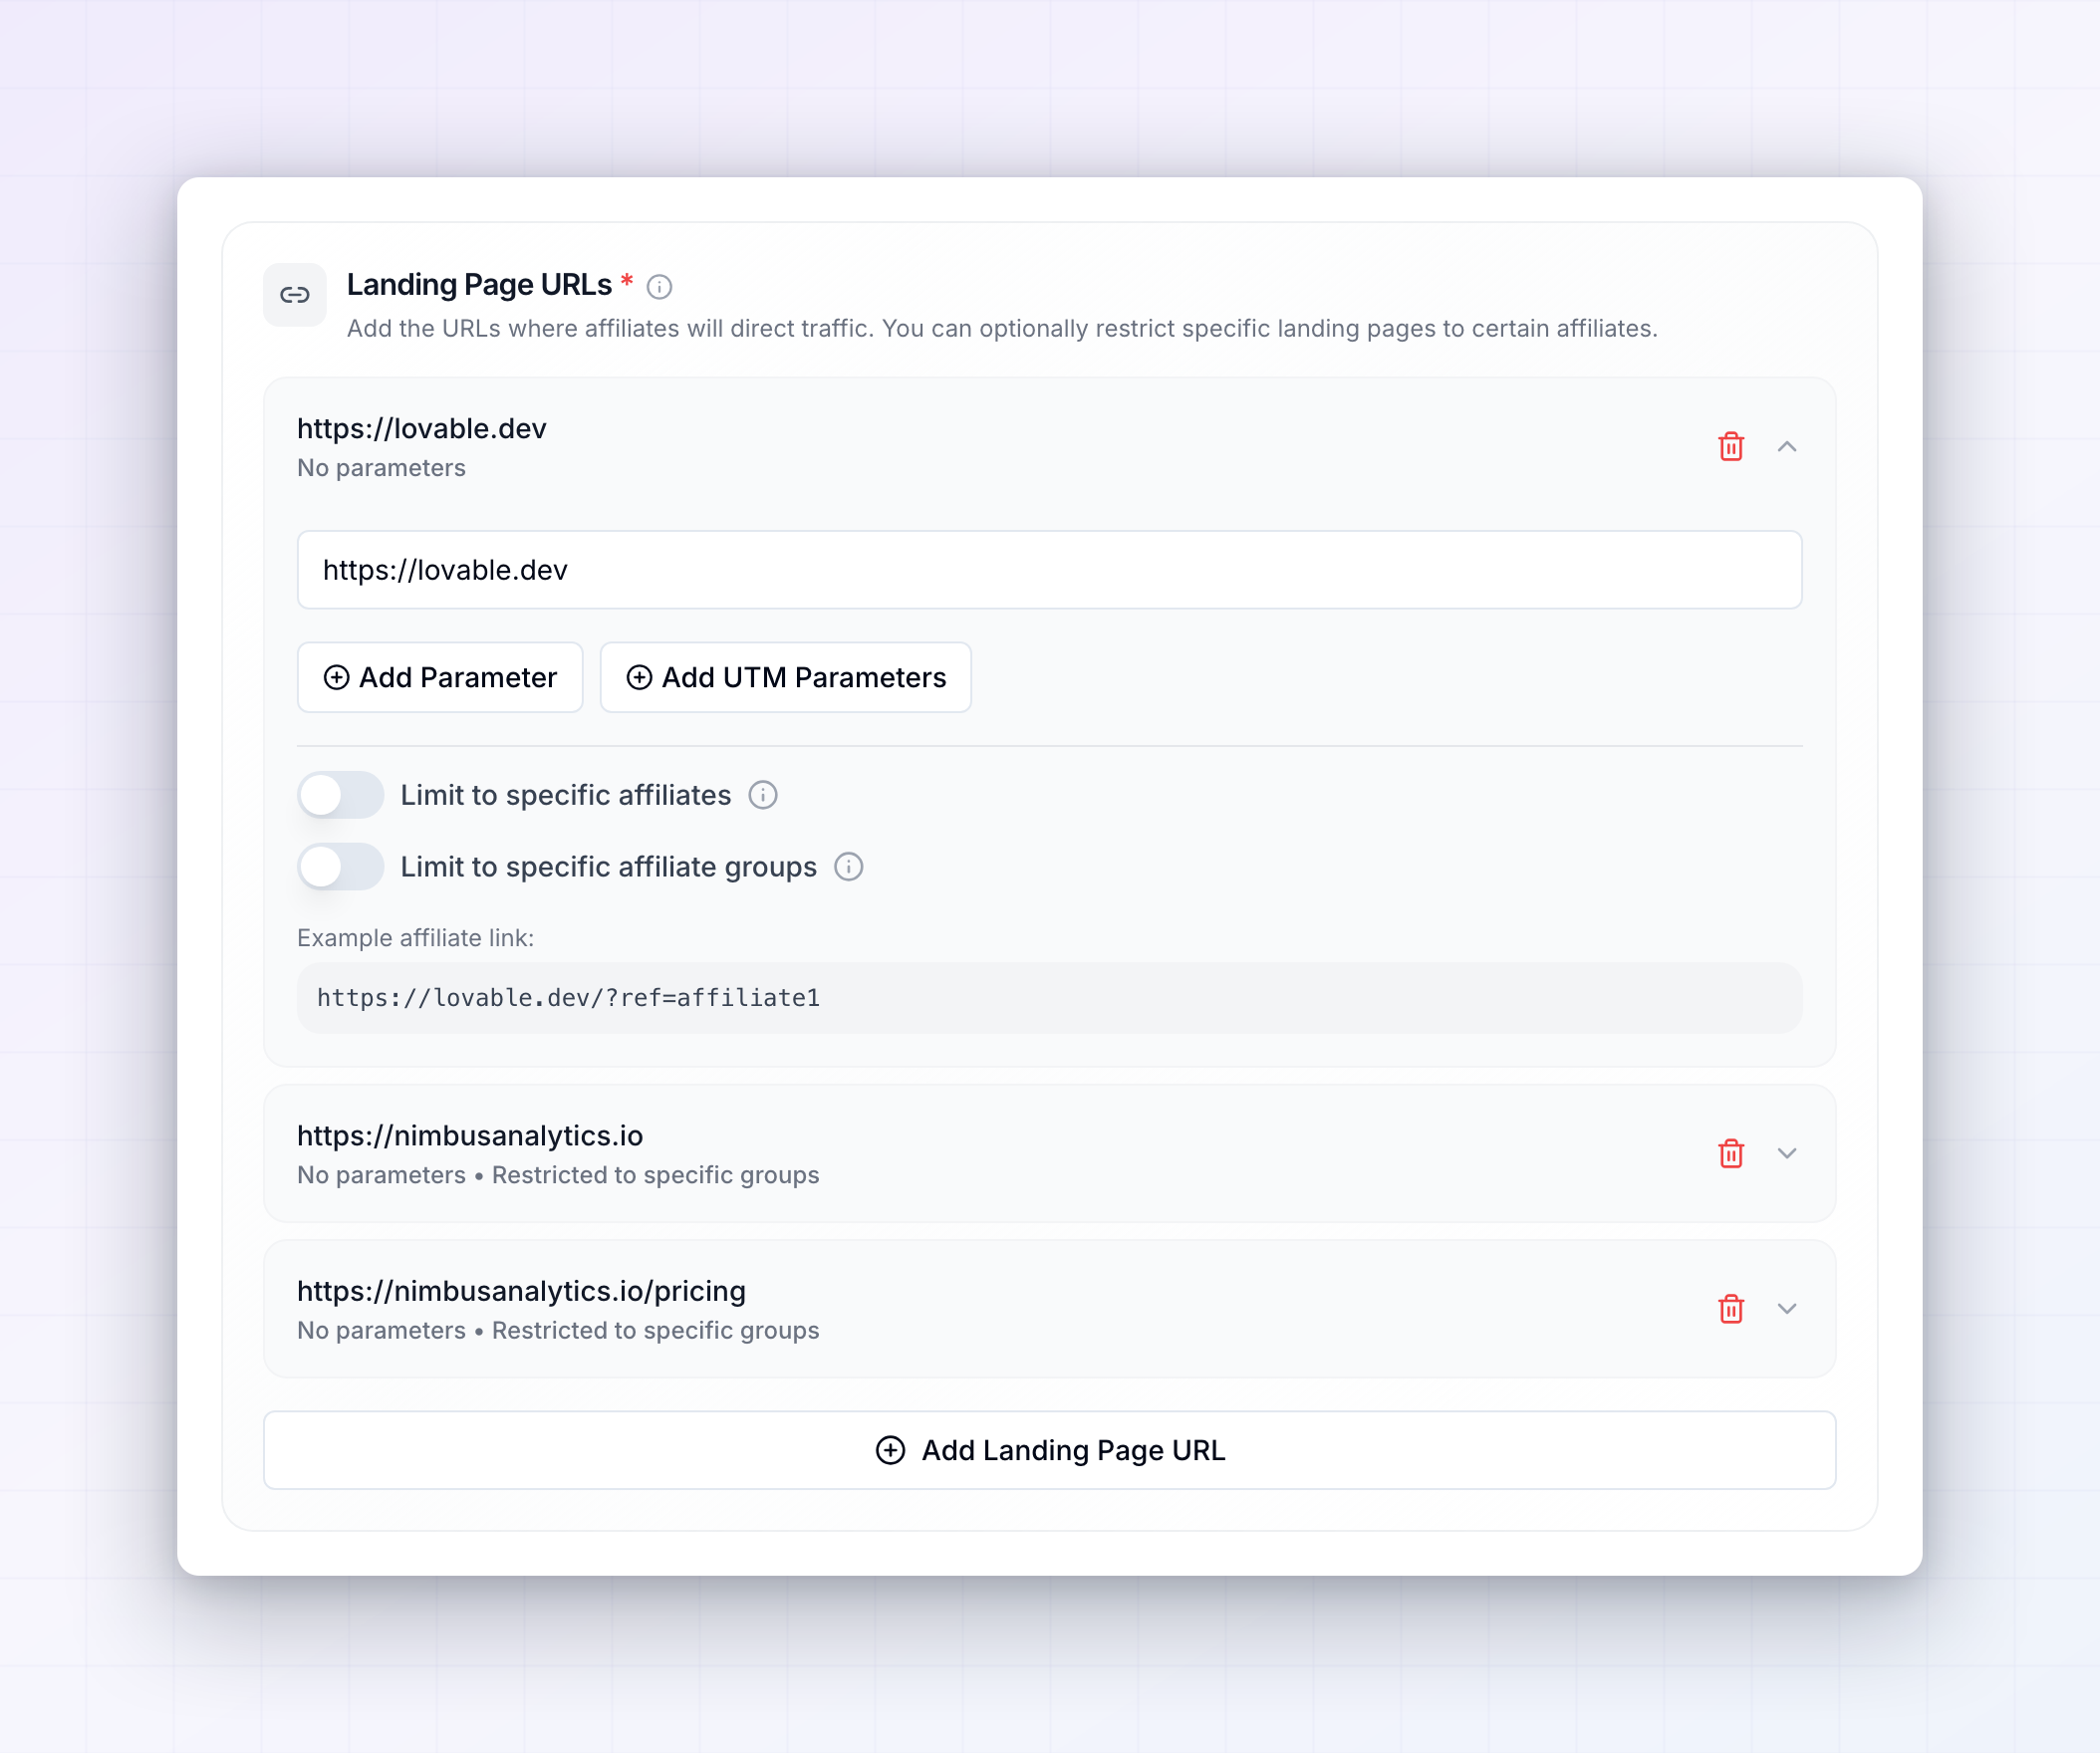 You can add more than one landing page, which is useful when different affiliates promote different things. With multiple pages you can also control who sees which one, restricting a page to particular affiliates or groups. Two rules apply when you save:
- You need at least one landing page. Saving without one gives you At least one landing page URL is required.
- If you have several and you’ve restricted them all, saving fails with At least one landing page must be available to all affiliates. Please remove affiliate restrictions from at least one landing page. Leave one page unrestricted as the fallback for everyone. (With only a single landing page this is handled for you — it’s automatically available to all affiliates.)
Set your base commission plan
The Base Commission Plan card, marked with a Default Plan badge, is the deal every affiliate gets unless you’ve put them on a plan of their own. Everything from here down describes how affiliates earn.Choose how you reward affiliates
Reward Type offers two paths:- Cash Reward — pay affiliates with cash commissions. This is the default and what most programs use.
- Non-Cash Rewards — reward affiliates with coupons or credits instead of money.
Decide what earns a commission
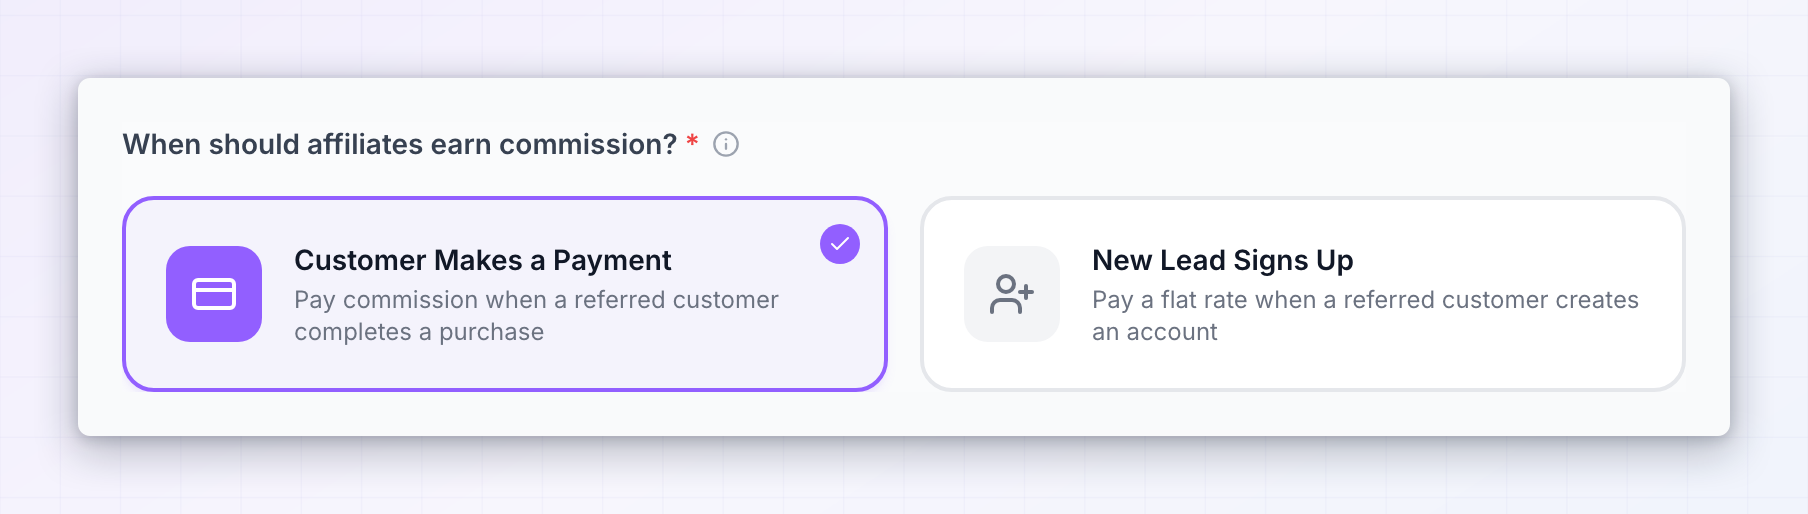
With Cash Reward selected, choose when affiliates get paid:- Customer Makes a Payment — pay commission when a referred customer completes a purchase. This is the default and the right choice for most stores and subscription products.
- New Lead Signs Up — pay a flat rate when a referred person creates an account, whether or not they ever buy.
Pay once or pay on every payment
For purchase-based commissions, Commission frequency decides how long an affiliate keeps earning from a customer they sent you:- First Payment Only — commission on the customer’s first purchase and nothing after.
- Recurring Basis — commission on multiple payments from the same customer. This is what makes subscription programs attractive to affiliates.
Limit commission to certain products
By default, affiliates earn on everything a referred customer buys. If you’d rather they only earn on specific items, search for them under Customer buys any of these products/plans: and select them. Leave it blank and commission applies to all purchases. If you sell on Shopify, you can select whole collections here, not just individual products. This restriction is all-or-nothing for the base plan — you can’t set one rate for one product and a different rate for another. Referly tells you as much with a note steering you to create a separate commission plan for that. See Commission plans.Set the rate
Commission Type picks the shape of the payment:- Percentage — a share of each sale.
- Flat Rate — a fixed amount per sale.
% or your program’s currency symbol so it’s clear which you’re entering. Percentage rates can’t be negative or above 100 — both are caught when you save, with Percentage commission rate cannot exceed 100%. or Please enter a valid commission rate that is not negative.
Decide how long recurring commission lasts
If you chose Recurring Basis, two dropdowns cap how long an affiliate keeps earning from one customer:- Give Commission For How Many Payments? — up to a set number of payments, or No Limit.
- Give Commission For How Many Months? — up to a set number of months, or Forever.
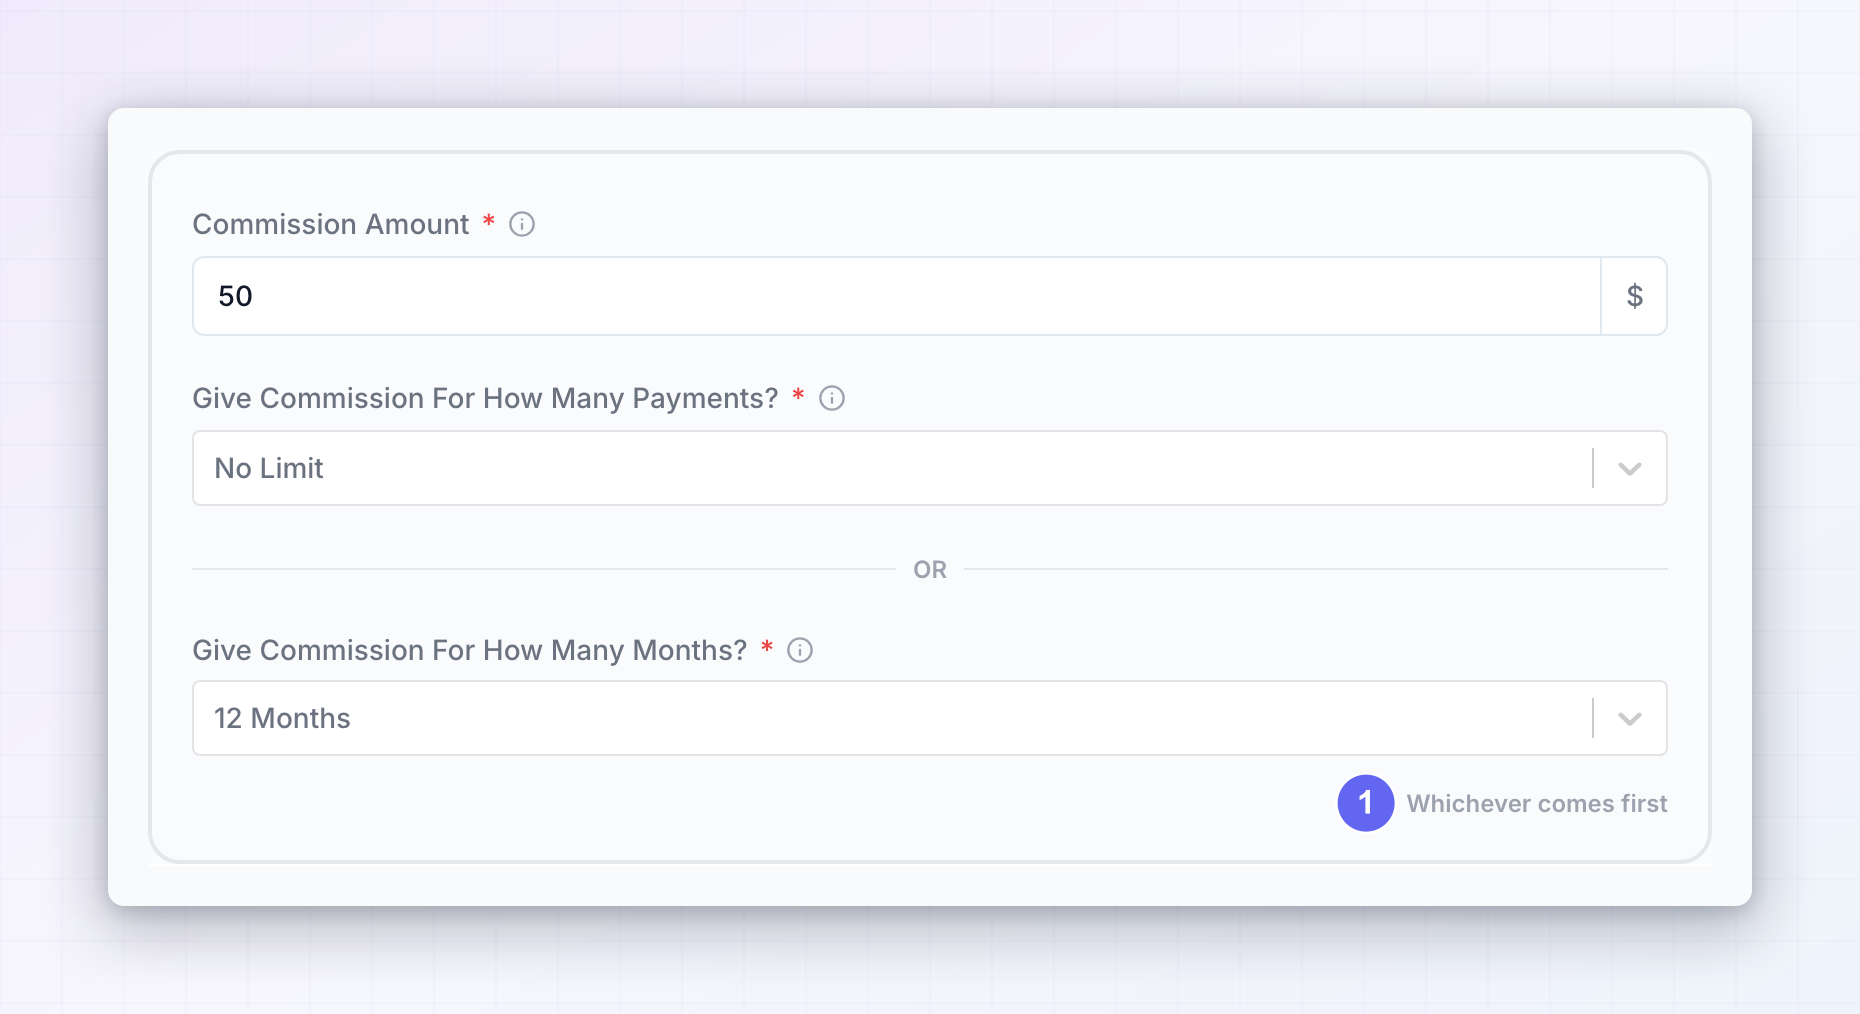 The label between them, Whichever comes first, is the important part: both limits run at the same time and commission stops as soon as either one is reached. Twelve payments and six months means an affiliate stops earning at six months even if the customer has only paid six times. Set one to unlimited if you only want the other to apply.
Step the rate down over time
Plenty of programs pay generously at first and less later. Select Add commission after period to add a follow-on rate, shown beneath a THEN divider. Each one has its own Commission Rate, For How Many Payments?, and For How Many Months?, so you can build a ladder — say 30% for the first year, then 15% for as long as the customer stays.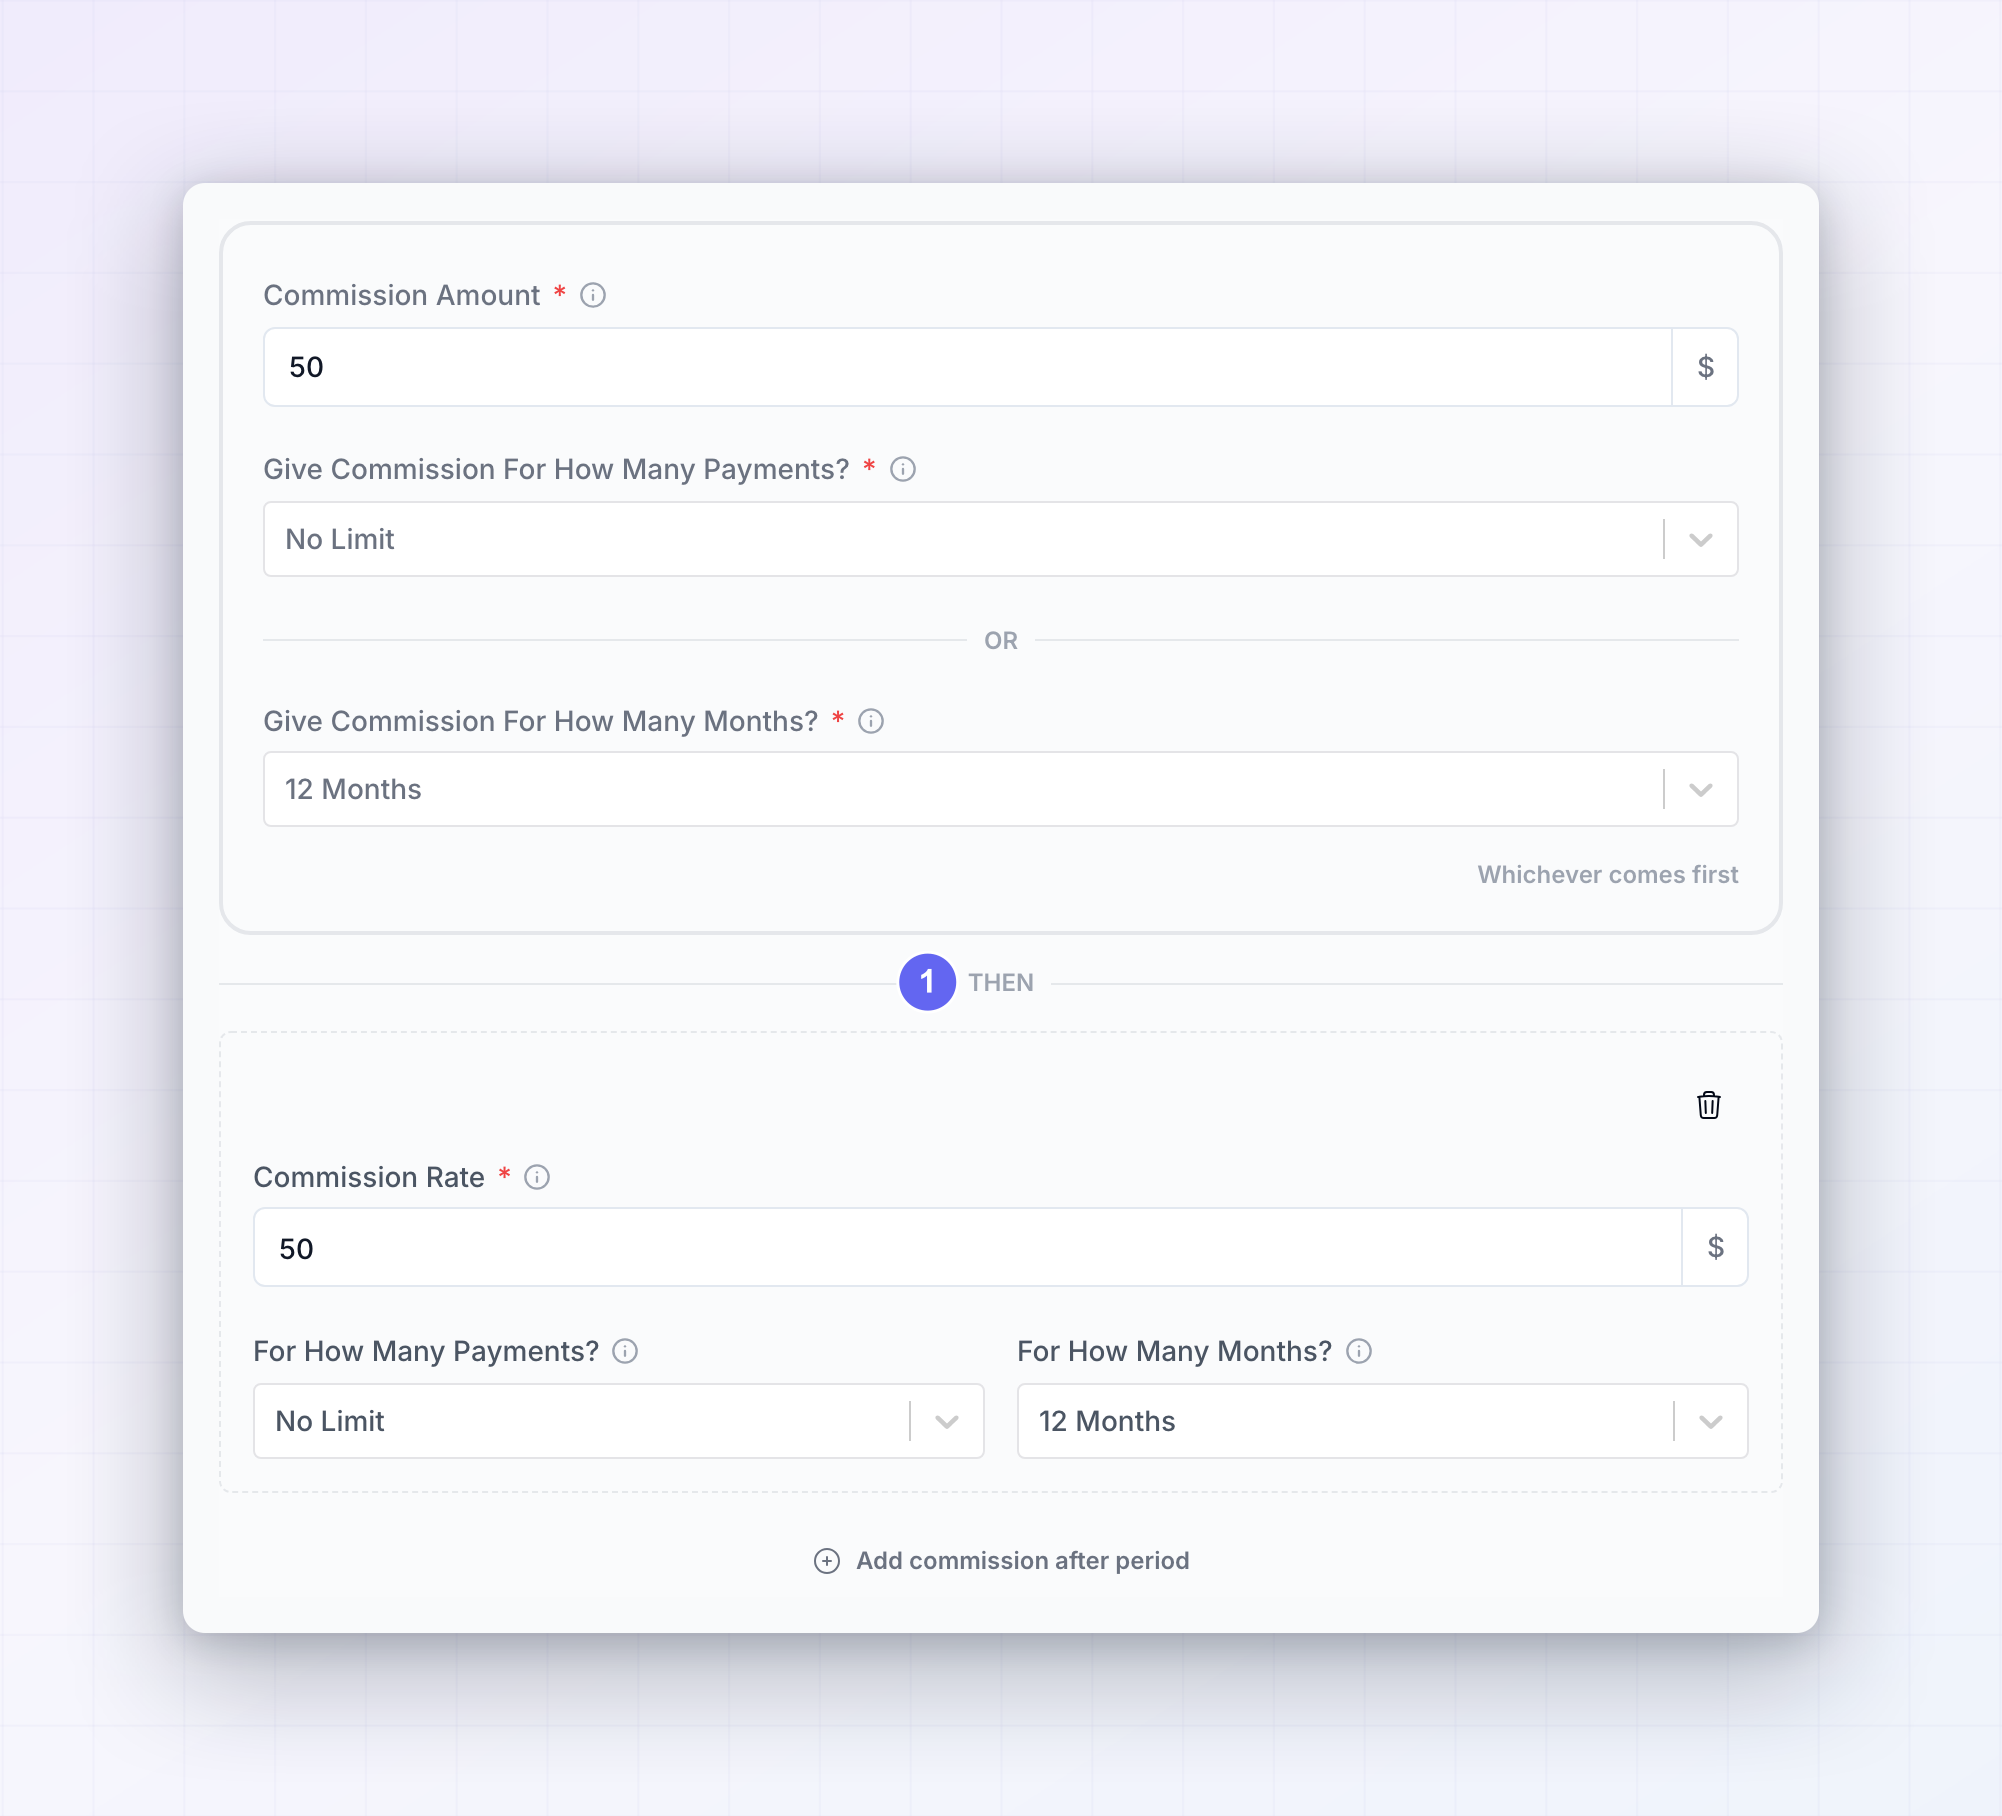 Two things to know. A milestone set to unlimited (No Limit and Forever) ends the ladder, because nothing can come after “forever” — so make your final step the unlimited one. And you can remove any milestone with the trash icon beside it.
Reward affiliates with coupons or credits
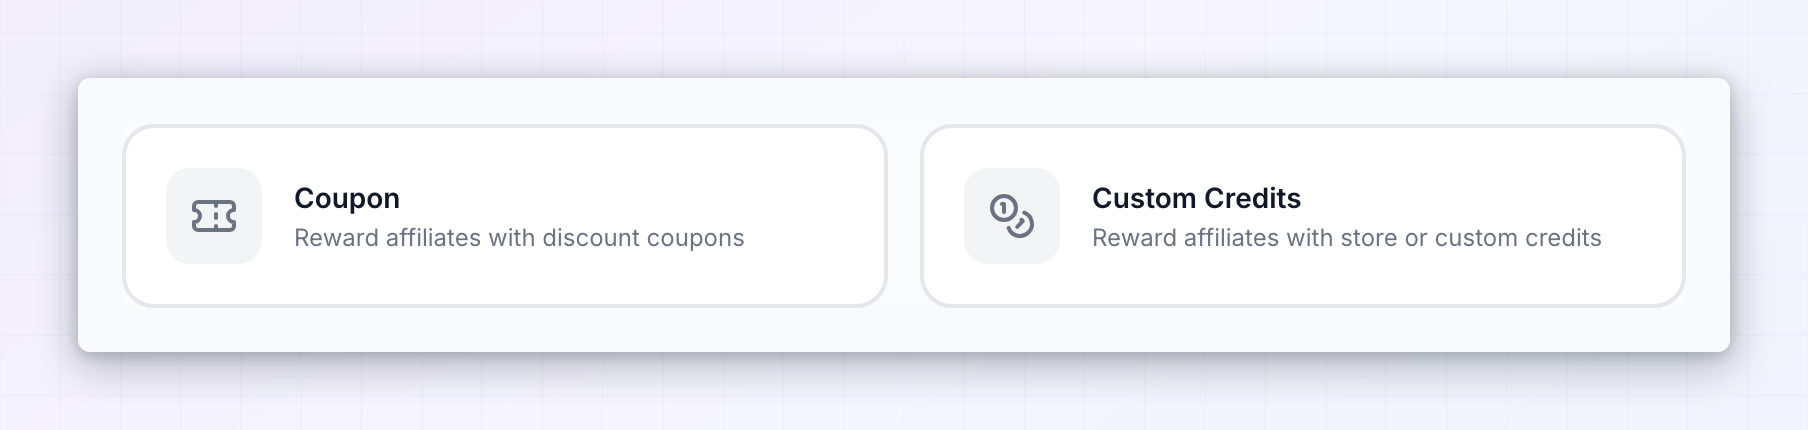
Choosing Non-Cash Rewards lets you pay affiliates in something other than money. Non-Cash Reward Type offers:- Coupon — reward affiliates with discount coupons they can use or share.
- Custom Credits — reward affiliates with store credits or your own unit, like coins or AI credits.
 For coupons, you tell Referly where the coupon should be created: API if you generate codes on your own server, or Shopify, Stripe, or WooCommerce to create them in a connected store. The detailed coupon fields only appear once that source is ready, so if you see a Connect prompt instead of settings, connect the store first. From there you set a Discount Type (Percentage or Fixed Amount), the amount off, and — under Advanced Coupon Settings — how long the discount lasts (Forever, Multiple Months, or One-time). You can also cap how many coupons one affiliate ever earns.
For credits, Credit Type decides how they’re fulfilled: Shopify Store Credits, Stripe Credits, WooCommerce Credits, or Custom if you handle distribution yourself. Custom credits need a Credit unit name — whatever you call them to affiliates. You can award a fixed number of credits per purchase, or scale them to the purchase amount, and cap how many times an affiliate can earn.
Non-cash rewards are a paid feature, so the option may appear locked depending on your plan. There’s a fuller walkthrough in Non-cash rewards.
For coupons, you tell Referly where the coupon should be created: API if you generate codes on your own server, or Shopify, Stripe, or WooCommerce to create them in a connected store. The detailed coupon fields only appear once that source is ready, so if you see a Connect prompt instead of settings, connect the store first. From there you set a Discount Type (Percentage or Fixed Amount), the amount off, and — under Advanced Coupon Settings — how long the discount lasts (Forever, Multiple Months, or One-time). You can also cap how many coupons one affiliate ever earns.
For credits, Credit Type decides how they’re fulfilled: Shopify Store Credits, Stripe Credits, WooCommerce Credits, or Custom if you handle distribution yourself. Custom credits need a Credit unit name — whatever you call them to affiliates. You can award a fixed number of credits per purchase, or scale them to the purchase amount, and cap how many times an affiliate can earn.
Non-cash rewards are a paid feature, so the option may appear locked depending on your plan. There’s a fuller walkthrough in Non-cash rewards.
Decide what gets approved automatically
At the bottom of the commission card, select Auto-approve settings to open a small dialog with three switches, all on by default:- Auto approve affiliates — new affiliates are approved the moment they apply and can start promoting right away. Turn it off if you want to vet people first; you’ll then approve each one by hand.
- Auto approve rewards — earnings are accepted as they come in. Turn it off and rewards go on hold until you approve them. Worth knowing before you flip it: sales left on hold are not paid out.
- Apply to all commission plans — pushes these two choices to every commission plan you have now and every one you create later.
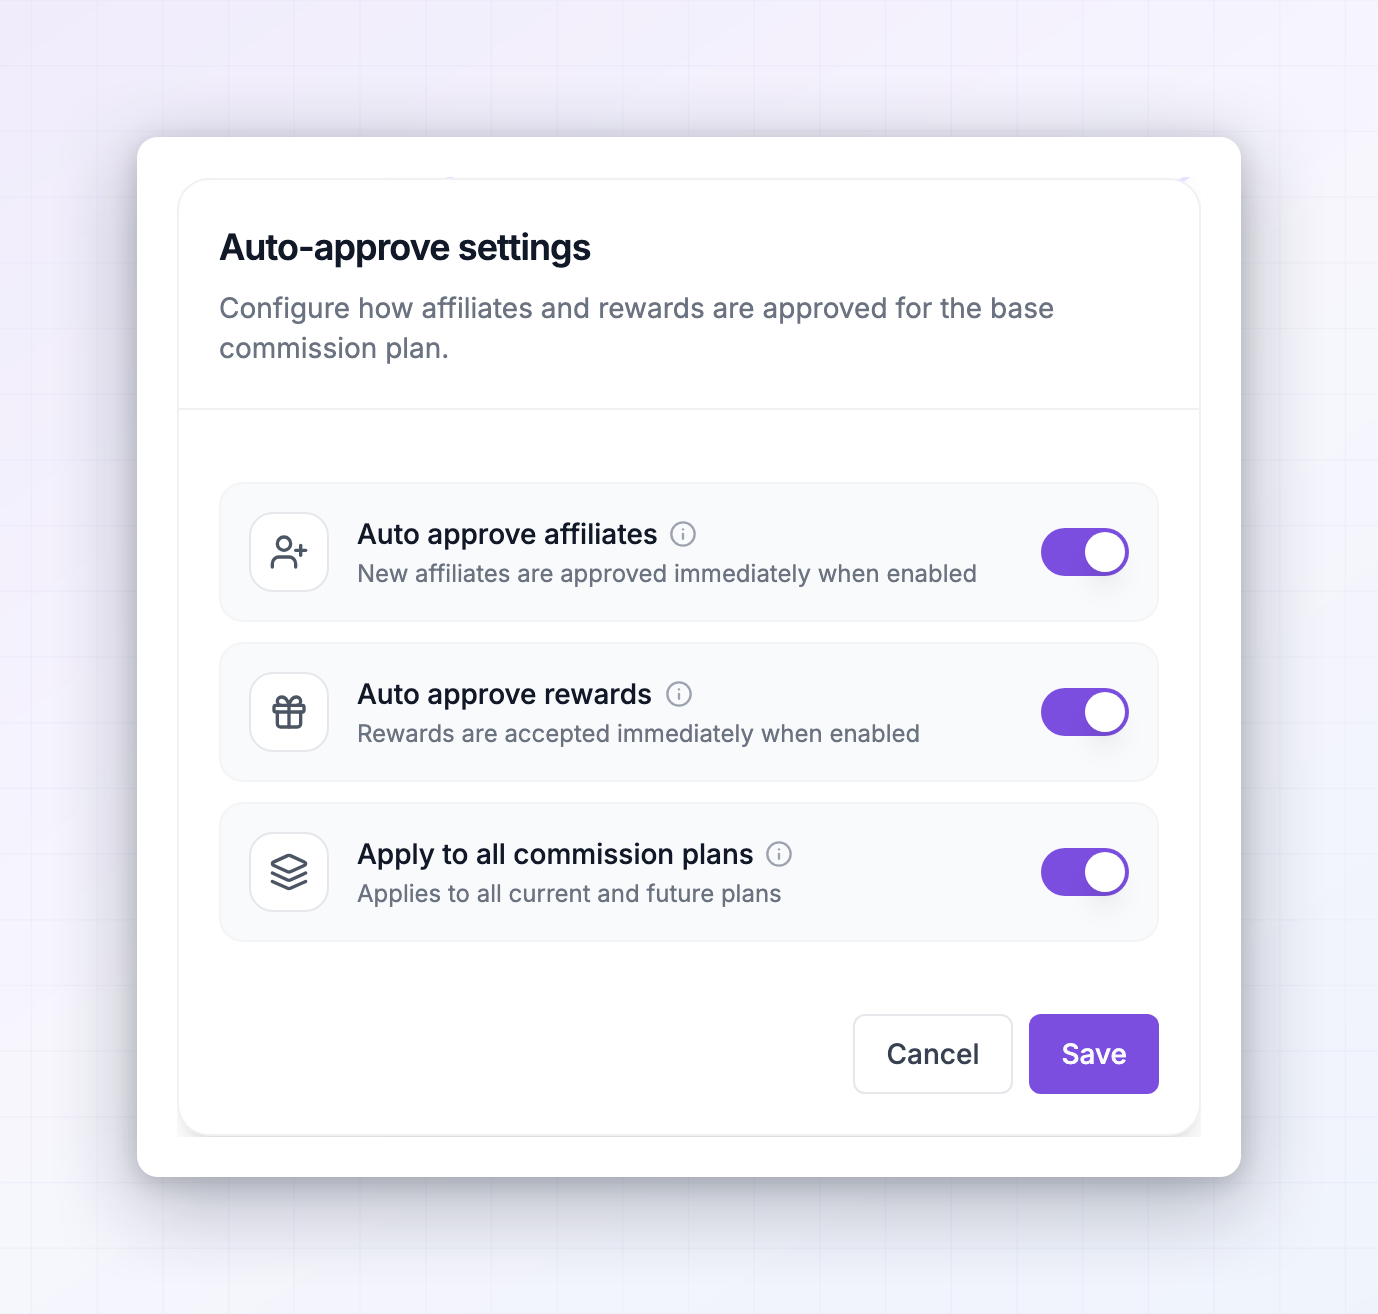 This dialog has its own Save button and saves on its own, separately from the rest of the page. You’ll see Auto-approve settings saved when it works.
Advanced settings
Open the Advanced Settings section for the details that rarely change once you’ve set them.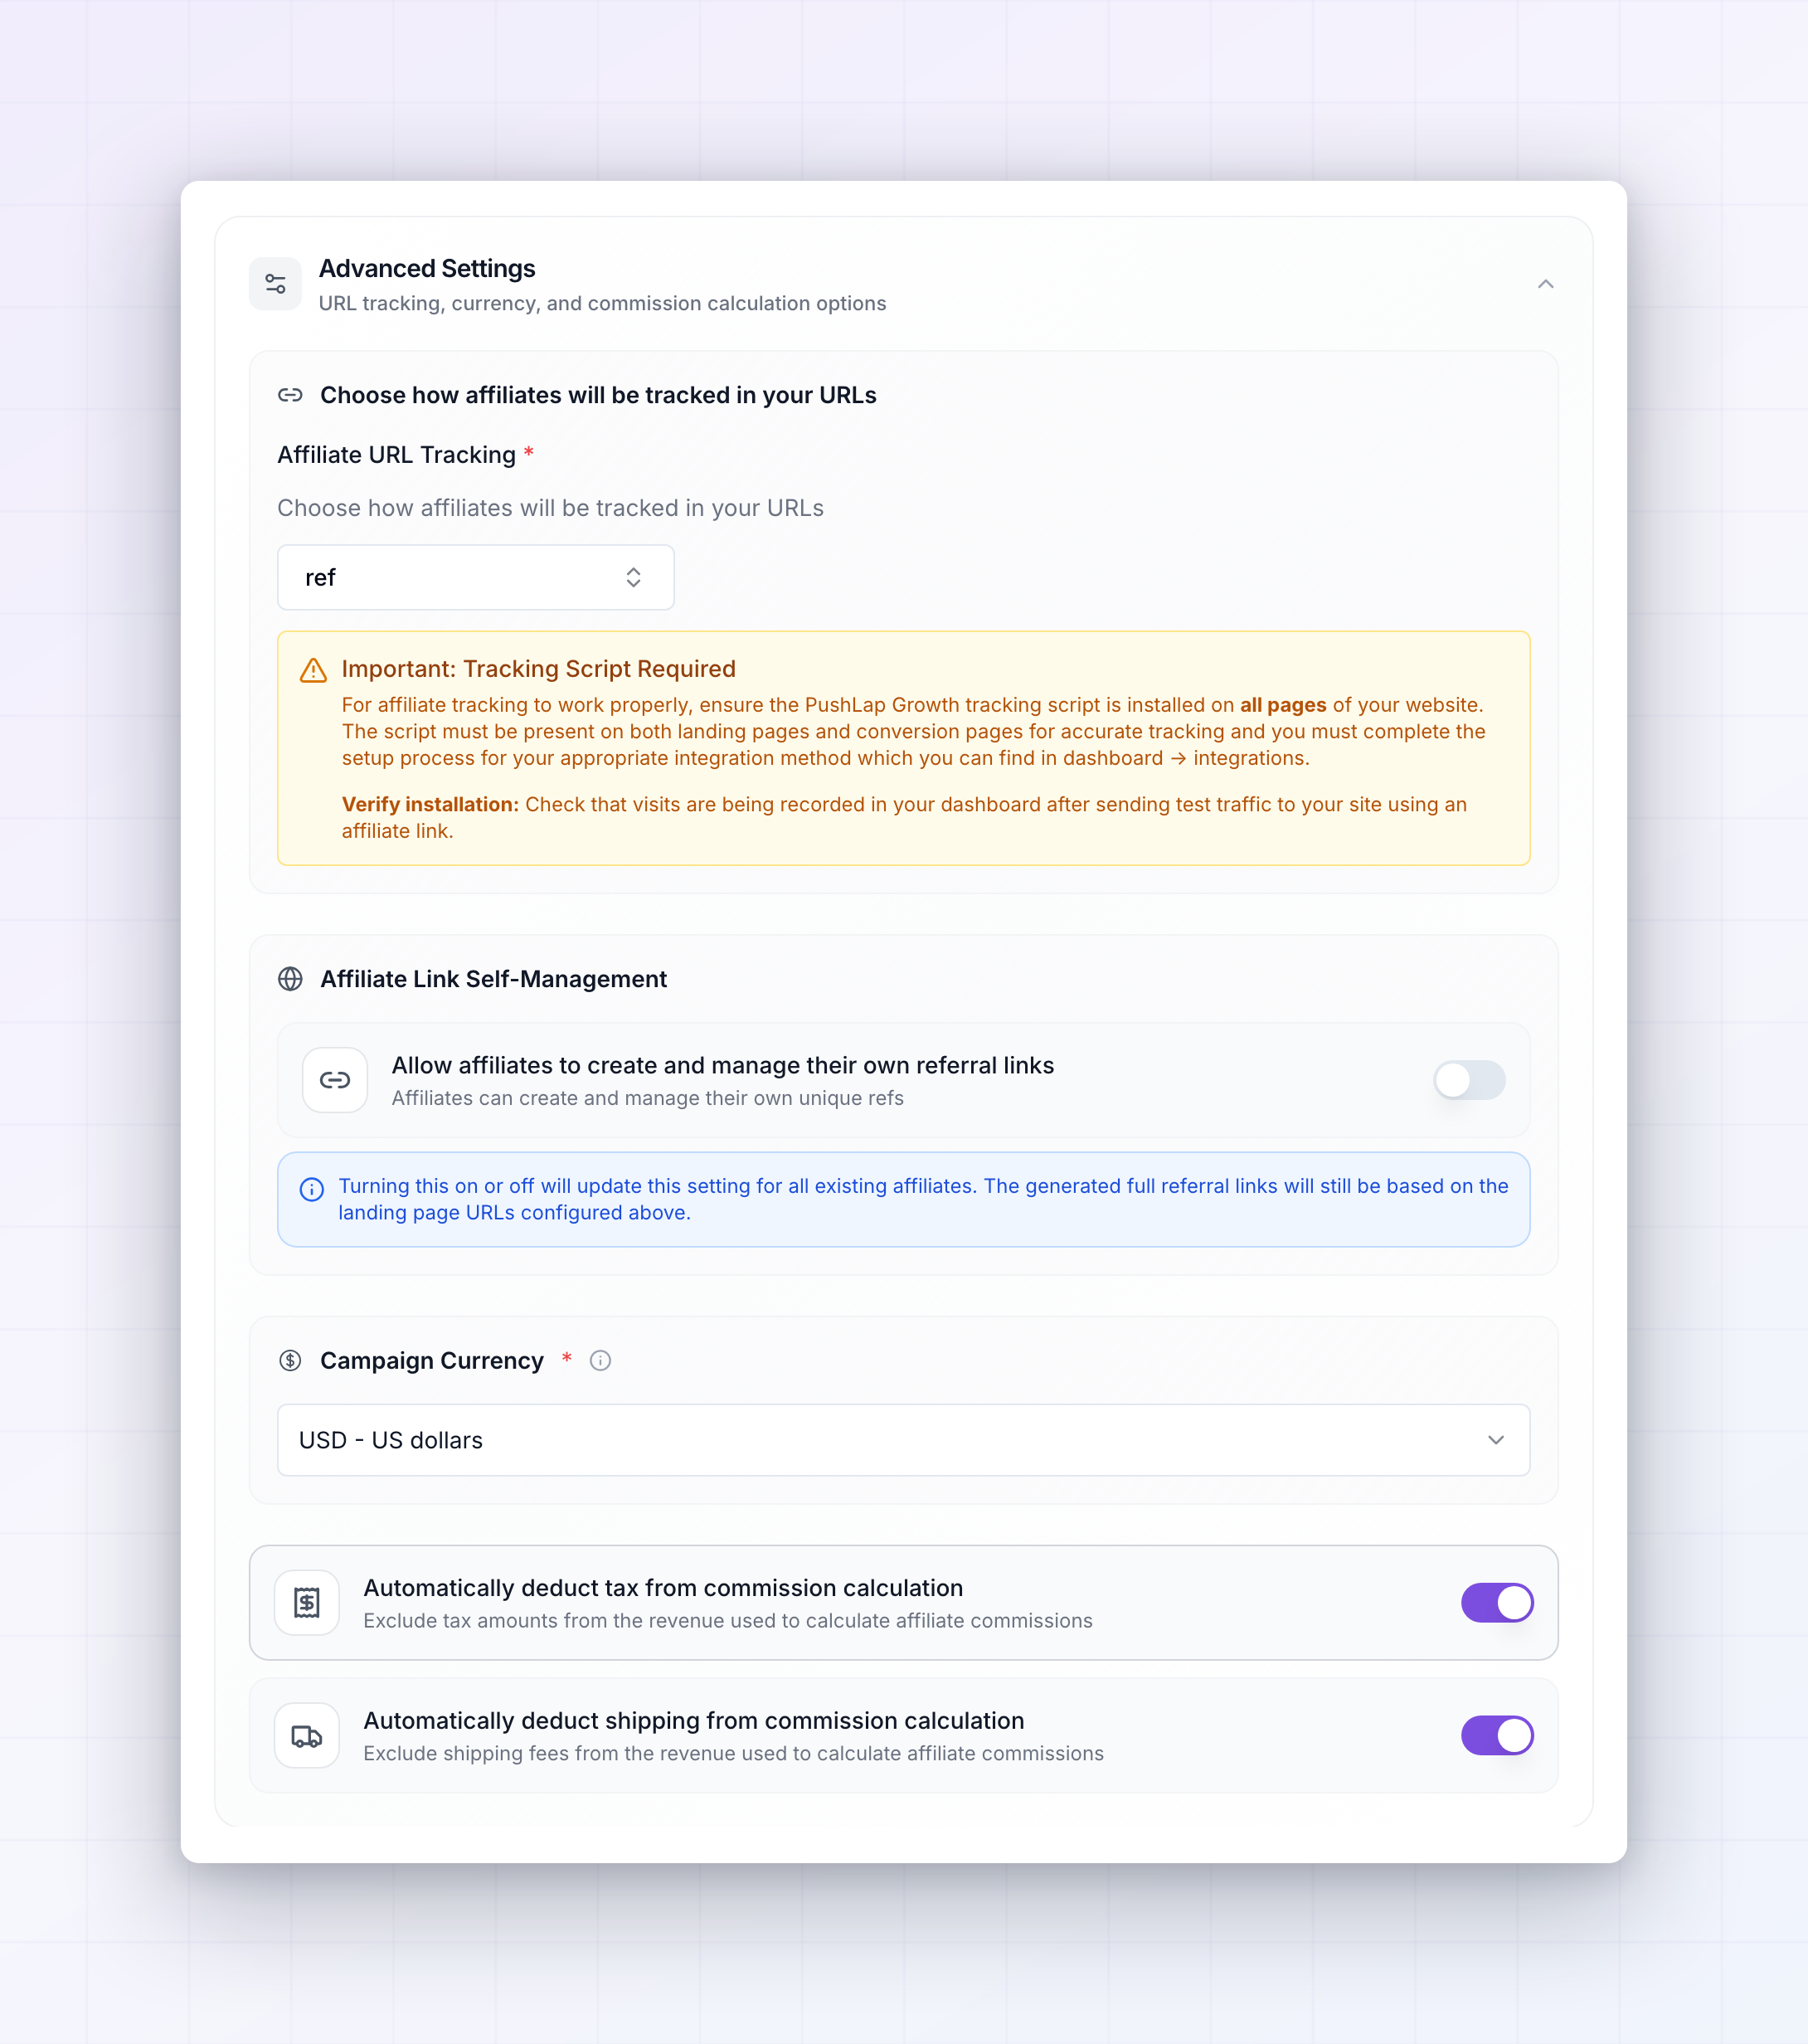
The tracking parameter in your links
Choose how affiliates will be tracked in your URLs sets the little tag Referly adds to a link to identify the affiliate. It’sref unless you change it, producing links like yoursite.com/?ref=jane. Some teams change it to match what they already use elsewhere. It can’t be blank — you’ll get URL tracking parameter is required on save.
Let affiliates manage their own links
Allow affiliates to create and manage their own referral links lets affiliates create extra links with their own custom tags, instead of using only the one you gave them. It’s off by default and available on the Business plan. Turning it on or off applies to every existing affiliate immediately, not just new ones. Their links still point at the landing pages you configured above — affiliates choose their tag, not the destination.Campaign Currency
Campaign Currency is the currency for every commission and payout in this program. It’s US Dollar unless you change it, and the list shows each option as a code and name together, likeUSD - US Dollar. Set it before you have real earnings on the books, since it’s the unit everything is calculated and paid in.
Deduct tax and shipping before calculating commission
Two switches decide what counts as the revenue a commission is based on, and both are on by default:- Automatically deduct tax from commission calculation
- Automatically deduct shipping from commission calculation
Save your work
When you’re done, select Save Changes at the bottom right. A confirmation reads Program details saved successfully. If the button is missing, you haven’t changed anything; if it won’t respond, check that your subdomain has finished its availability check and shows a green check mark.Related
Commission plans
Go beyond the base plan with per-group and per-product rates.
Affiliate groups
Split affiliates into groups with their own terms.
Tracking methods
Choose how referrals are attributed to the right affiliate.
Payout settings
Decide how and when affiliates actually get paid.