

This integration is for Paddle Billing, Paddle’s current platform. Paddle Classic, the older product, isn’t supported.
What the Paddle integration can and can’t do
Before you start
You’ll need:- Admin access to your Paddle dashboard, so you can create an API key.
- The ability to add code to your website, or someone who can. There are two snippets: one for tracking clicks and one for your checkout.
- A decision on sandbox or live. Paddle keeps the two completely separate — separate dashboards, separate keys, separate data. Referly connects to one or the other.
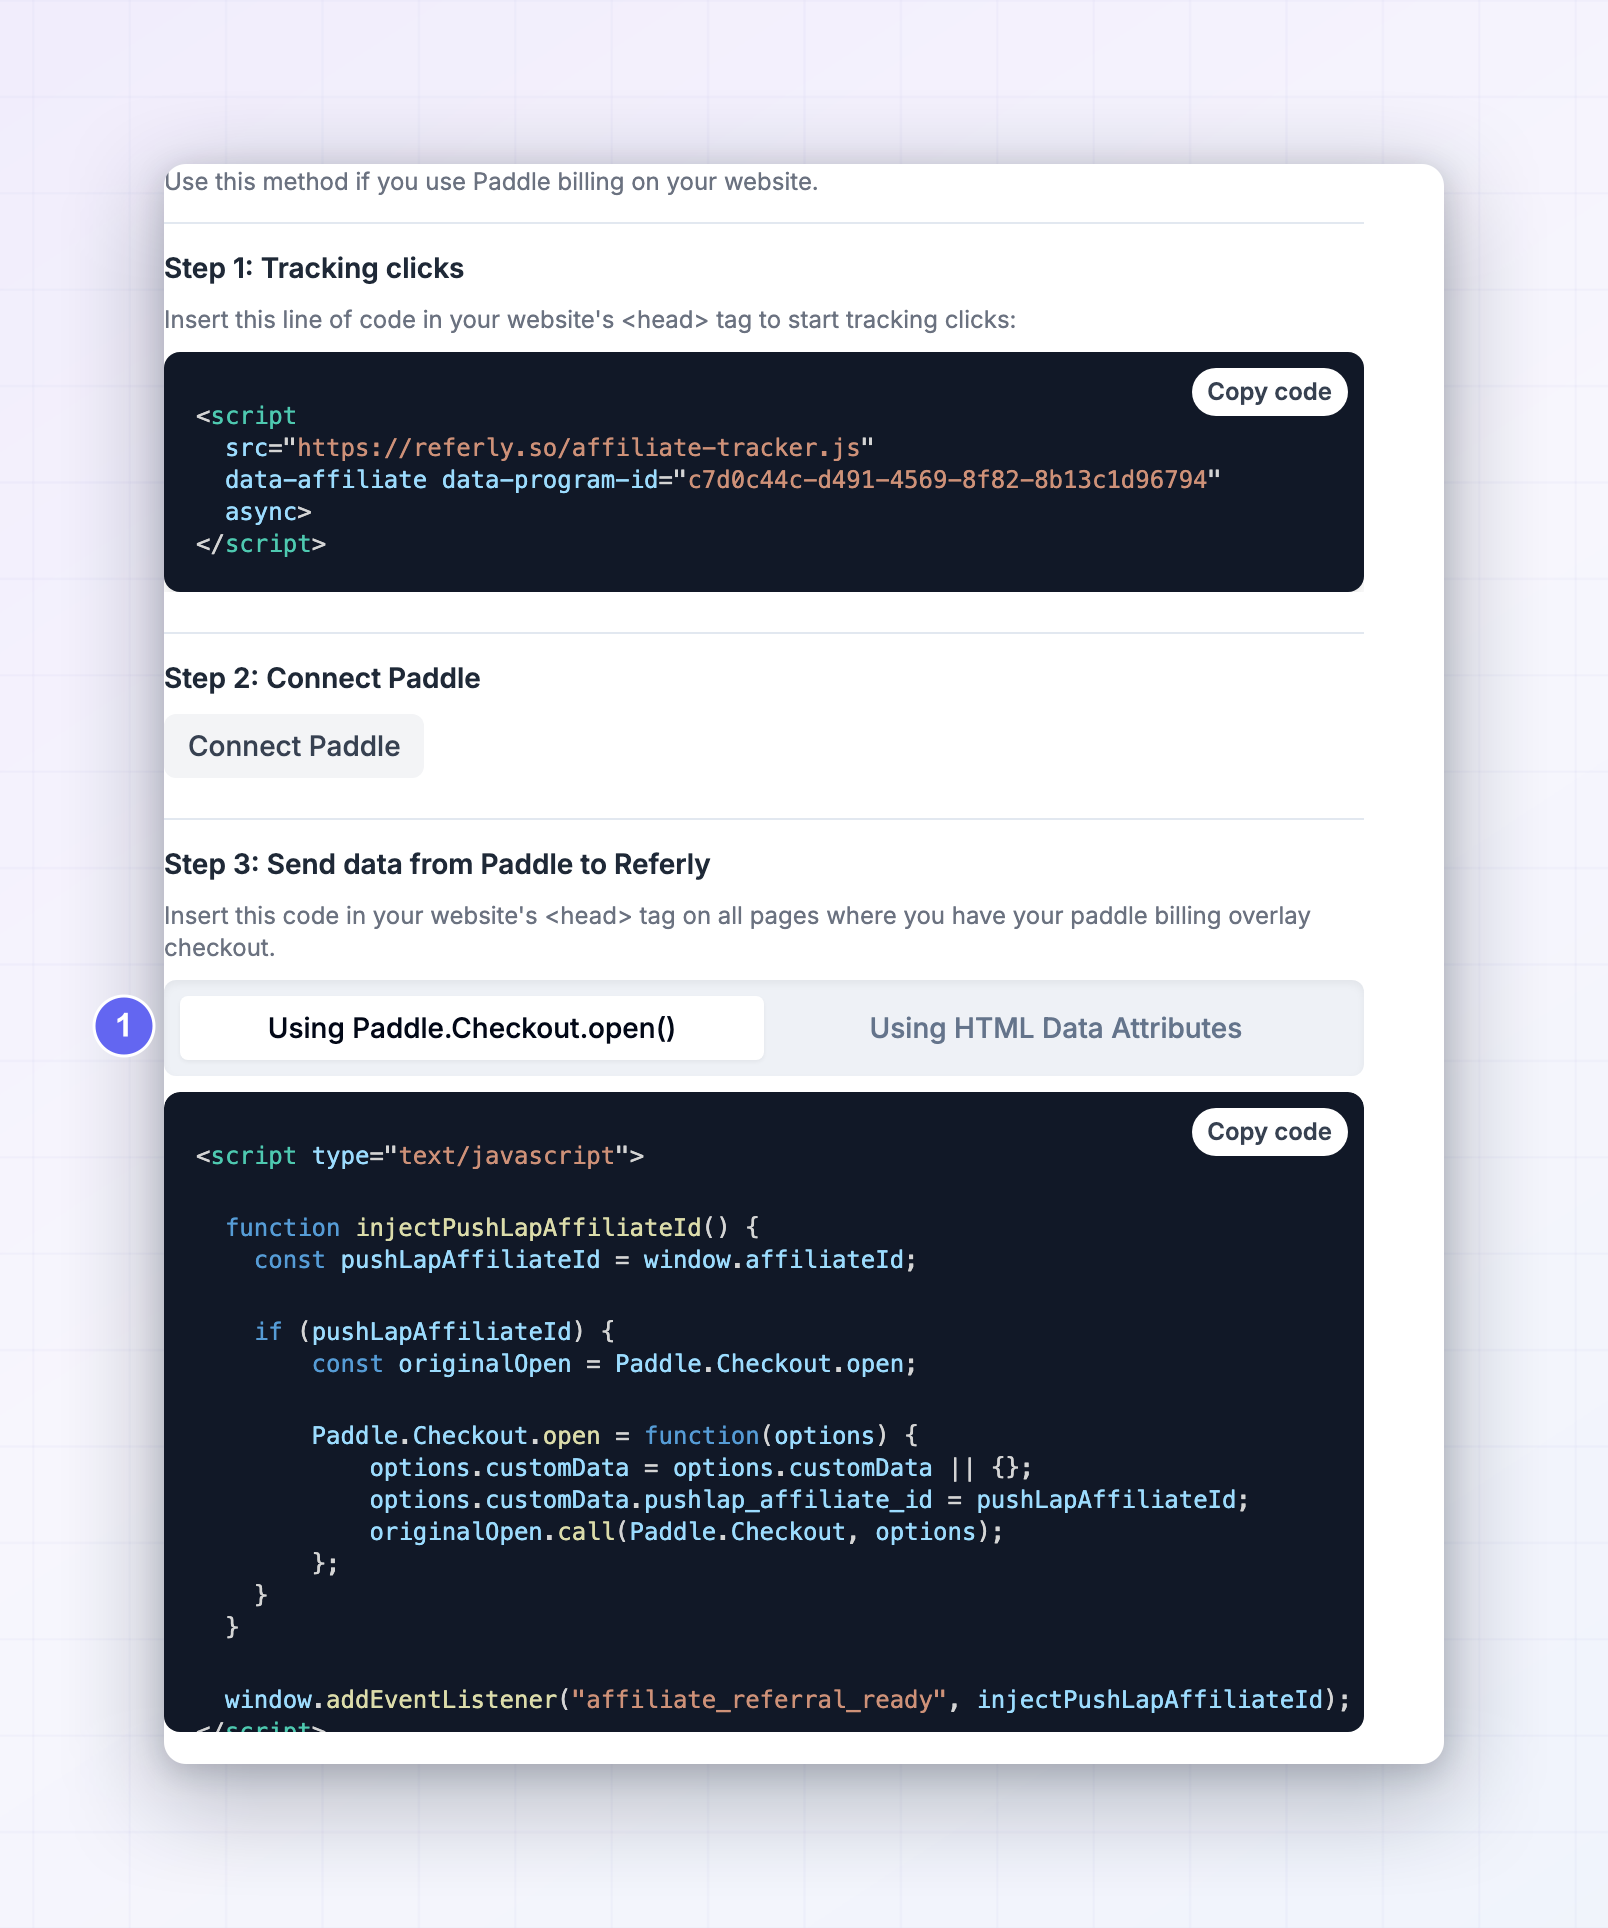
Step 1: Install the tracking script on your site
The tracking script recognises visitors who arrived from an affiliate link, records the click, and remembers who referred them until they buy.1
Open your integration instructions
In Referly, open your program, go to Settings, then Integrations, and select the Paddle Overlay Checkout card.
2
Copy the script from Step 1 of the guide
It comes pre-filled with your program ID. If you use Google Tag Manager, switch to the Using Google Tag Manager tab for that version instead.
3
Paste it into your site
Put it inside the
head section of your website, on every page.Tracking script
Step 2: Create an API key in Paddle
1
Choose sandbox or live
Sign in to the Paddle dashboard you want to connect. Sandbox and live are separate environments with separate keys, so make sure you’re in the right one before you start.
2
Open the API keys screen
Go to Developer Tools, then Authentication, then the API keys tab, and select New API key.
3
Name it and set its permissions
Give it a name you’ll recognise, such as “Referly”. Referly needs two permissions:
customer.read, so it can look up who bought, and notification_setting.write, so it can set up the connection back to Referly for you.4
Set the expiry date carefully
Paddle defaults new keys to expiring in 90 days, and the longest you can choose is one year. When the key expires, your tracking stops. Set the longest expiry you’re comfortable with, and put a reminder in your calendar to replace it before that date.
5
Copy the key
Copy it as soon as it’s created and keep it somewhere safe. Sandbox keys start with
pdl_sdbx_apikey_ and live keys with pdl_live_apikey_ — a quick way to check you grabbed the right one.Step 3: Connect Paddle in Referly
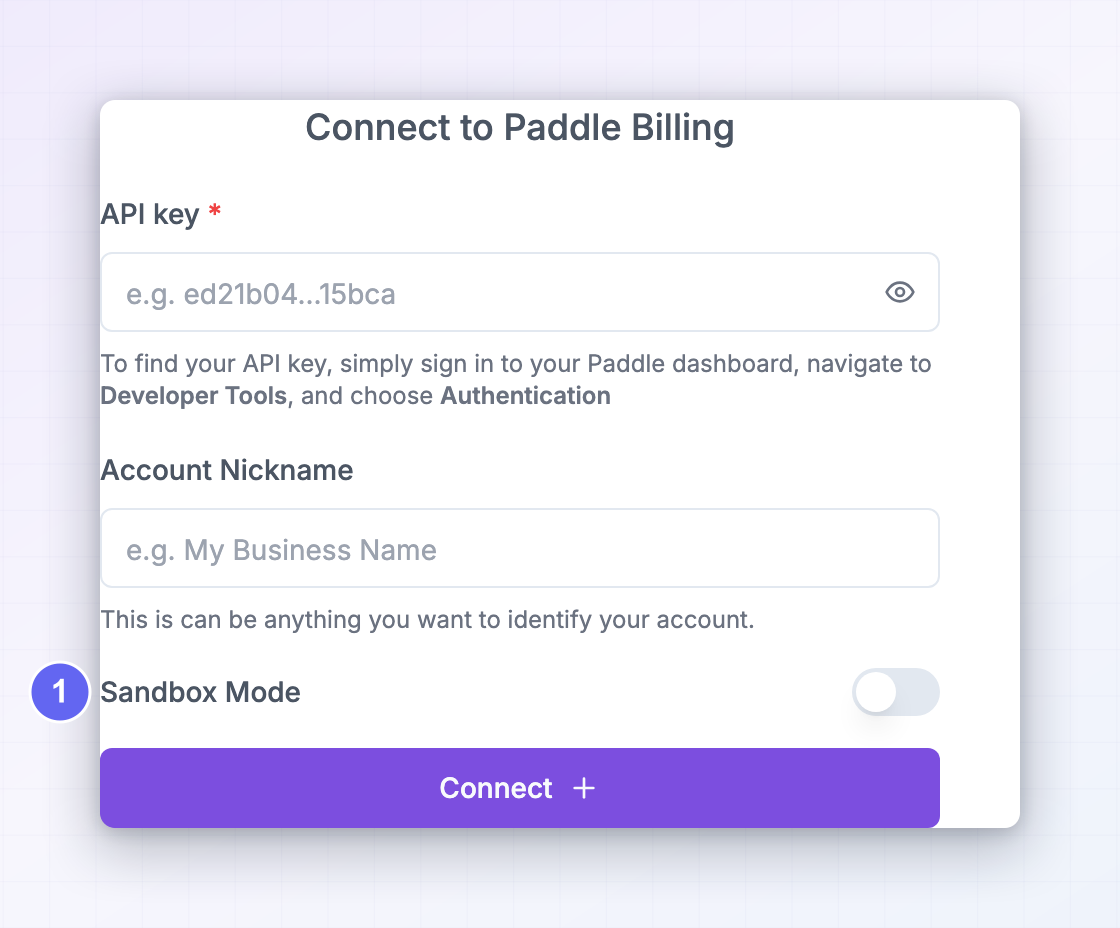
1
Open the integrations dialog
In Referly, open your program, go to Settings, then Integrations, select Connect Integration in the top right, and choose Paddle from the Choose Integration grid.
2
Paste your key
Fill in the API key field with the key you copied.
3
Give it a nickname
Account Nickname can be anything that helps you recognise the account later — your business name works well.
4
Set Sandbox Mode to match your key
Turn Sandbox Mode on if you pasted a sandbox key, and leave it off for a live key. Getting this wrong is the most common reason a connection fails.
5
Connect
Select Connect. Referly checks the key against Paddle and, if it works, sets up the connection back from Paddle for you. You’ll see a green Connected badge with your nickname.
 You don’t add anything under Paddle’s Notifications settings by hand. Referly creates that destination during connect, and it listens for completed transactions, subscriptions, cancellations, and refund adjustments.
These fields lock once saved, including Sandbox Mode. To change the key or switch between sandbox and live, select Disconnect and connect again.
Step 4: Send the referral through your checkout
This is the step that decides who gets paid. It adds the visitor’s referral to the custom data on your Paddle checkout, so the transaction Paddle reports back carries the affiliate with it. Paste the snippet for your setup into your site, just before the closingbody tag, on every page where your Paddle checkout can open.
- Opening checkout in code
Use this if you open Paddle’s checkout yourself with
Paddle.Checkout.open(). It wraps that call so the referral is added every time, whichever button opened it.Paddle.Checkout.open
Why renewals take care of themselves
Paddle copies the custom data from the first transaction onto the subscription it creates, and then onto every transaction that subscription produces afterwards. So the referral rides along with each renewal and each upgrade, with no work from you. Paddle’s custom data documentation explains this behaviour.What happens when the referral is missing
If a transaction arrives without a referral in its custom data, Referly ignores it completely — no sale is created, not even one without an affiliate attached. This is different from the Stripe and WooCommerce integrations, which record the sale either way. In practice that means your Referly Sales page shows only affiliate-driven revenue for Paddle, and any transaction where the snippet didn’t run is invisible. If you need it counted, add it with Add a sale.Step 5: Test it end to end
1
Connect your sandbox first
Create a key in your Paddle sandbox, connect it in Referly with Sandbox Mode on, and point your test page at your sandbox Paddle setup.
2
Visit your site through an affiliate link
Use a real affiliate’s referral link from your Affiliates page, in a private window.
3
Check the click was recorded
Open that affiliate’s record in Referly and confirm the click count went up. If it didn’t, the tracking script isn’t running.
4
Complete a checkout
Go through your Paddle checkout and pay with one of Paddle’s test cards.
5
Check the transaction in Paddle
In your Paddle dashboard, open the transaction and look at its custom data. You should see the referral there. If it’s empty, the Step 4 snippet didn’t run — check it’s on the page where your checkout opens.
6
Check the result in Referly
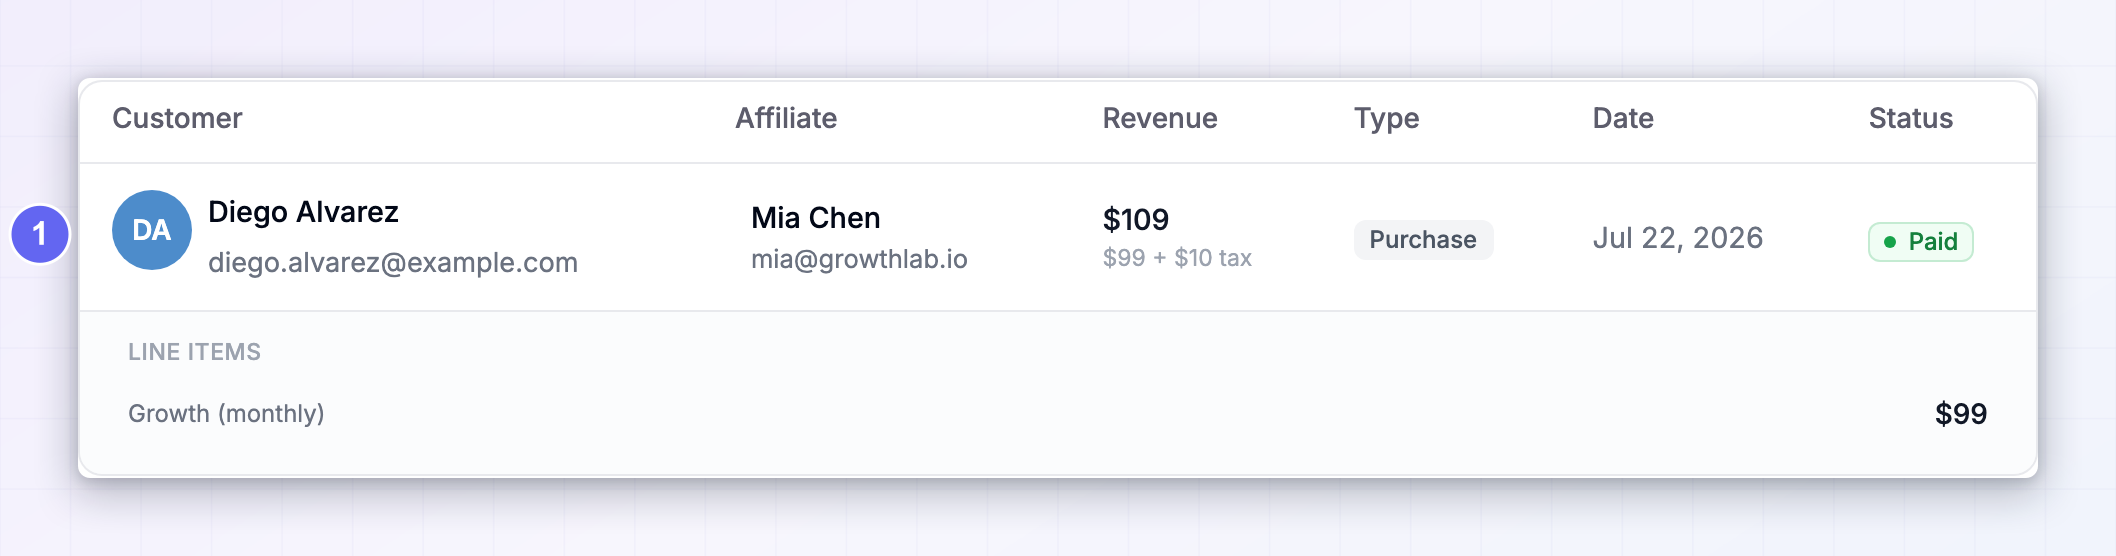
Open Customers to find the buyer attached to the affiliate, Sales to confirm the amount and products, and Rewards to see the commission.
7
Switch to live
Disconnect in Referly, create a live key in your live Paddle dashboard, and connect again with Sandbox Mode off. Delete your sandbox test customers and sales so they don’t skew your reporting.

Refunds
When a refund is approved in Paddle, Referly finds the matching sale and marks it as refunded, so no commission is owed on money you gave back. This only applies while the commission is still on hold. Once the affiliate has been cleared for payout on that sale, it’s left alone — adjust it by hand if you want it reversed. See Refunds and Reward holds. A refund that’s created but not yet approved doesn’t change anything until Paddle approves it.Disconnecting or replacing your key
Open Connect Integration in Referly, select Paddle, and choose Disconnect. Referly stops receiving transactions from that account immediately. Nothing already tracked is deleted. Transactions that happen while you’re disconnected are not recorded and won’t be picked up when you reconnect, so if you’re replacing an expiring key, create the new key first and reconnect promptly. You can also remove the destination Referly created from your Paddle dashboard under Developer Tools, then Notifications, if you want a clean slate on Paddle’s side.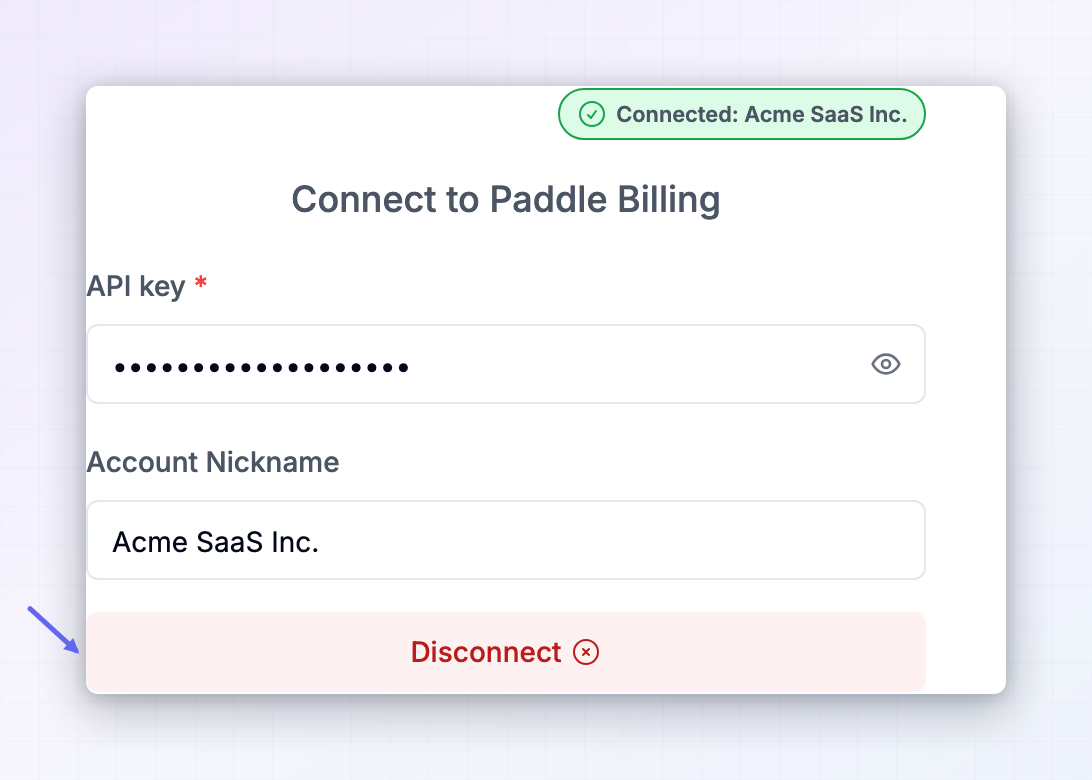
Troubleshooting
Connecting fails
Connecting fails
Almost always one of three things: Sandbox Mode doesn’t match the key you pasted, the key is missing the
notification_setting.write permission, or the key has expired. Check the key’s prefix — pdl_sdbx_apikey_ for sandbox, pdl_live_apikey_ for live.Everything stopped working after a few months
Everything stopped working after a few months
Your Paddle API key expired. Paddle keys expire — 90 days by default, a year at most. Create a new key, disconnect in Referly, and connect with the new one.
No sales are appearing
No sales are appearing
Open a recent transaction in your Paddle dashboard and look at its custom data. If the referral isn’t there, the Step 4 snippet didn’t run on the page where your checkout opened. If it is there, check that your Referly plan is active.
Clicks are being tracked but sales aren't
Clicks are being tracked but sales aren't
That’s the same problem from the other direction: the tracking script is working, the checkout snippet isn’t. Both need to be on the pages where your checkout can open.
Renewals aren't creating commissions
Renewals aren't creating commissions
Check the renewal transaction in Paddle for custom data. If the first transaction had it and the renewal doesn’t, the subscription was created outside your normal checkout flow. You can add the custom data to the subscription in Paddle so future renewals carry it.
Paddle says the account is already connected to another program
Paddle says the account is already connected to another program
That API key is in use on a different Referly program. Disconnect it there, or create a separate key.
Related
Commission plans overview
Set what affiliates earn on first payments and renewals.
Product-based commissions
Pay different rates on different Paddle products.
Universal integration
Track sign-ups and leads that never reach Paddle.
Add a sale
Record a sale by hand when a transaction wasn’t attributed.